
It's well known among current Aston Martin owners that, unless you are a masochist, replacing the battery in the Vantage was best left to the dealer.
I thought I had taken all reasonable precautions against the battery ever going dead in my presence. A battery maintainer was the batteries constant companion when the car was not in use. In addition I had an LED voltage readout prominently located at eye level next to the car that I dutifully looked at whenever I entered the garage. Battery Conditioner .
All for naught, as recently I was shocked to see the digital voltmeter display 9 volts as I walked past the car on my way out of the garage. Examination of the battery maintainer revealed a melted case with the logic board fried. Not satisfied with not performing its intended task of keeping the battery charged, in one last defiant act, it decided to apply a short to the battery in its moment of death.
Using a conventional charger I charged the battery overnight. It rewarded me by registering 6 volts on my voltmeter. Another overnight charging was an exercise in futility, the battery was toast.
My worst fear was now staring me in the face. I had to replace the battery.
A dead battery in an Aston Martin is not a simple matter. The Vantage's battery is located behind the passenger seat (In the US). To get to the battery the passenger side door needs to be opened and the passenger seat needs to move forward in order to get access to the battery location.
Because the door glass moves up into a sealing position after the door is closed, in most cases the door glass in the sealing position prevents the door from opening.
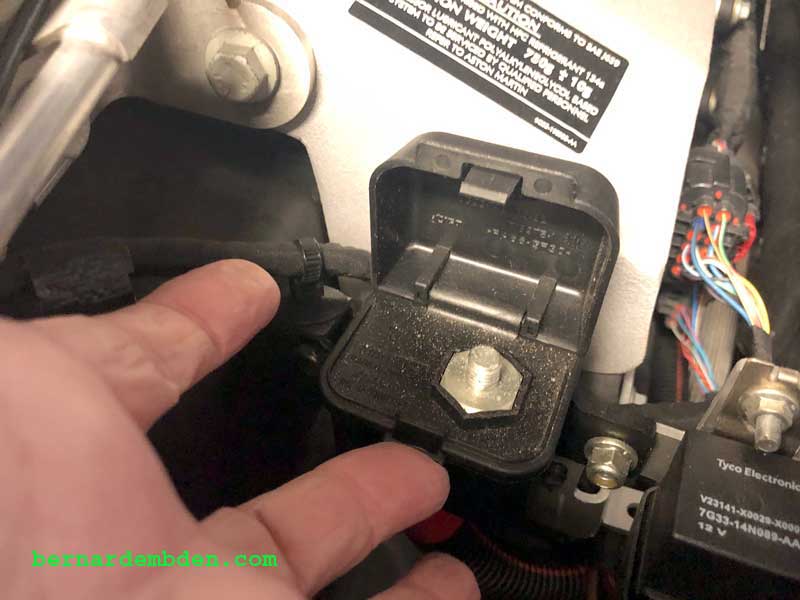
If the door cannot be opened, the passenger seat cannot be moved forward to get access to the battery. With a dead battery the seat will not move. There is a positive connection in the engine compartment that can be used to apply 12 volts to the battery, thus allowing the doors to open and the seats to move, however without access to the cabin the hood release latch for the hood (bonnet) is not accessible.
In this worst case scenario, there is a possibility that the positive connection in the engine compartment can be accessed after removing the under tray panel from beneath the engine.
(see photographs below)
Thankfully I did not need to do that.
In my case, the door glass was down enough that I had access to the cabin.
I positioned my SUV so that my jumper cables would reach through the driver’s window to the dead battery behind the passenger seat. (photographs below).
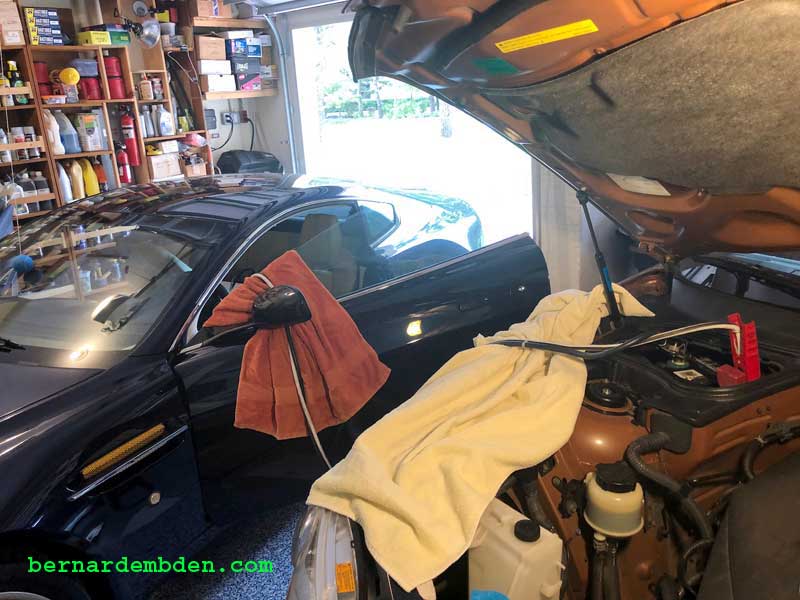
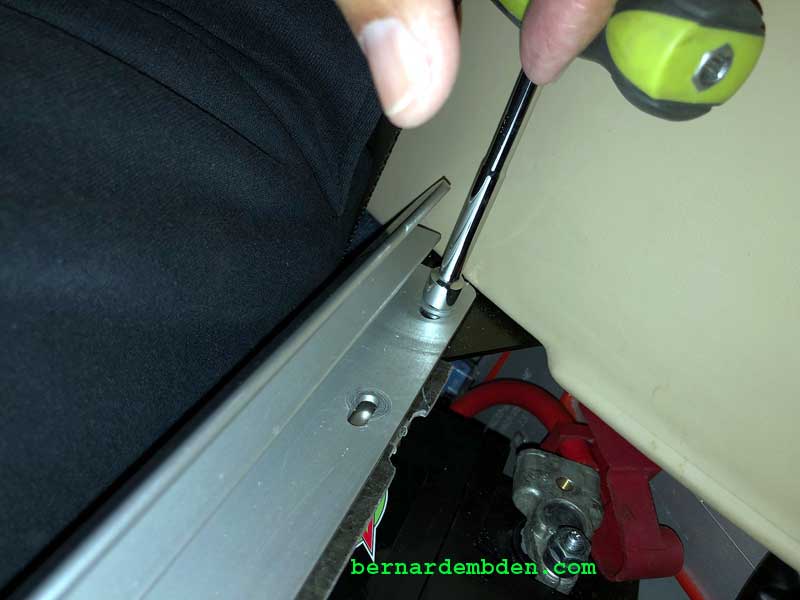
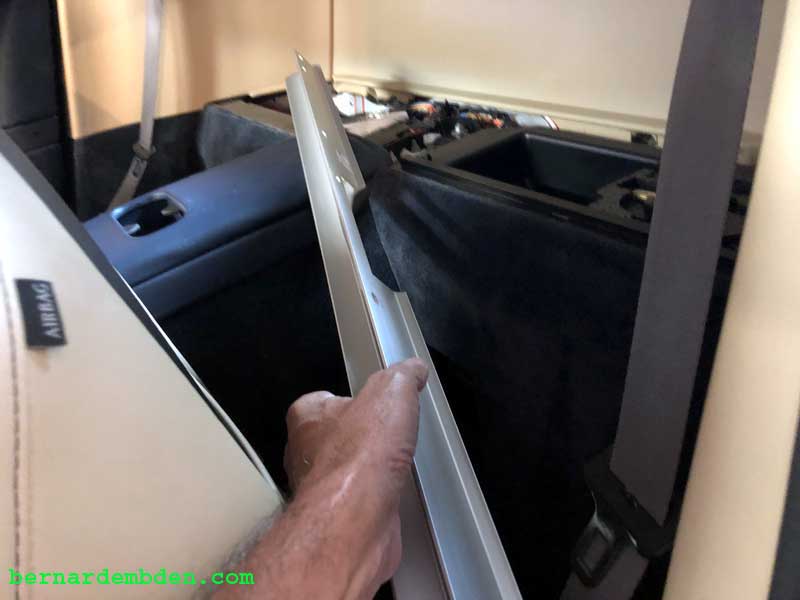
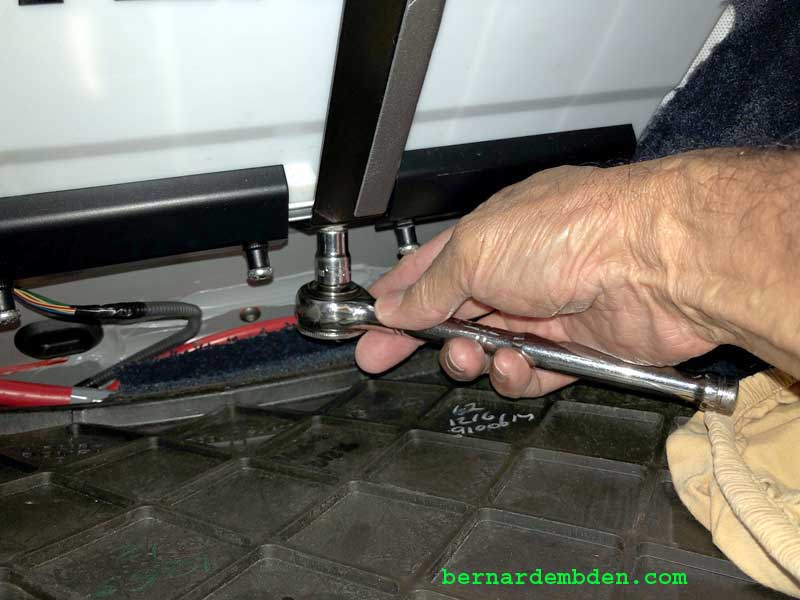
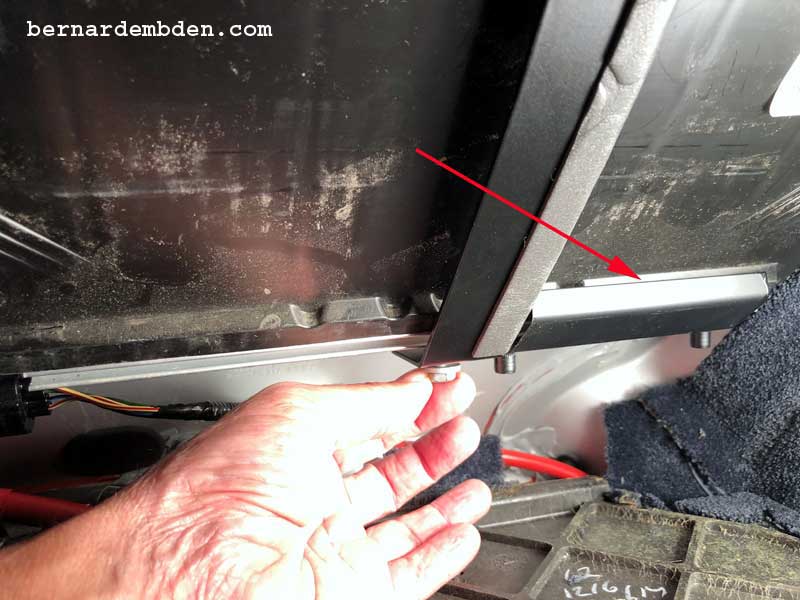
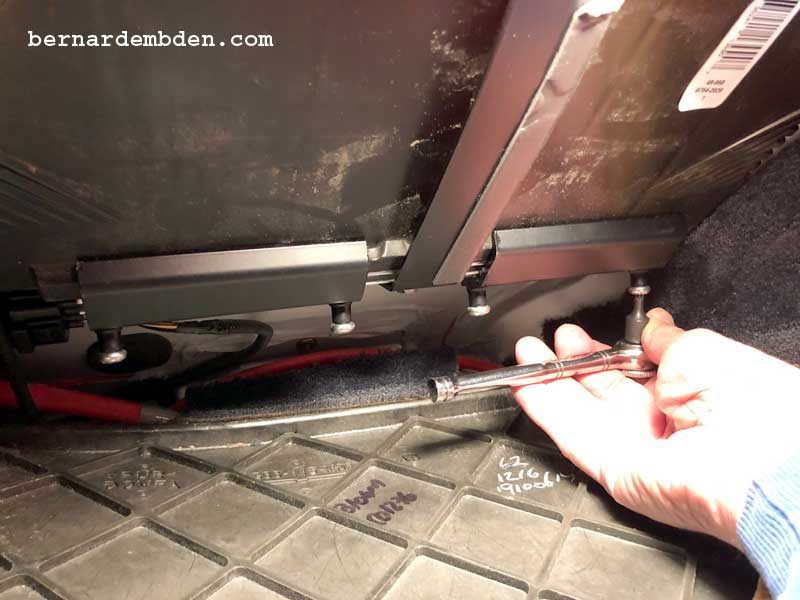
With juice to the battery I was able to roll the windows down and move the passenger seat forward. This allowed me just enough access to remove the parcel shelf rail. You will need an 8 mm socket for the first bolt and a Phillips screwdriver for the rest. (Photographs below).
Be careful removing the rail. Leather tend to attract sharp edges. One scratch and a dead battery will be the least of your problems.
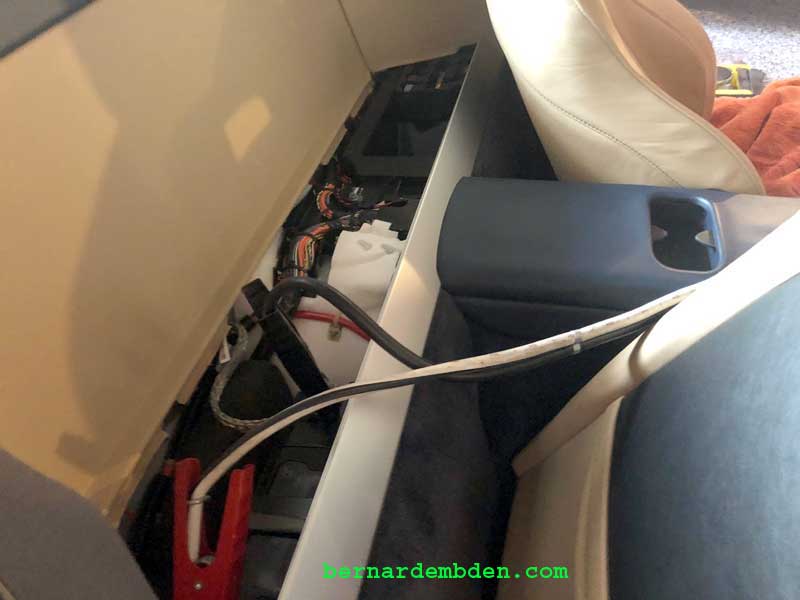
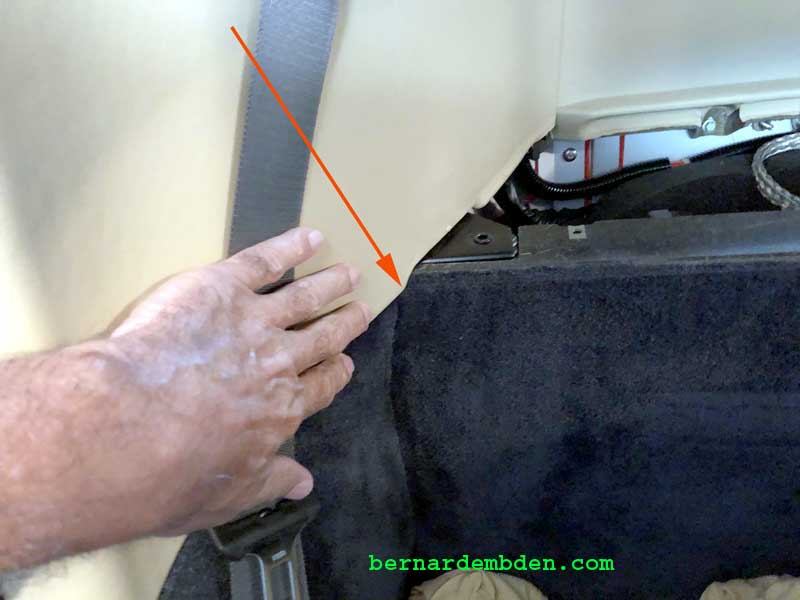
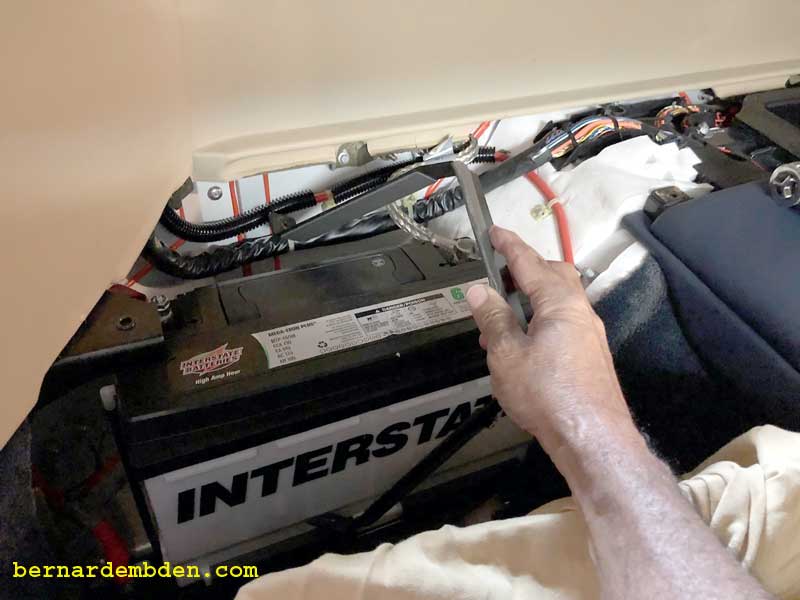
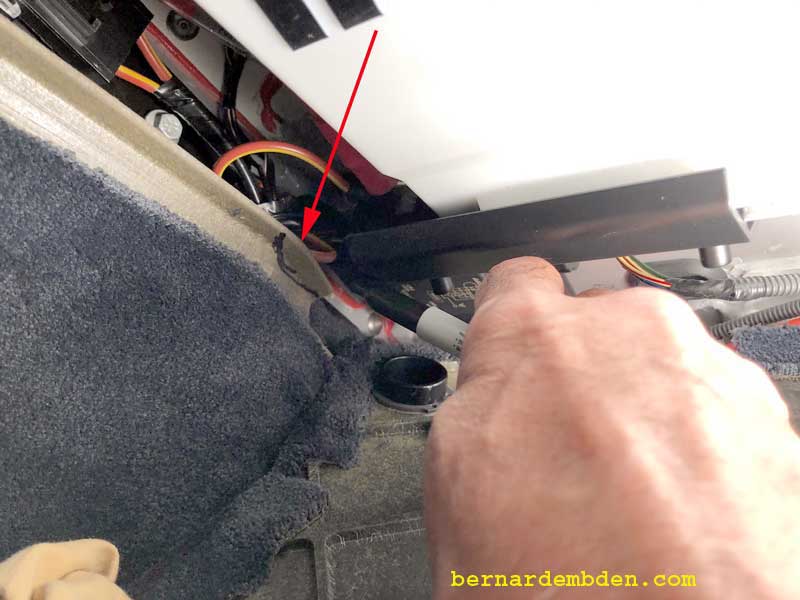
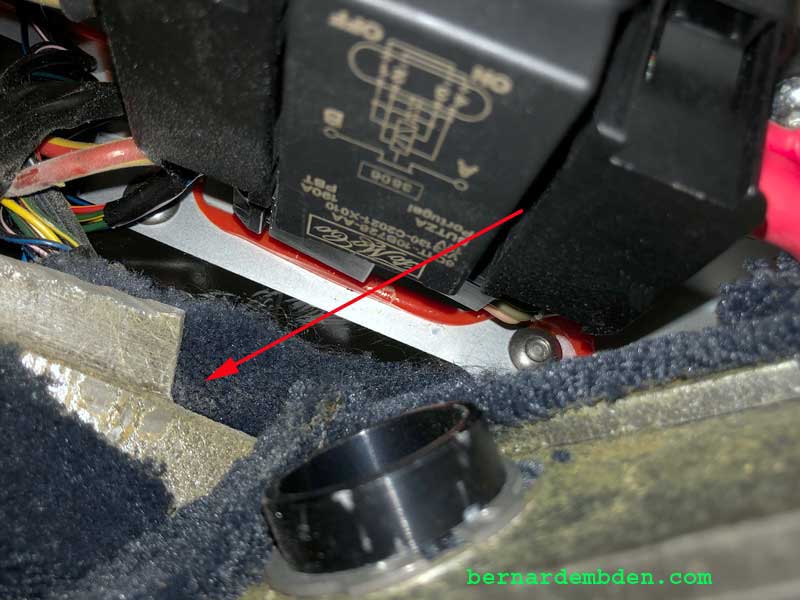
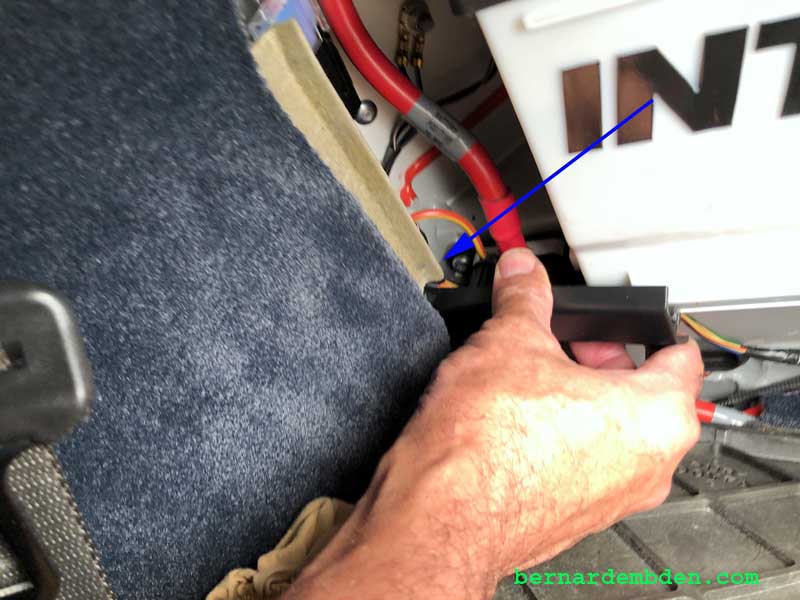
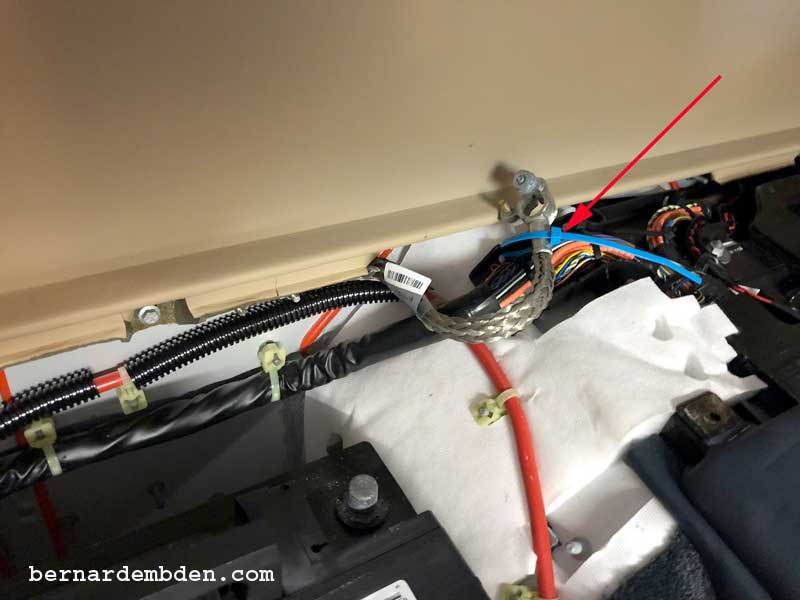
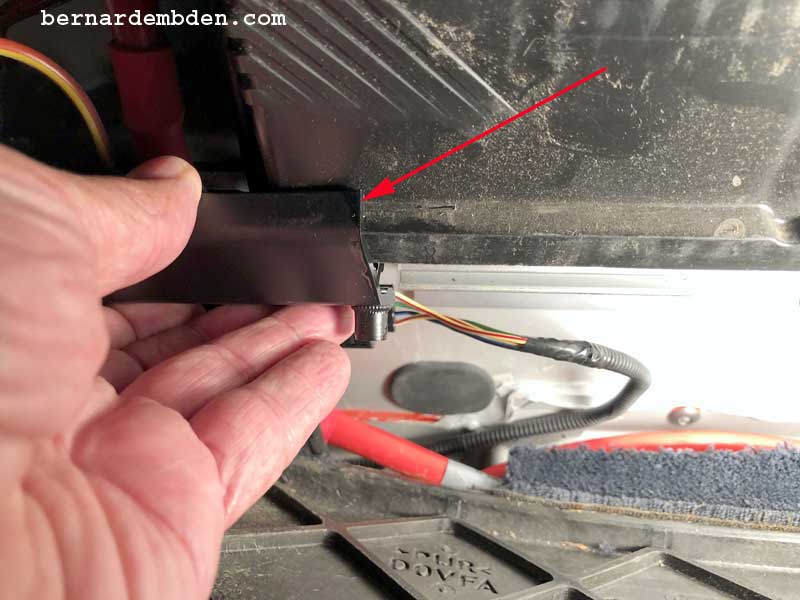
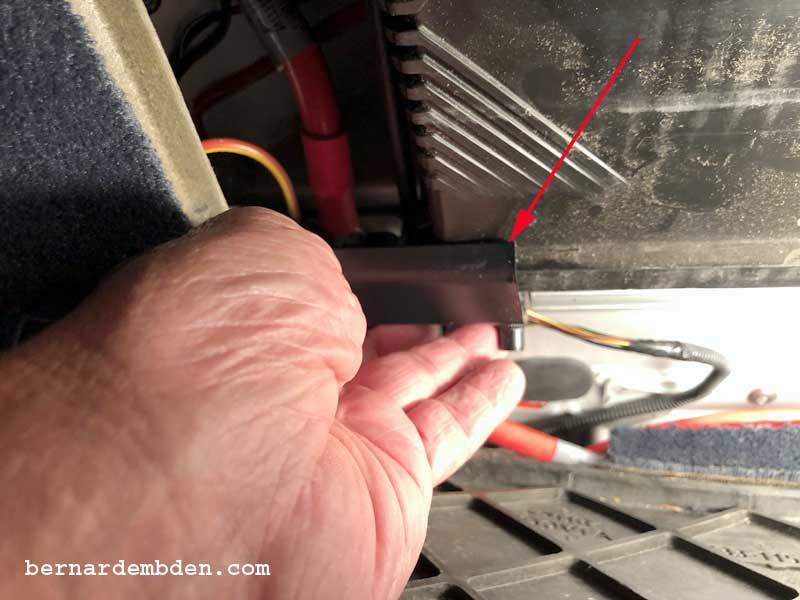
With the passenger seat forward and the rail removed the interior paned in front of the battery can be moved forward. There is no need to remove the entire panel. Note that the left side of the panel tucks in behind the side upholstery (red arrow photograph below) The proper process is to hold the left side of the panel in while pulling the right side of the panel out. (blue arrow second photograph below).
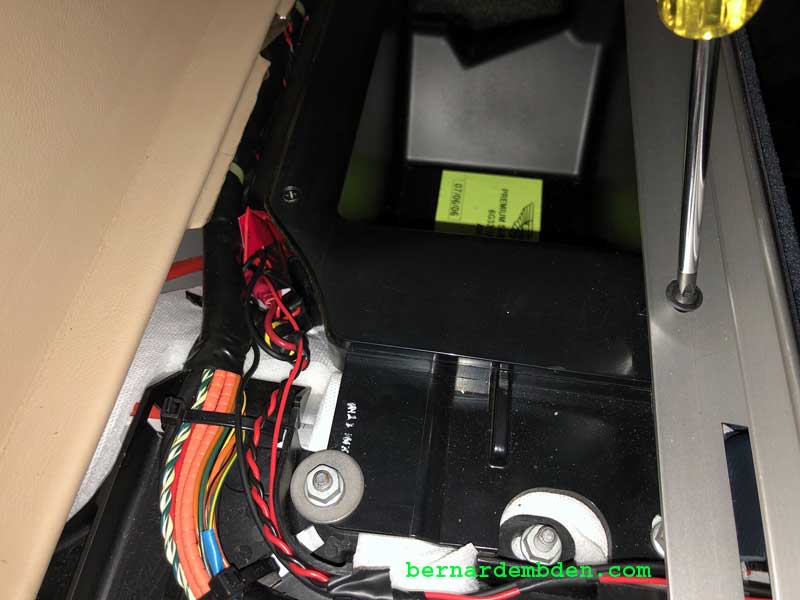
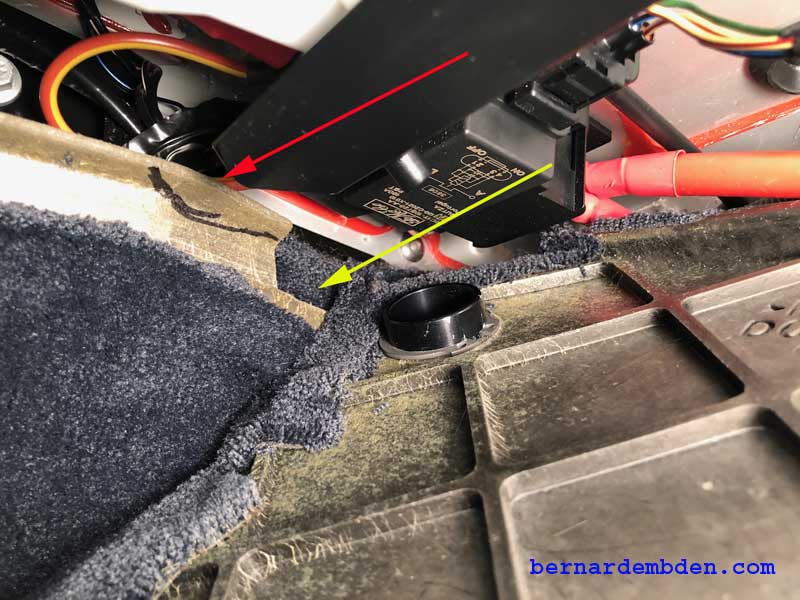
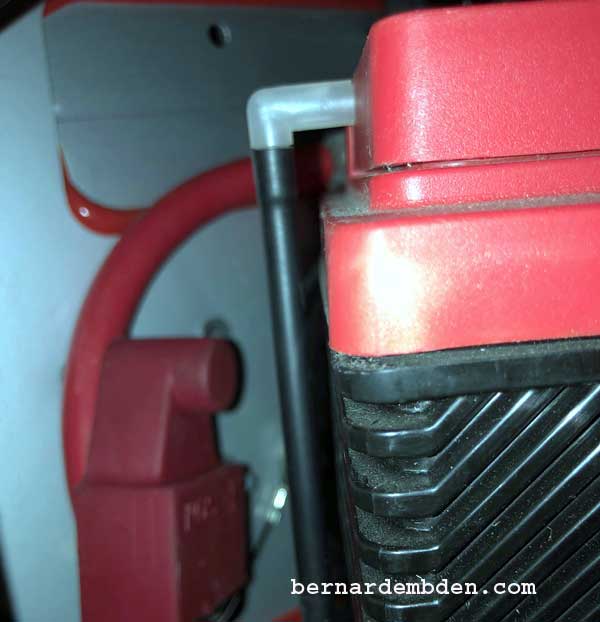
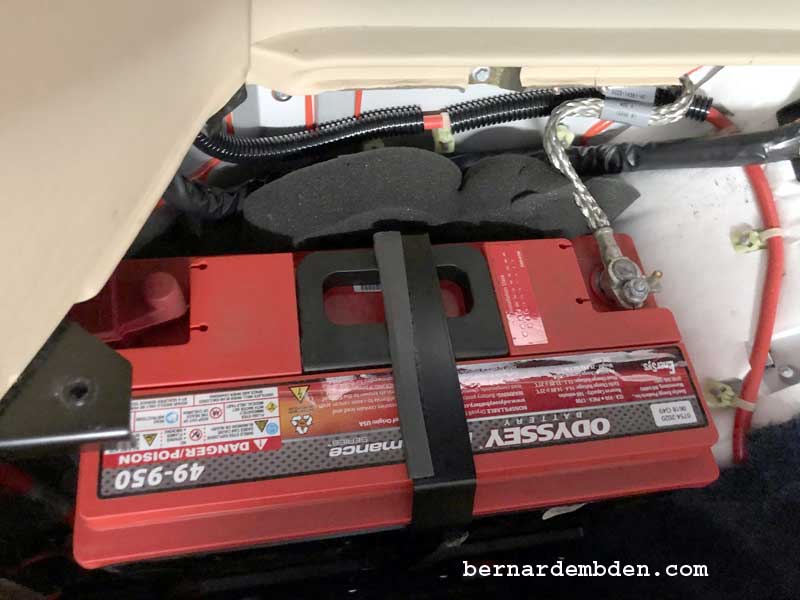
In the photograph below, the infamous battery is finally visible. The green arrow identifies the strap across the top of the battery. The red arrows point to the evil clamps that have caused grown men to drink alcohol and say bad words.
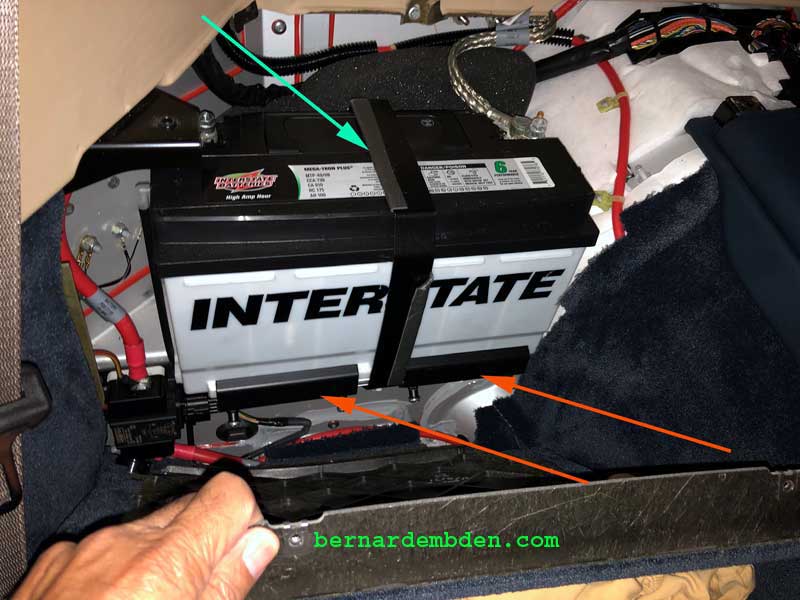
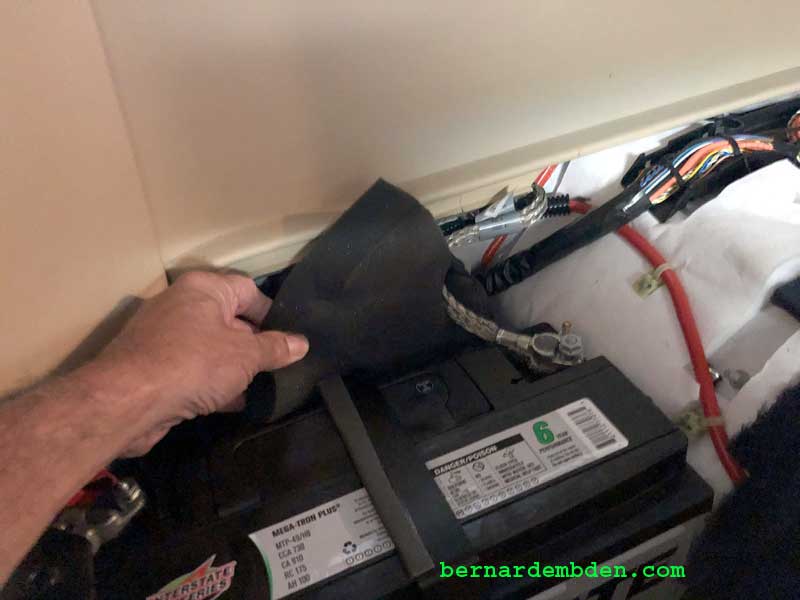
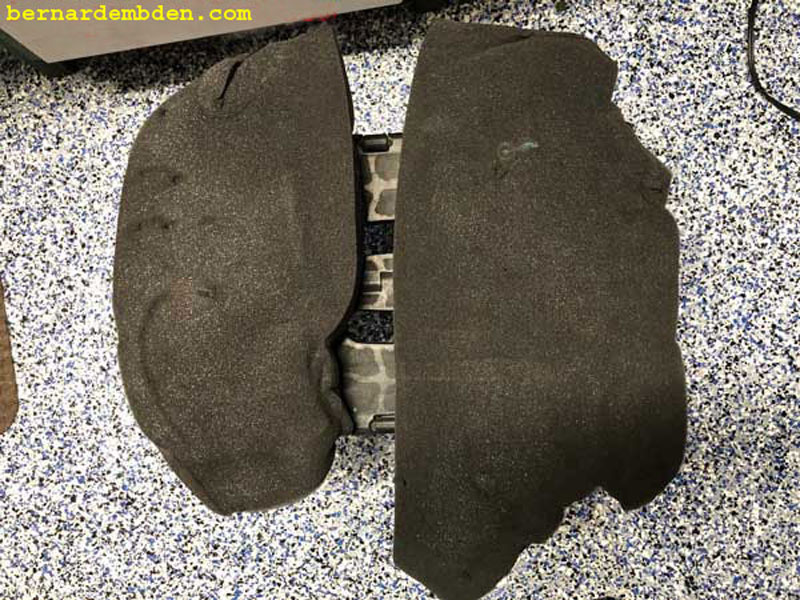
To access the strap the sponge in the rear of the battery needs to be removed.
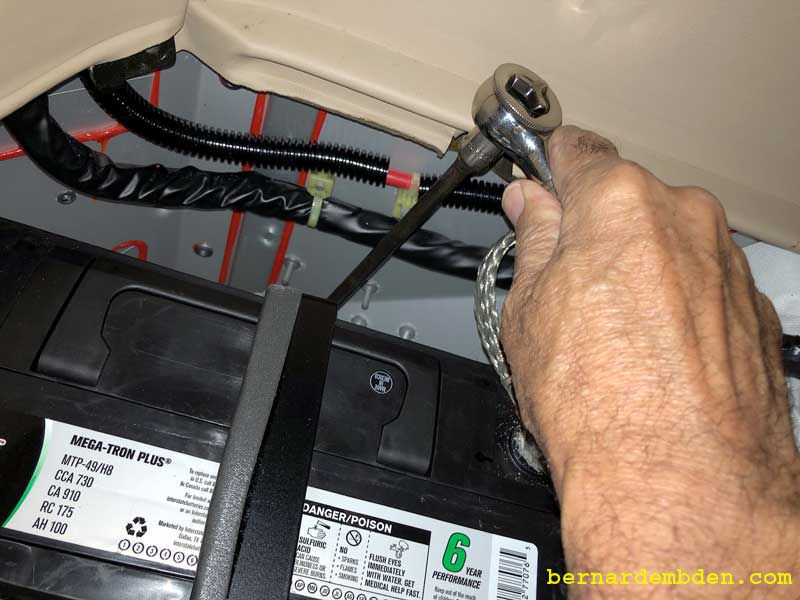
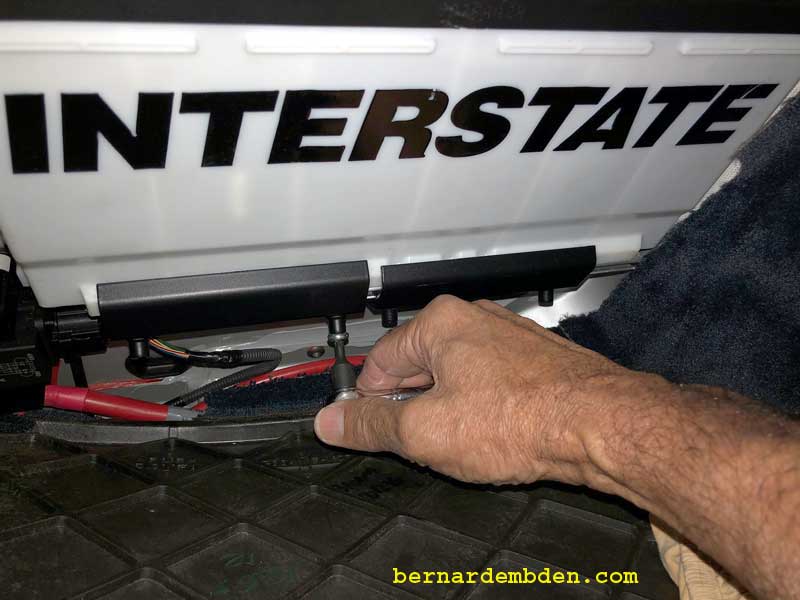
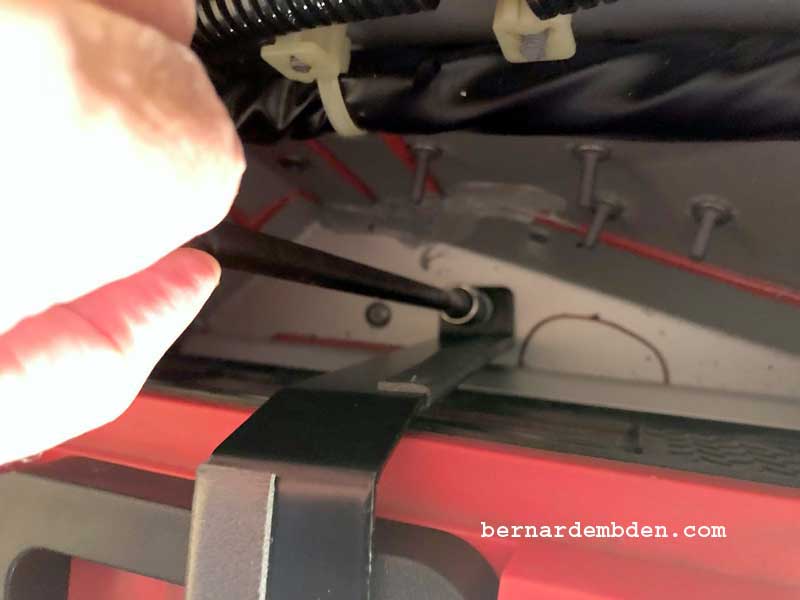
I chose to remove the front strap bolt first. You will need a short 10 mm socket for the front bolt and an extension and 10 mm socket for the rear bolt. (Photographs below)
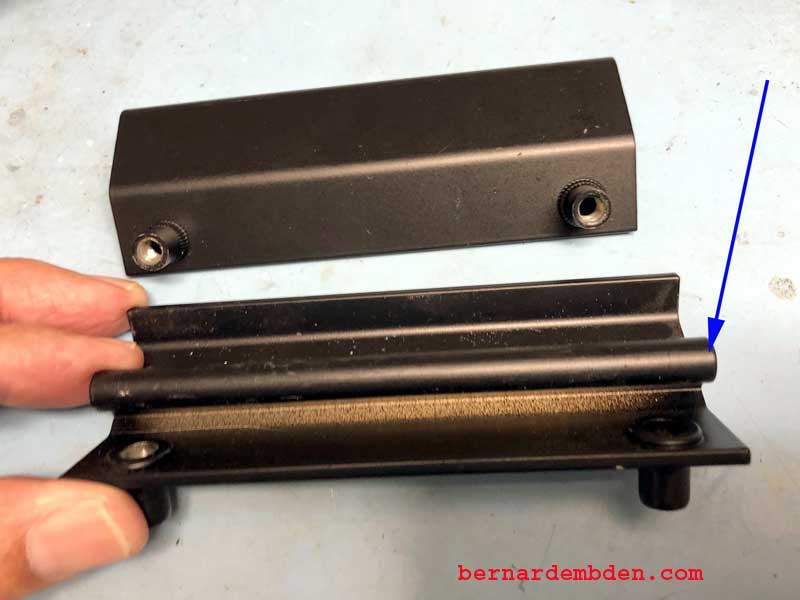
Next are the notorious clamps, secured in place by four T-27 Torx bolts. You can just loosen them, I decided to remove the bolts completely as I believed that would aid in removing them. (red arrows photographs below)
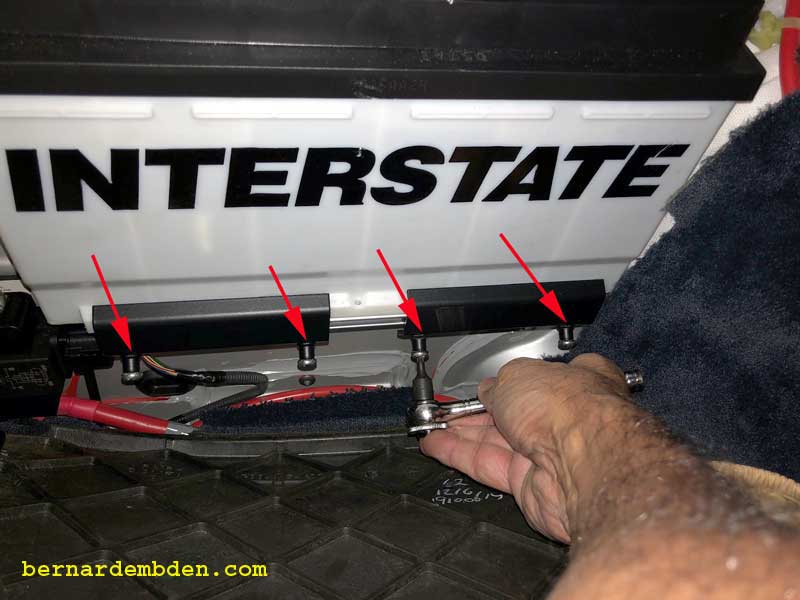
These clamps slide off via a channel at the bottom of the battery. The problem is that the clamps don't have enough room between the battery and the upholstery to exit the channel that secures them. As the following photographs illustrates.
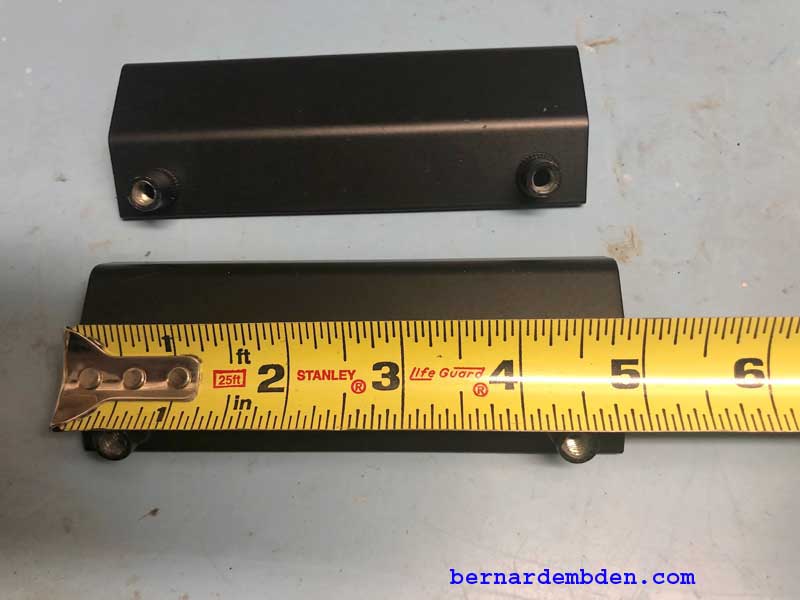
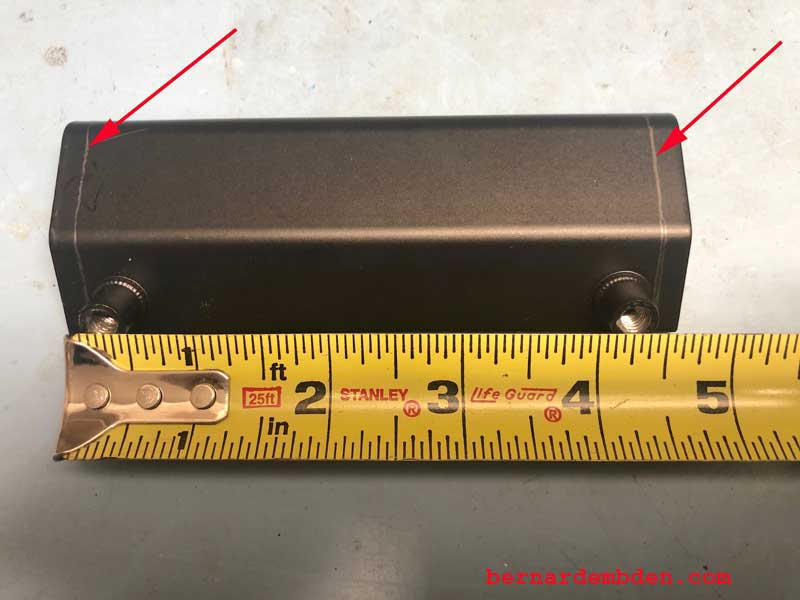
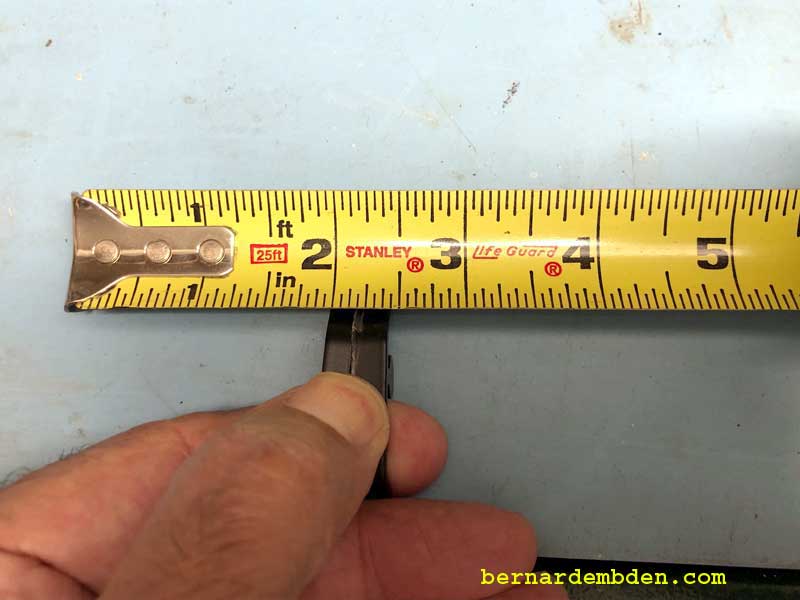
The clamps are just under 5 inches long.
The space available to slide the clamps off is approximately 2 3/4 inches.
An additional 2 1/4 inches of space is needed to remove the clamps.
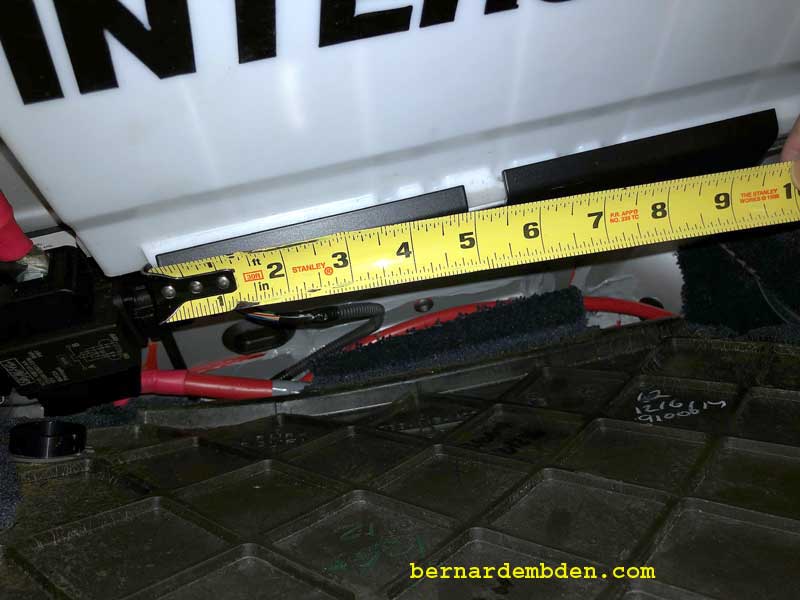

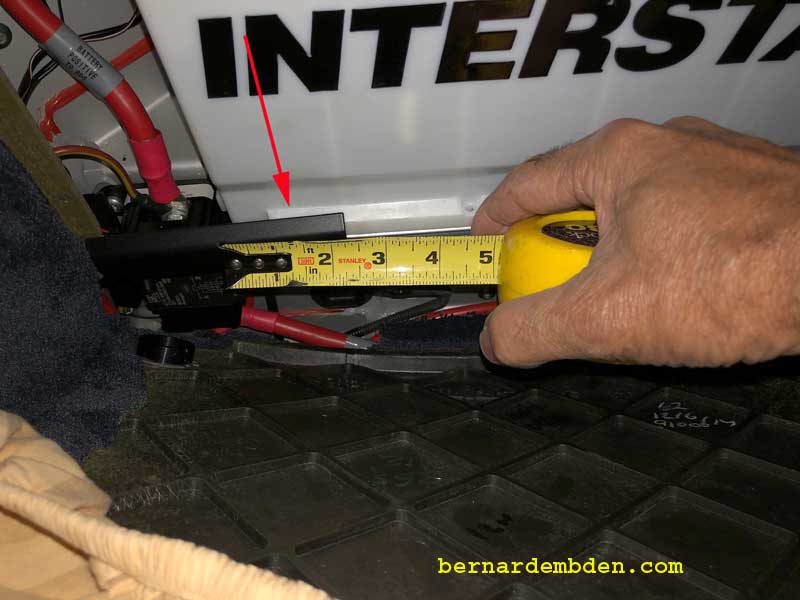
That is the problem.
There are two ways to address this problem.
1) Muscle the interior panel to gain clearance to slide the clamps off.
2) Cut out the panel to gain the necessary clearance.
I tried to muscle the panel, but I quickly realized that my days of muscling anything were long gone. A closer examination of the reluctant panel revealed that it was attached to a rigid fiber backing. Attempting to move this panel seemed like a bad idea. On to plan B.
We are going to cut stuff up.
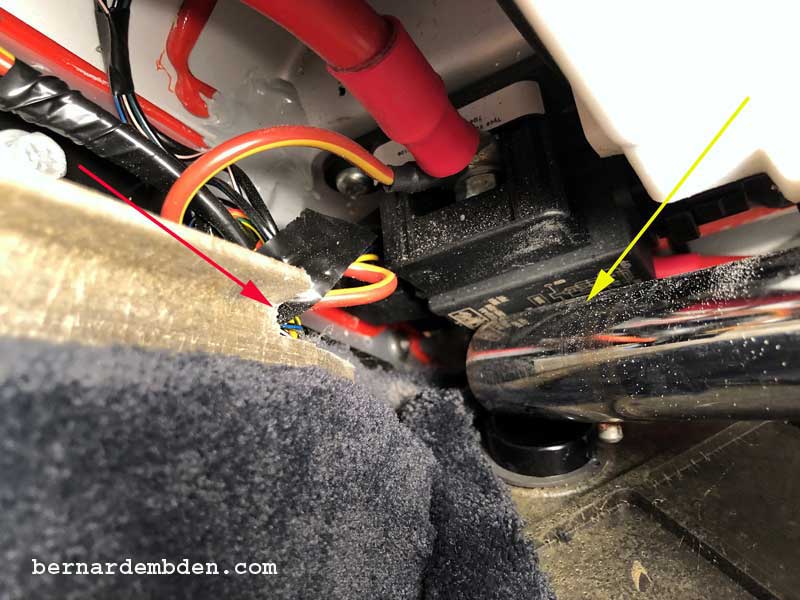
Using the now famous clamp as a template draw out the necessary opening that needs to be removed (red arrow photograph below)
Interestingly, If Aston Martin had carried the existing cutout in the fiber board up another 3 inches (yellow arrow photograph below) there would be no need for this process.
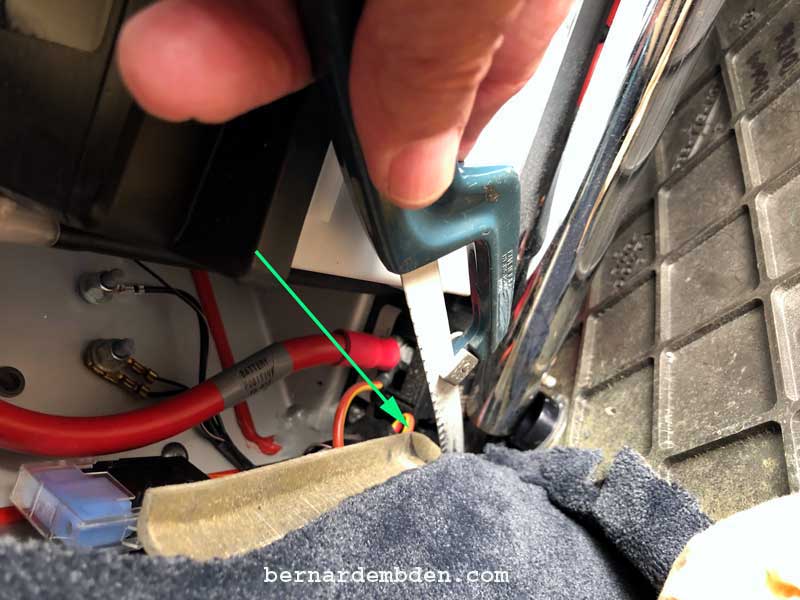
I used my Dremel for the horizontal cut. Note that there is a wiring harness just below the cutout line.
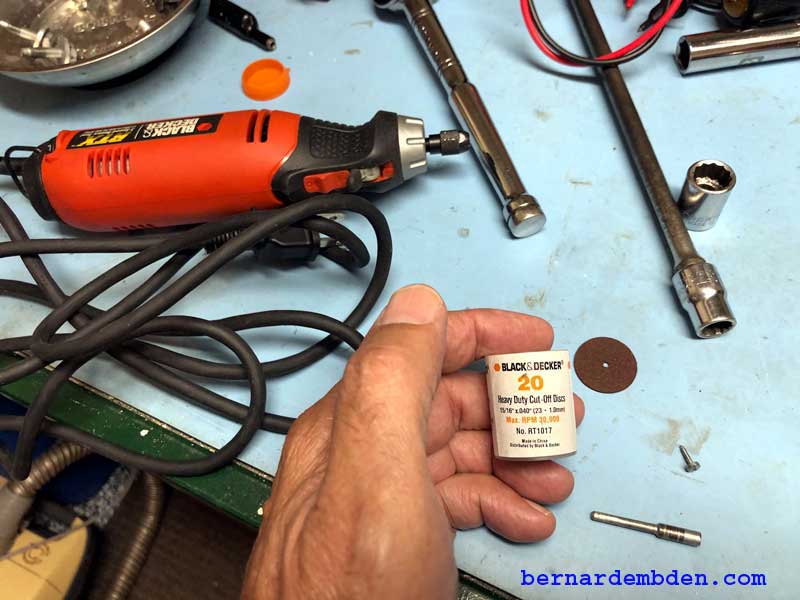
The Dremel is indiscriminate; it will just as easily cut the wiring harness. (green arrow) For that cut I used a hacksaw blade.
(Photograph below) Cutout complete, (red arrow) I used a vacuum attachment to catch the inevitable dust from the fiber board. (yellow arrow).
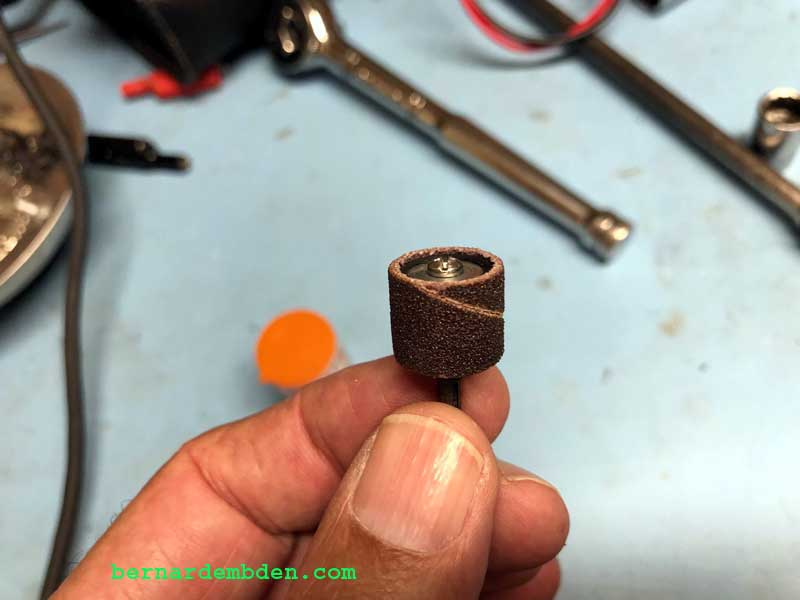
Although hidden it shouldn’t look as if you butchered the cut in the fiber board. I cleaned it up using a round grinder-like attachment on the Dremel.
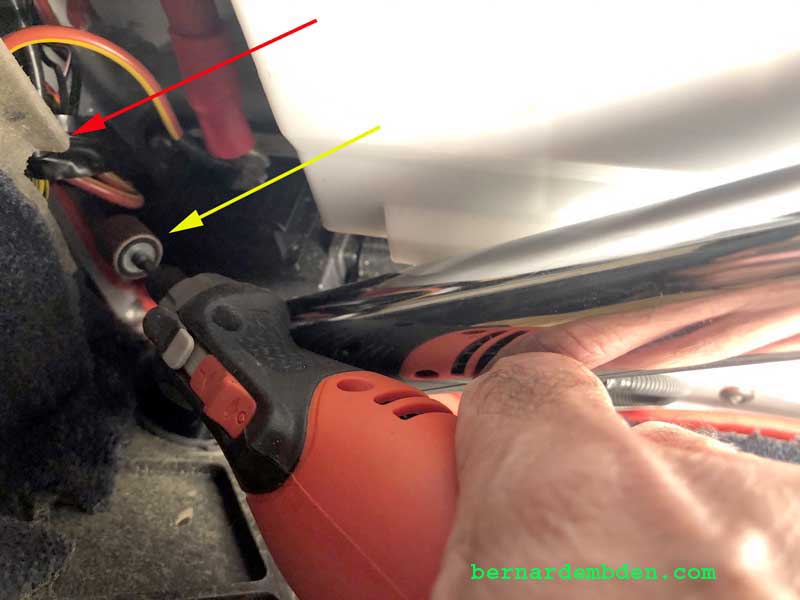
In the photographs below, the yellow arrow shows the Dremel cutting tool and the red arrow indicates the final cut in the fiber backing.
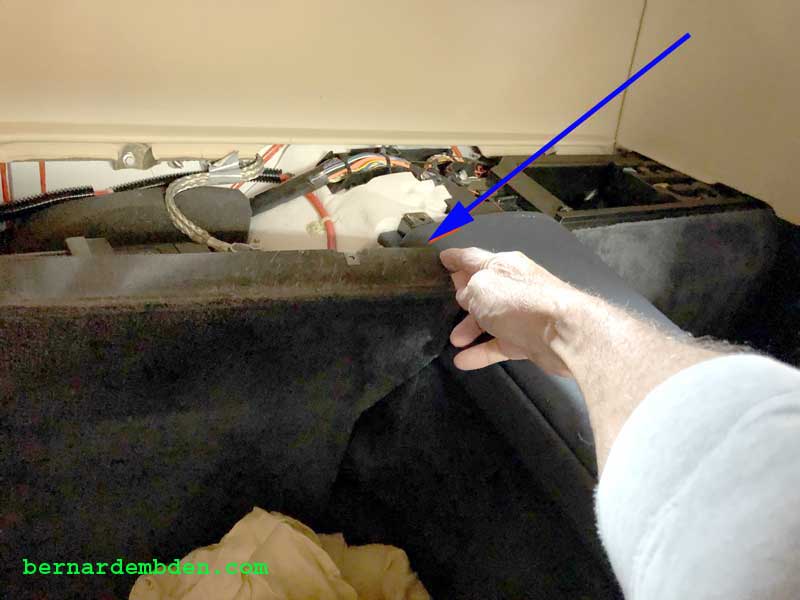
With the fiber board cutout finished to my standards, I was just able to slide the brackets off by pushing firmly up against the wiring harness. (blue arrow photograph below).
This gave me enough clearance to finally remove the sliding brackets.

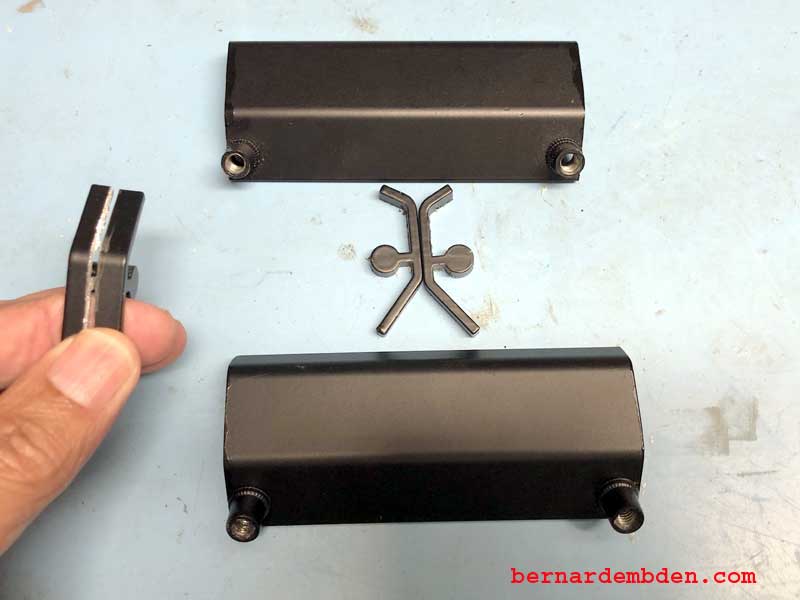
Closer examination of the brackets reveal a width of 4 13/16 of an inch.
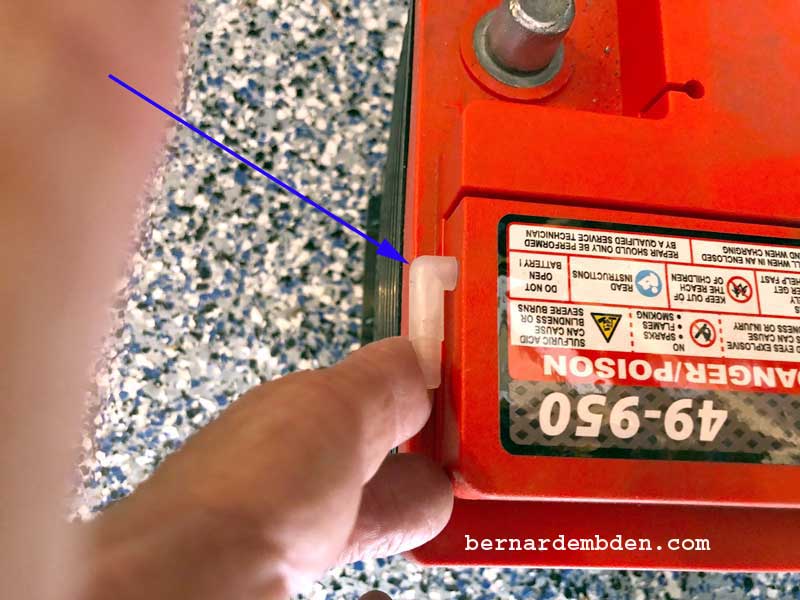
Note the round extension (blue arrow) that slides into the channel secured beneath the battery.
Measuring the space between the battery and the wiring harness determined that I needed 4 1/2 inches to re-install the brackets without pushing against and possibly compromising the wiring harness. (red and blue arrows photograph below).

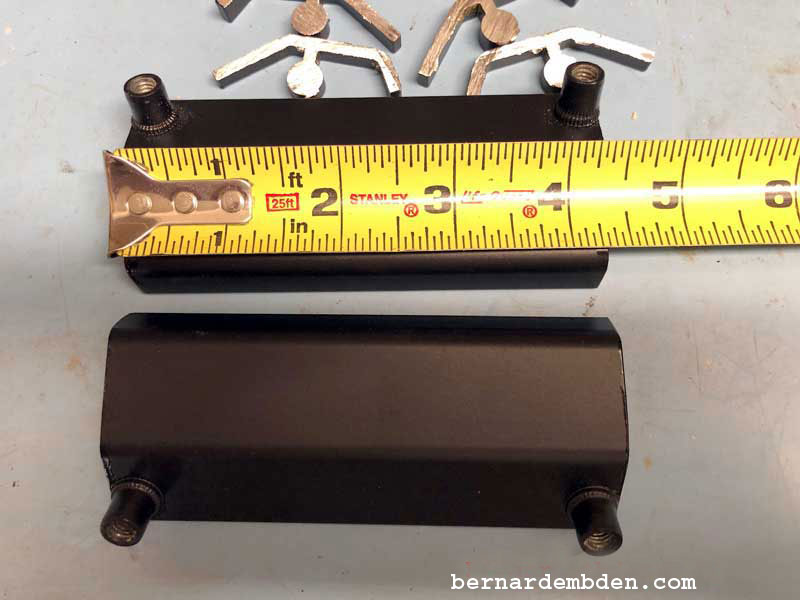
Ideally, I needed to reduce the width of the clamps to 4 3/8 inches. Cutting the clamps off just after the holding screws should give me exactly the width I needed. (red arrows photograph below).
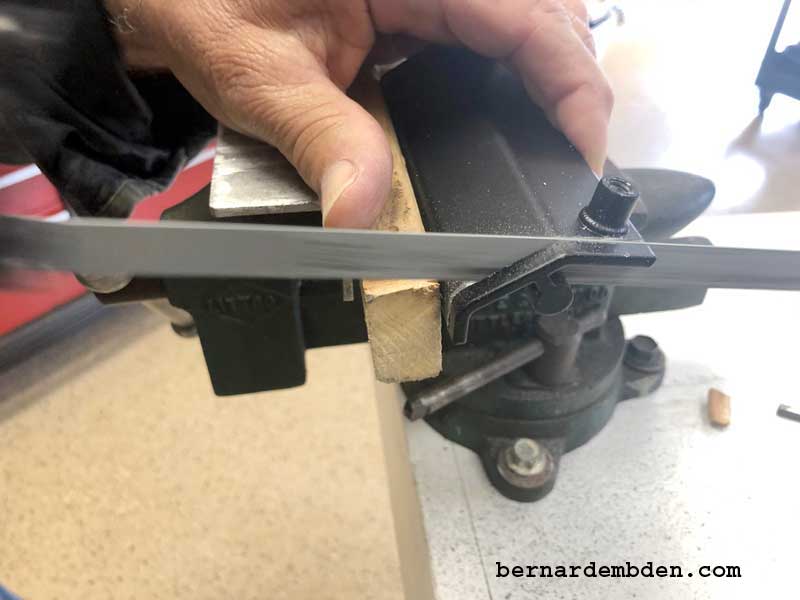
Using scrap wood to protect the finish on the visible side, I used a hacksaw to cut the clamps at the marks.
An air powered file (red arrow photograph below) finished up the edges.
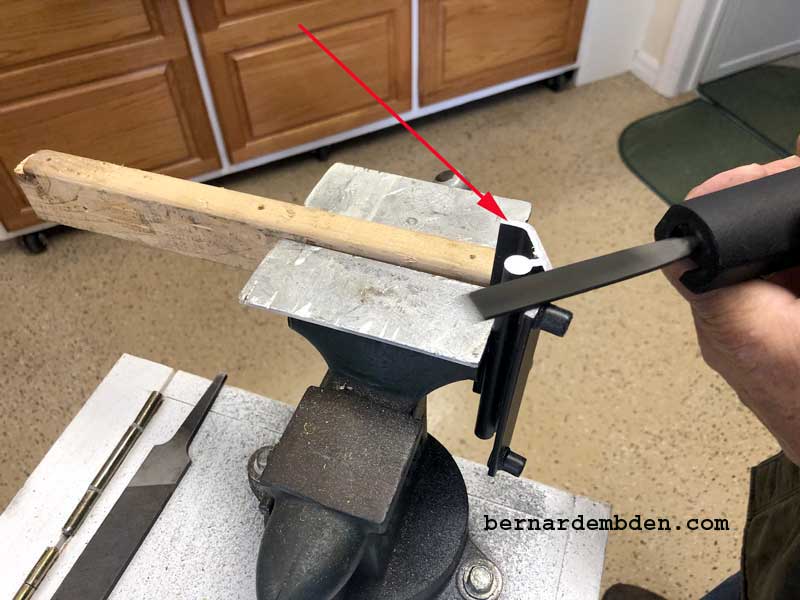
The width of the area removed from the bracket measured 7/16 of an inch which left the bracket measuring just under the target width of 4 3/8 of an inch. (Photographs below).
Unable to postpone the inevitable, it was now time to order a battery. (I needed a Type 49 battery) My objective was always to order an Absorbed Glass Mat (AGM) battery. However in looking at the comments / reviews it seemed that some AGM batteries did not last as long as their lead acid counterparts and failed prematurely. The advantages of faster charging along with cold temperature and vibration resistance were not major factors for me. I wanted the best battery with the longest life span.
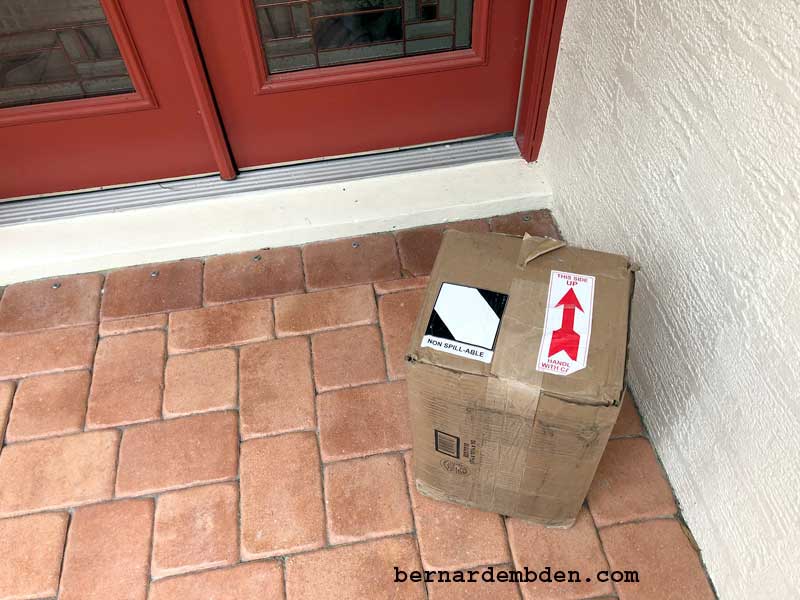
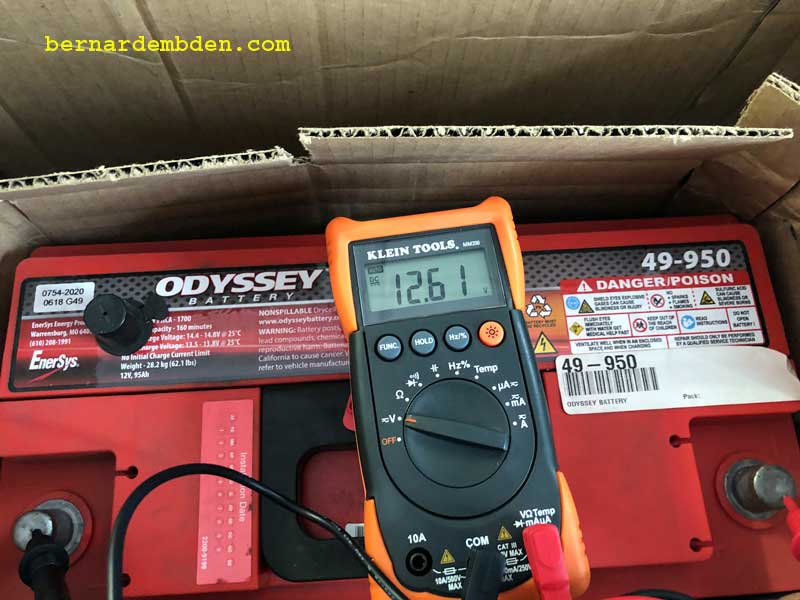
In the end I decided to go the conventional path and get a lead-acid battery. I looked at AC Delco, Bosch, Diehard etc, but kept coming back to the Odyssey. It cost the most ($320.00 US) but it also got the best reviews. Hell, getting this battery out was not anything I wanted to do again, so the Odyssey was ordered from Amazon. The FedEx guy dropped it off at my front door a couple of days later.
Ignoring the big red "UP" arrow (or because of it) he left the box on its side.
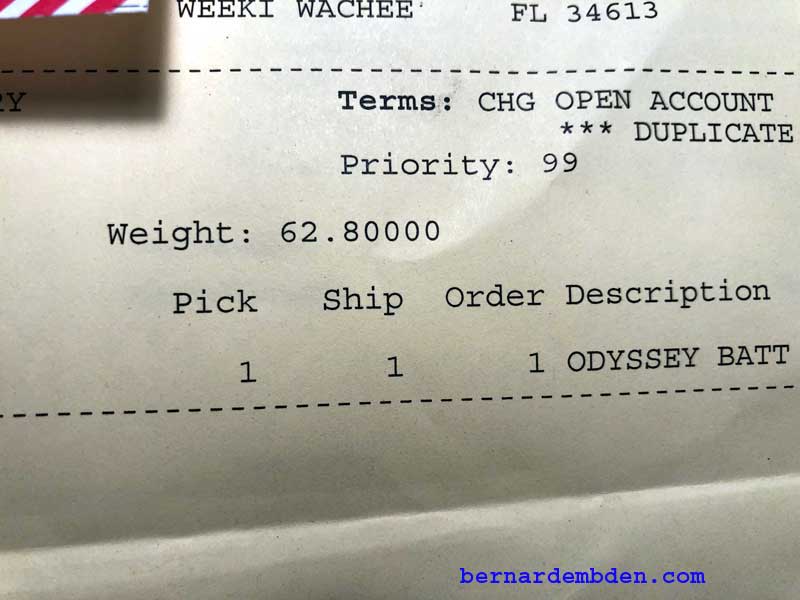
Once transported to the garage (needed a furniture moving dolly) I was pleased to see that the battery was fully charged. A quick look at the packaging indicated that this monster weighted in at almost 63 pounds.
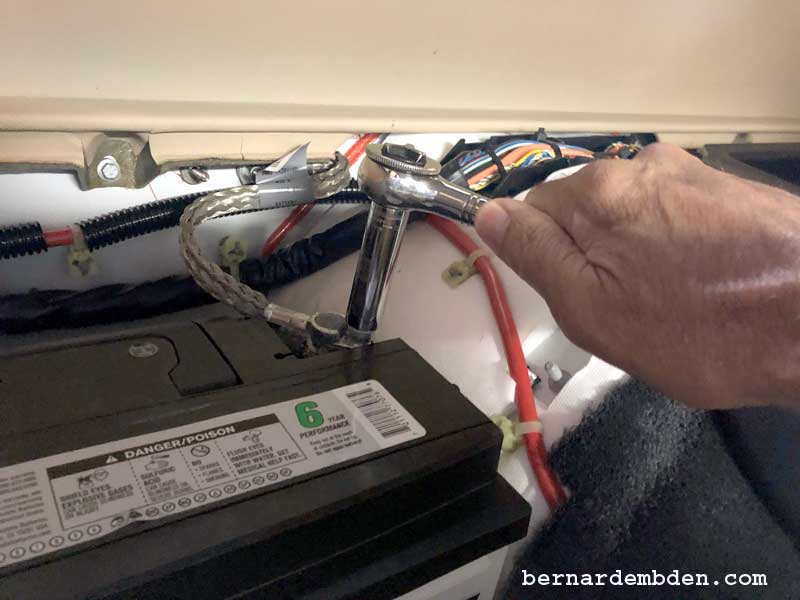
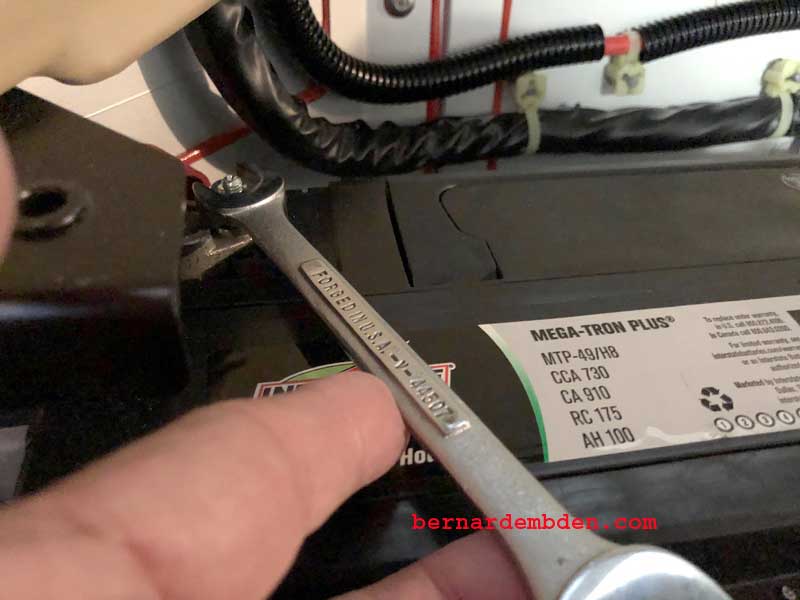
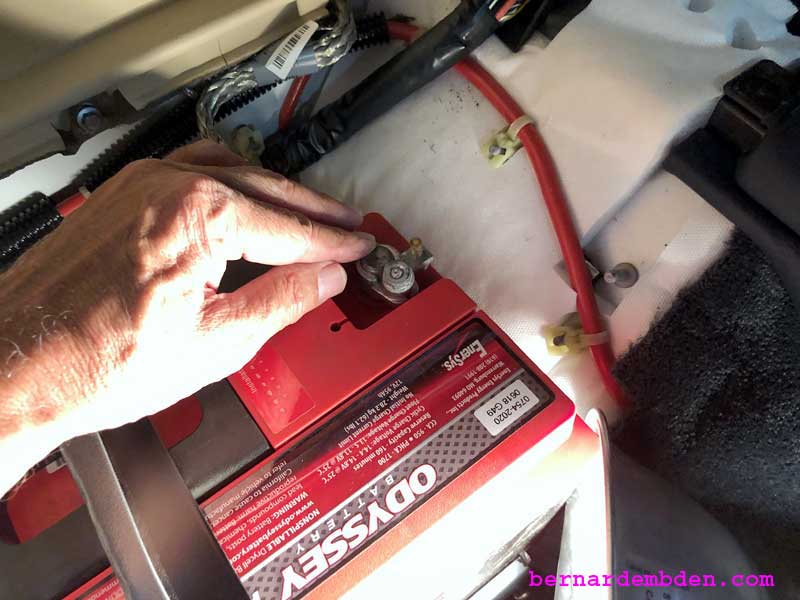
Removing the battery starts by removing the terminals. You will need a 13 mm socket and 13 mm wrench/spanner to remove the battery terminals. The negative terminal is removed first. There is a reason for this. Note that the car does not care which terminal is removed first.
But you should.
If the positive terminal is removed first and you inadvertently touch the removal tool to the body of the car it will create a direct short of the battery. (remember the negative terminal is still attached). It’s fair to say your battery won’t like this, but more importantly, you will piss off your cars sensitive electronic equipment to the point that they might decide not to work anymore.
By removing the negative terminal first, it negates that possibility. Even if the wrench / spanner inadvertently touches the body of the car nothing happens. It’s just a ground to ground connection. Finally once the negative terminal is removed I advise securing it out of the way to facilitate battery removal. (photographs below)
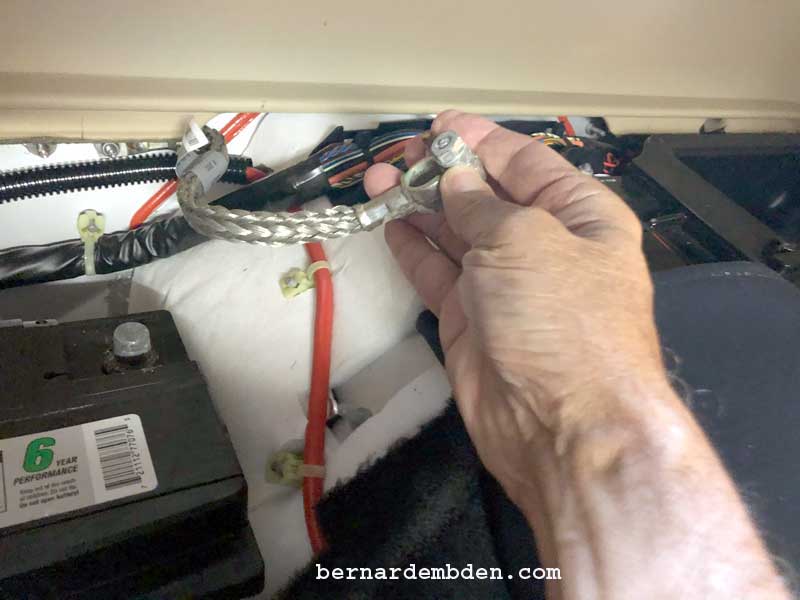
With the negative terminal secured, the positive terminal can be removed. Again, to facilitate battery removal, I secured it behind the fiber upholstery panel. (photographs below).
An attempted test lift of the battery confirmed two irrefutable facts.
1) The car was built around the damm battery.
2) No mere mortal could possibly lift this battery from its current location.
The small space between the seat and the batteries massive weight, combined with the awkward and impossible body contortions necessary to apply any lifting motion was impossible for most humans, and absolutely impossible for a 74 year old male (me) with a heart condition.
Even with help offered by my neighbor (same age but better physically) there was no way to get two people in this confined space.
I needed a unicorn, essentially a dwarf with the strength of Arnold Schwarzenegger in his prime.
In desperation, I called my Gardner. A smaller wirery gentleman who I hoped possessed enormous strength.
My gardener was able to dislodge the battery and lift it to some extent, allowing my neighbor to reach in and partially support its enormous weight. Together they were able to manhandle the battery from the confines of the car. My contributions were invaluable as I stood out of the way babbling incoherent instructions.
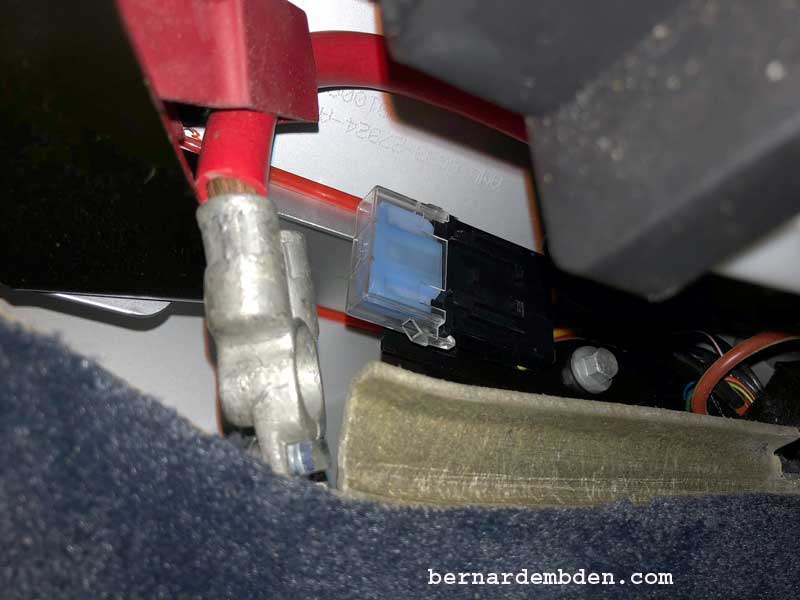
With the battery out it appeared that I had forgotten about the vent tube. Removing the plastic angle nipple connection from the old battery and re-installing it on the new battery was simple enough. (blue arrow photograph below) However we had inadvertently pulled the rubber hose out of its location, necessary to vent the battery outside the car’s interior.
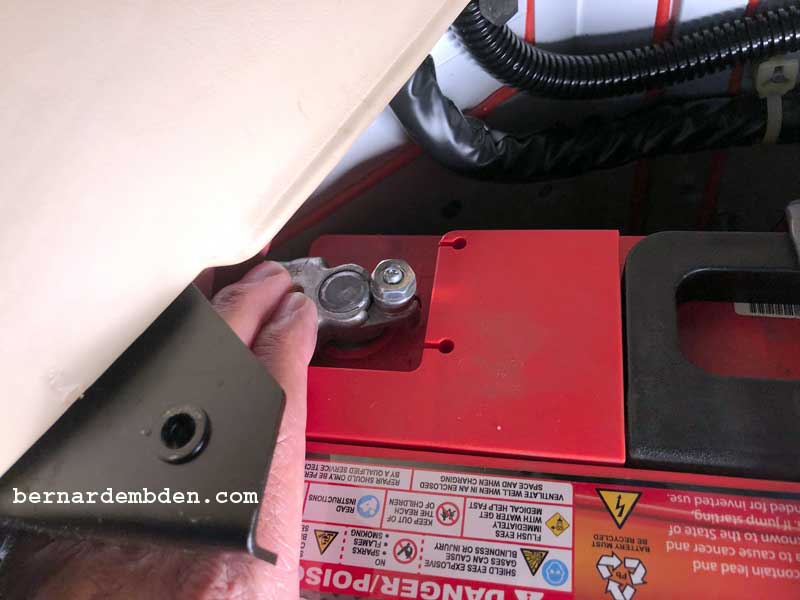
Be forewarned. If the vent hose is removed from its location, the vent hose exit location magically closes up and becomes invisible to the naked eye. It was only by sheer luck that I found it hidden in the floor of the car. Once the end of the rubber hose vent was reinstalled in the car my Gardner summoned enough courage to attempt installation of the new battery. Note that the battery has to slide under a bracket that Aston Martin has installed above the positive terminal. (photograph below) This bracket serves no purpose other than to piss off whoever is unlucky enough to be manhandling 63 pounds of battery dead weight while twisted in an unnatural fetal position.

Vent tube attached to plastic nipple inserted in new battery.
With new battery in place one modified clamp is easily slid onto the batteries retaining rail and moved to the far right position. (red arrow photograph below)
This position of the first clamp (red arrow) allows the installation of the batteries center strap front and rear bolts. (photographs below).
The second bracket is now installed and all four screws tightened.
For reasons discussed earlier, the battery terminals are installed in reverse order of removal. The positive terminal is installed first, then the negative.
The smaller sponge goes behind the battery. The larger is installed on top of the battery. Orientation of the sponges? I have no idea.
Battery installation complete.
The next time I need a battery for this car I am towing it to the dealer.
