
Driving my 2007 Vantage presents unique problems in terms of where do I park it. Specifically is there a curb, am I far enough from other cars opening doors, and most importantly can I actually see the position of the front splitter and or the back bumper?
This car desperately needs front and rear cameras.
A few years ago I was fortunate to meet the crew from Aston Installations. This company, based in England, had visited Florida at the invitation of, and in cooperation with Richard Seidlitz, owner of Redpants.lol, an online Aston Martin parts reseller.
At that meeting Aston Installations, facilitated by Redpants.lol, installed front and rear cameras in my Vantage. The cameras then worked flawless for several years.
And then they did not. The cameras became dark and fuzzy.
A through diagnosis of the system revealed that the cameras were fine. The issue was a problem with the video output sent to the cameras.
This link will cover the installation of the cameras, however it’s primarily focus will be on the reason the video interface failed and on replacing the defective HDMI video interface that feeds the cameras.
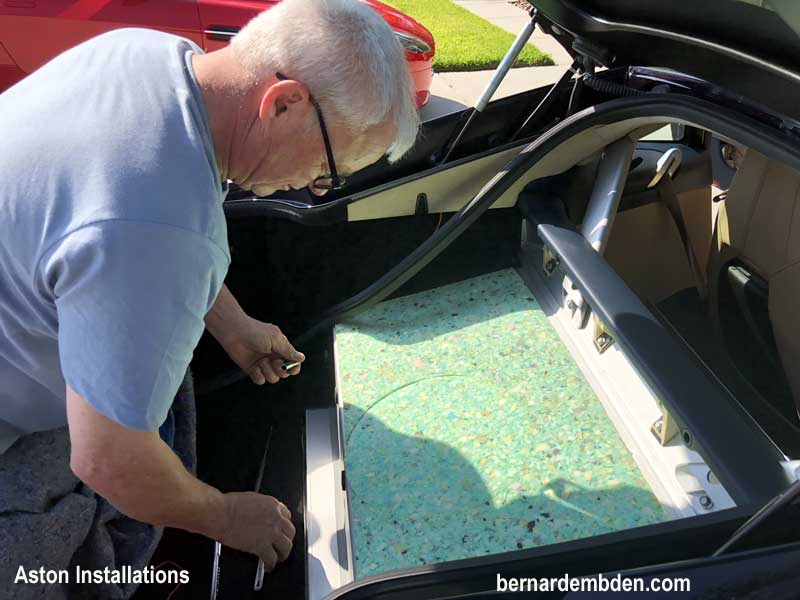
The project starts with the installation of the cameras by Aston Installations.
The rear carpet, gas tank cover and vertical back cover is removed.
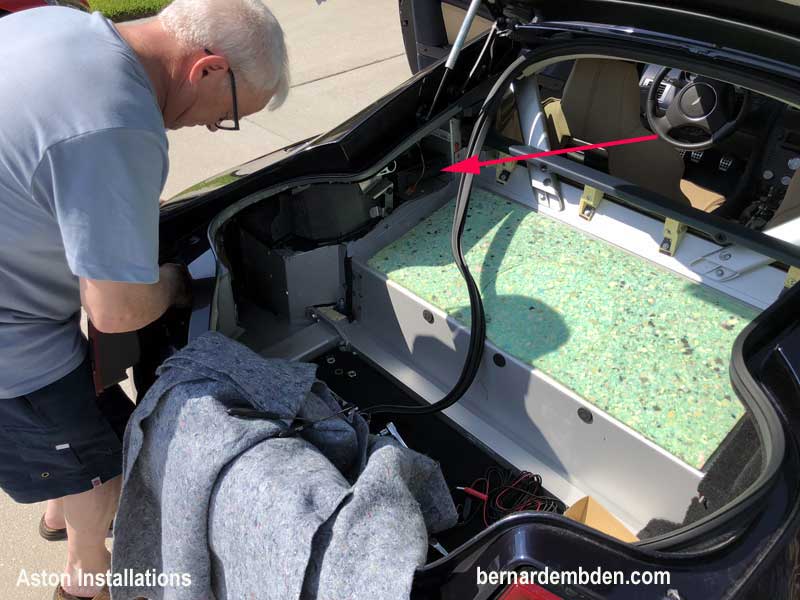
Along with the left side trunk lid's weather stripping, left side body trim and left side rear light. Note the location of the navigation's CD player unit. (red arrow photograph below)
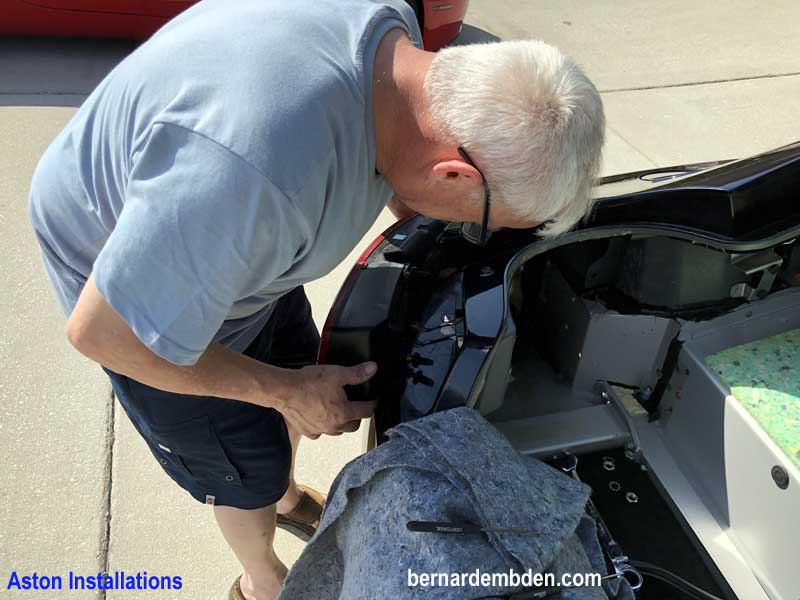
Removal of the left side rear light to facilitate running the camera cable from the rear camera and determining the 12 volt wire activated by the reverse light, necessary to tell the video interface when to switch its video feed to the rear camera. (Photograph below)
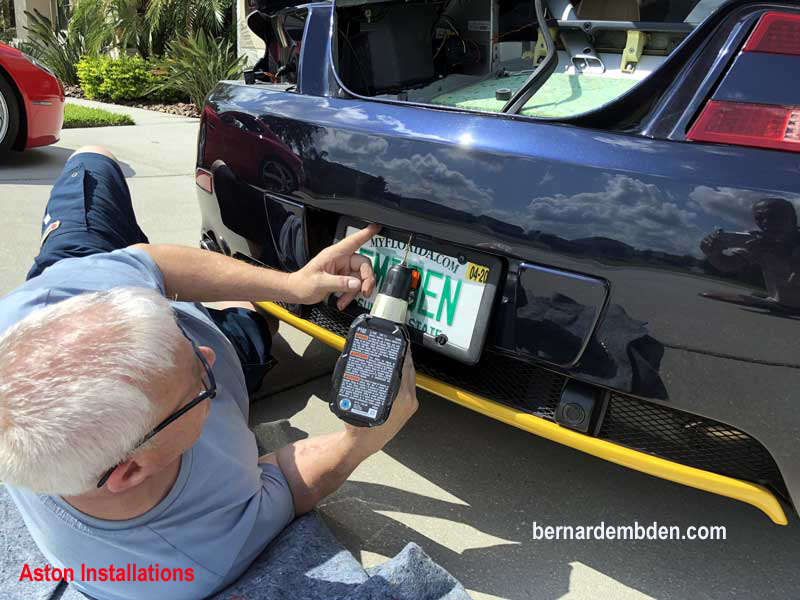
A hole is drilled in the center of the bumper and just in front of the license plate bracket and using double side tape, the rear cameras is installed. (Photographs below)

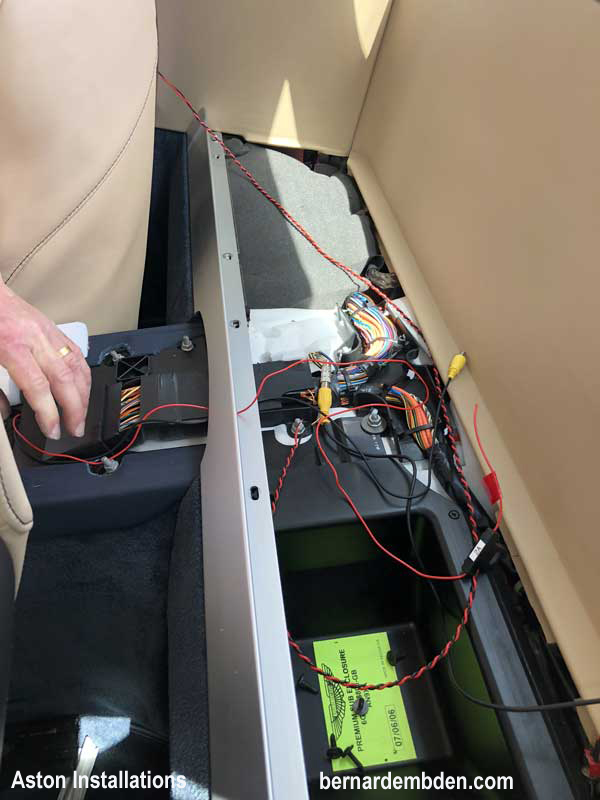
The navigation CD unit is removed from it position within the rear quarter panel and the Video interface (yellow arrow) is installed on top of the CD unit (red arrow) using double side tape. Aston installations have pre-formed wiring looms that make the process easier.
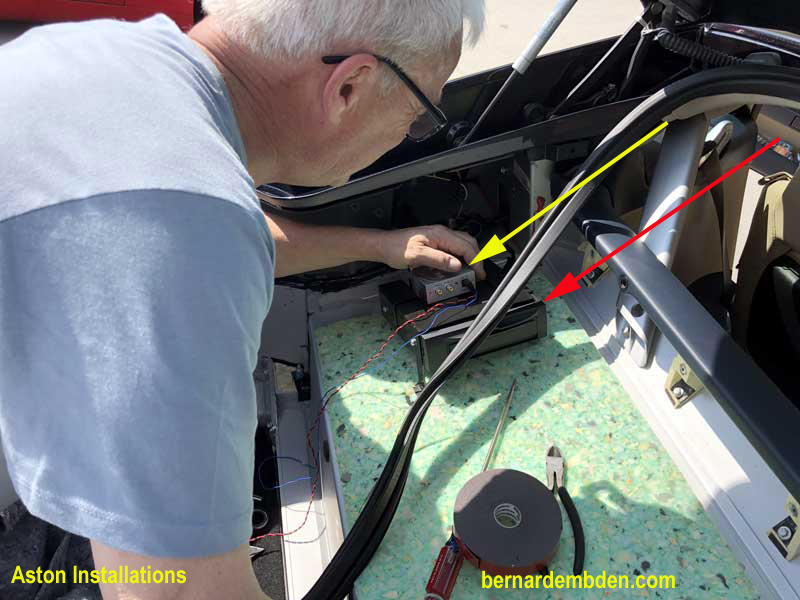
Using a test light, ignition switch on voltage is determined. Wiring from back up camera is routed through the rear light opening and into the location of the navigation’s CD unit.
With the rear camera installed, the process moves to installation of the front camera.
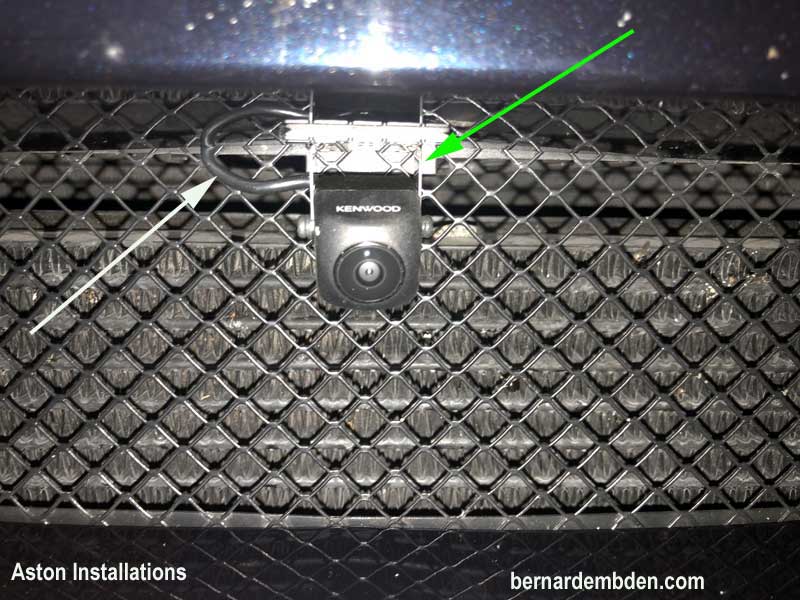
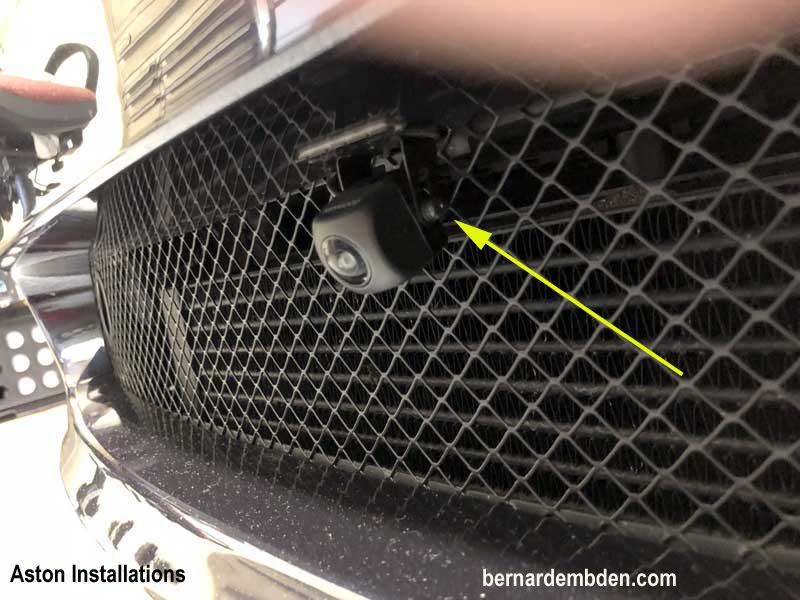
The center point on the bumper above the lower grill is determined. A bracket with up and down adjustability is secured to the lower bumper, up against the lower grill, with double sided tape. (green arrow) The front camera is then installed in the bracket. Note camera cable (white arrow) that will be tucked in behind camera.
Camera wire tucked away behind camera bracket. Front camera adjusted slightly downward (via screw yellow arrow) to provide the desired view. (photograph below).
Front camera wire is routed behind grill, along left fender and into the cabin. I don’t know exactly how this wire is routed. I believe that Aston Installations have a secret path that very few people know, because for everyone else, entry from the engine bay to the cabin is a bitch.
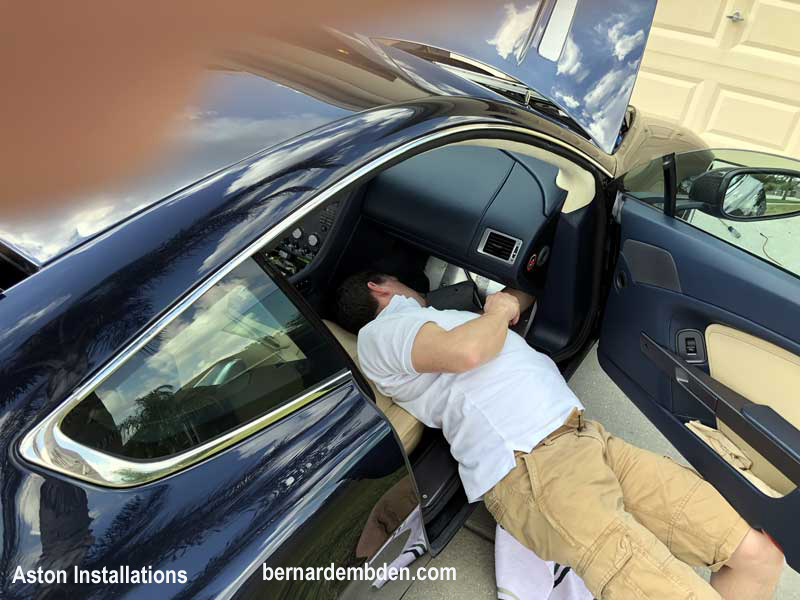
The console is removed, along with the rear shelf to allow routing of the front camera wire back to the video interface secured to the navigation's CD unit.
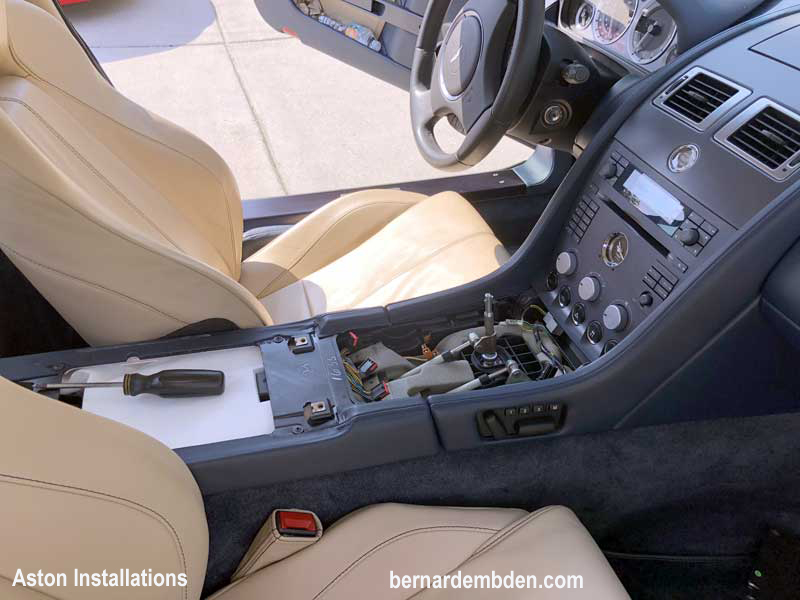
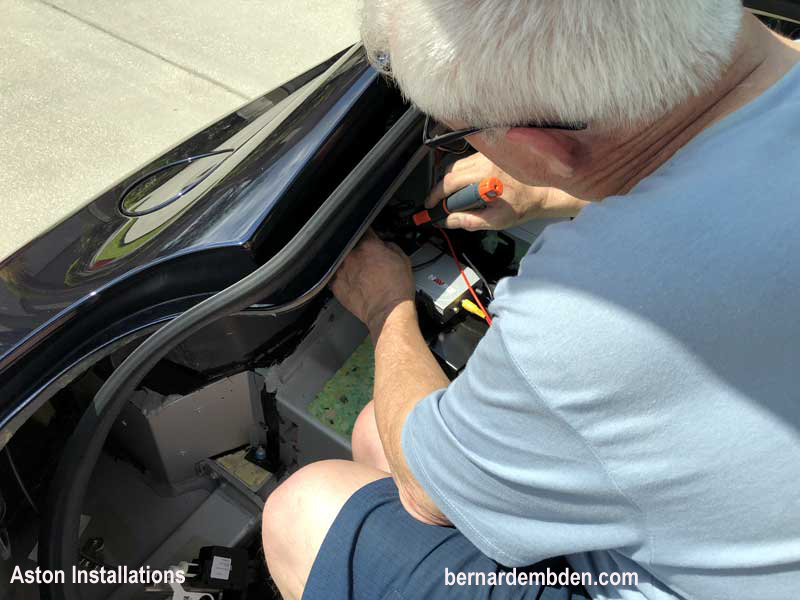
Video interface wiring cable is installed between CD unit and video interface. Interface is wired up with video feeds from front and rear cameras, back up light, 12 volt trigger, ignition on voltage and ground cable.
Aston Installations install was now complete. Once the navigation unit was in the up position, the backup camera would activate when the car was put in reverse. Front camera activation was via a switch installed in the "ash tray" on the center console.
And then, years later the video interface stopped processing the cameras feeds.
My diagnosis was to feed the video controller with a known good external RCA video feed to see how it would process that.
It failed
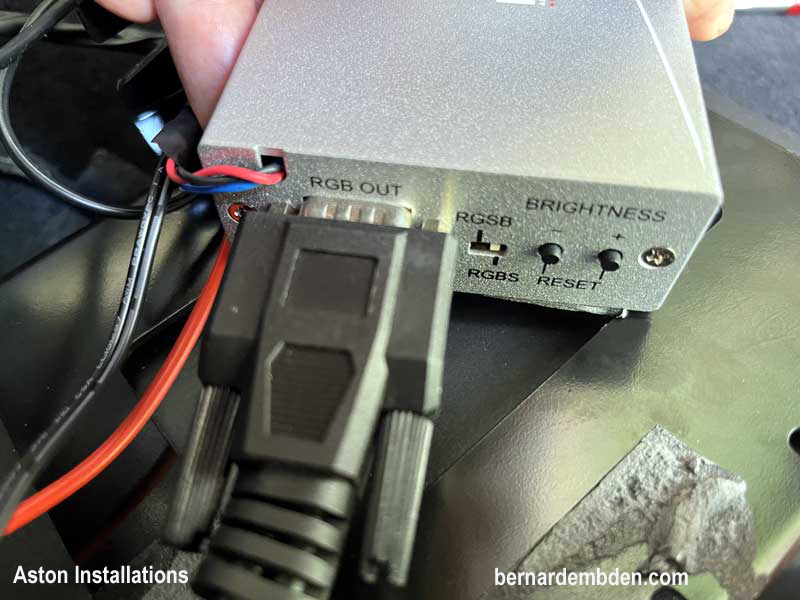
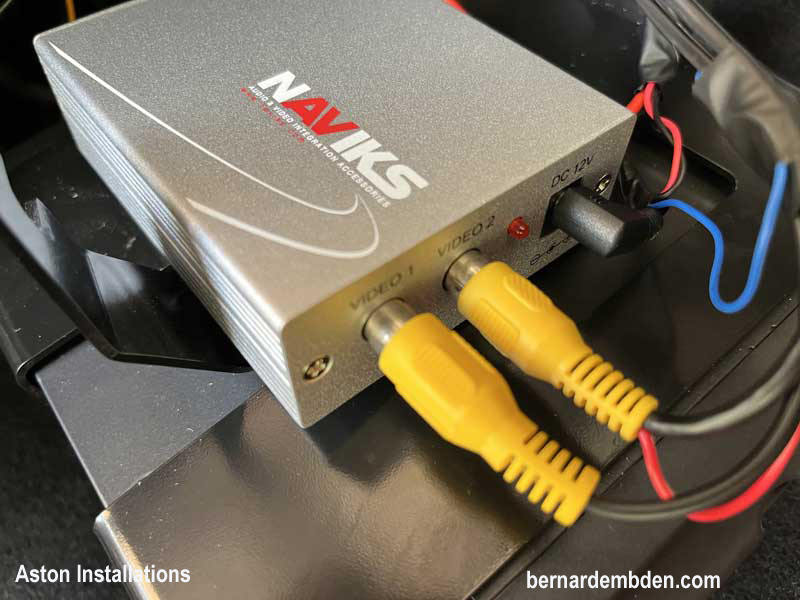
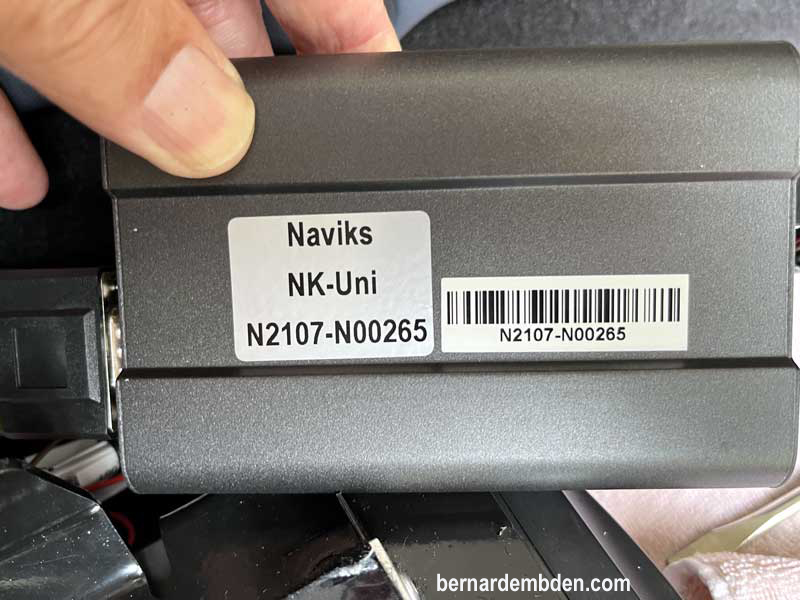
I needed a new video interface. A call was made to the manufacturer of the NAVIKS HDMI Video Interface. They are located in Brooklyn New York. The original video interface in my car was now obsolete, however the new model could be retrofitted and would still work with my existing Kenwood cameras.
After my credit card became $295.00 dollars lighter, the new video interface arrived at my door. The unit is redesigned and comes with a new interface cable that connects to the video interface and connects to the CD unit and the cars wiring loom. (photographs below)
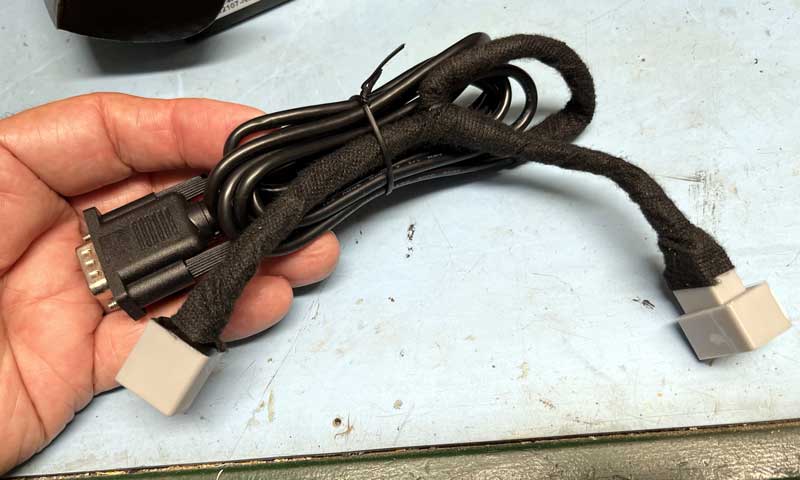
The new video interface had wires labeled for front and rear cameras, ignition on positive, ground and the reverse trigger wire. There was also a cable that switched the video feed to the front camera via a switch located at the end of a cable.
The switch for the front camera would be installed in the same location as Aston Installations. In the ash tray. The challenge was getting the wire there.
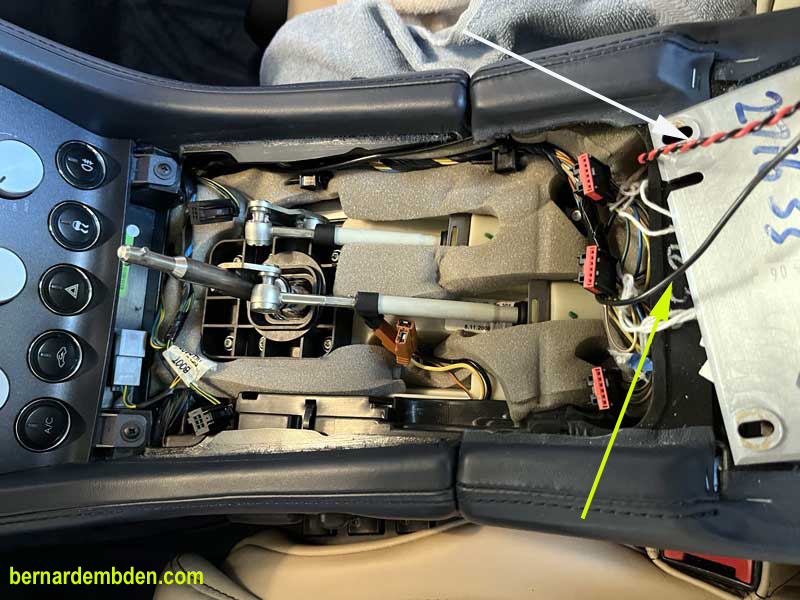
I removed the rear chrome bar and parcel shelf. Then removed a screw from lower right hand corner of the rear panel. (white arrow photograph below).
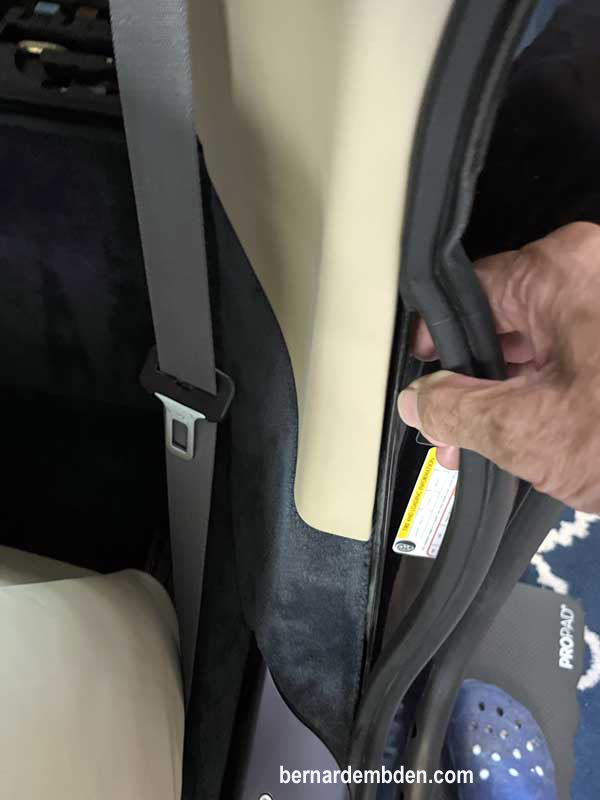
Pull off weather stripping at rear of driver’s door opening. There is a fig tree connection inside the panel that needs to be removed. That will allow just enough access to fish your cables through.
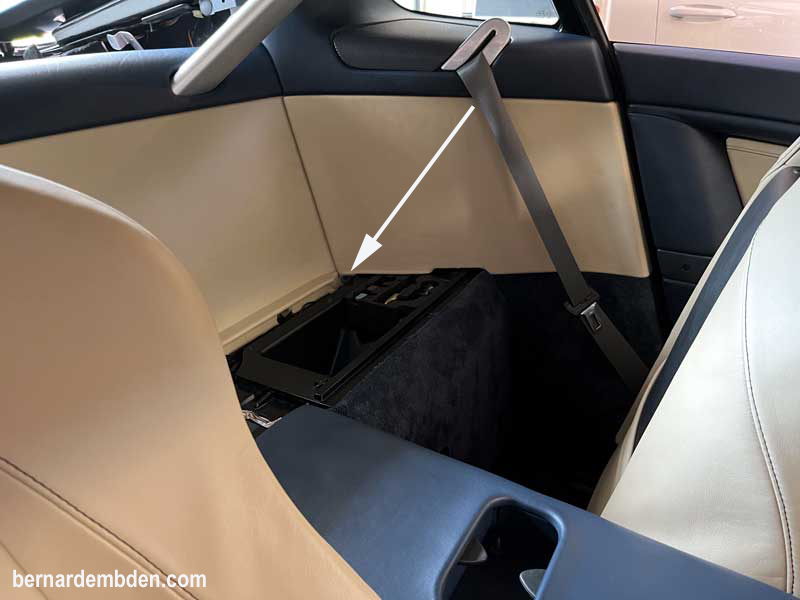
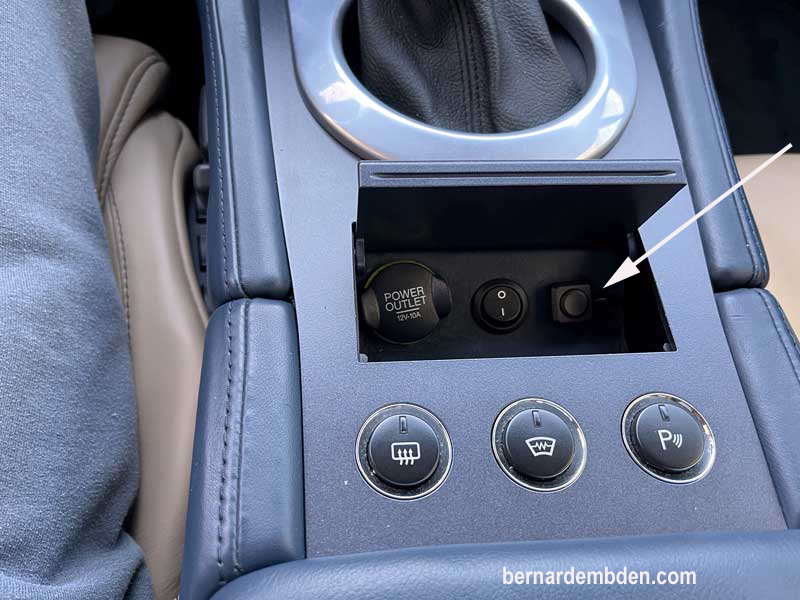
Remove console and gearshift surround. This will give you a clear path to run the front camera wire back to the video interface. Note location of ash tray. (red arrow photograph below).
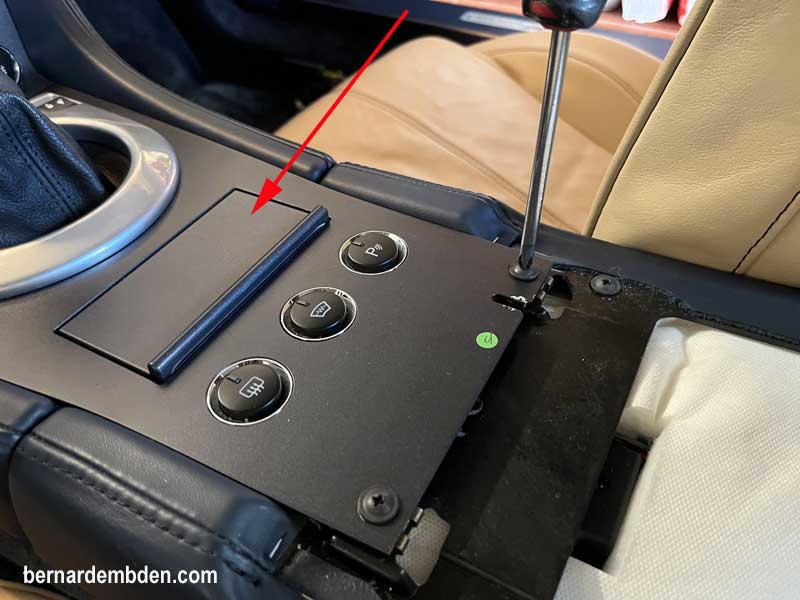
With gearshift surround removed, note location of front camera wire (white arrow) and front camera cable switch (yellow arrow).Front camera cable switch will be re-installed in the ash tray.
If you are going to remove the carpets and side panels you will need the following tools. T30, T20, 10mm, 8mm.
Remove carpet strip from rear of fuel tank. Remove carpet from fuel tank top to get access to the location of Navigation CD changer. (Photograph below)

With the carpets removed you can now access the navigation CD area. To gain more access to the area you can remove the bracket that holds the gas cap release mechanism. (White arrows photograph below)

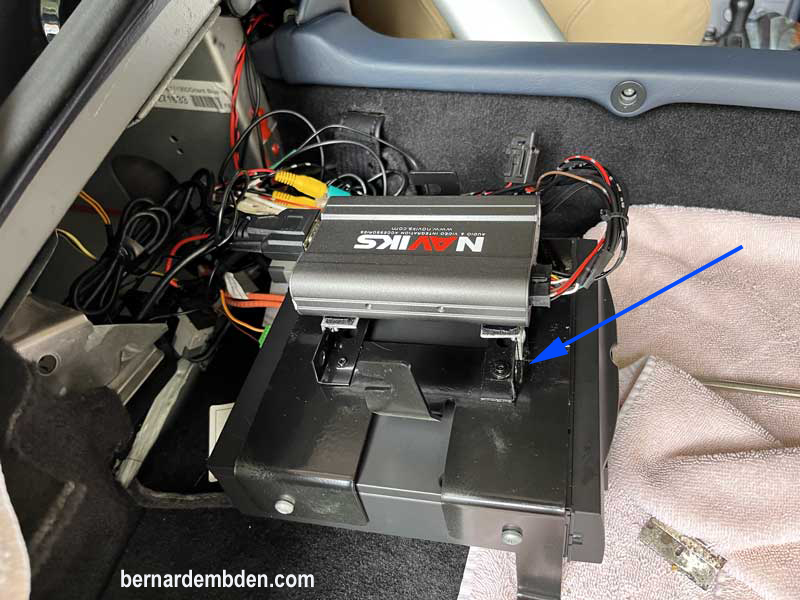
Photograph below. There was no clear reason why the original video interface failed. I suspect age and heat were contributing factors. To help with the heat factor I fabricated a bracket (blue arrow) to keep the new video interface some distance away from the top of the CD unit.
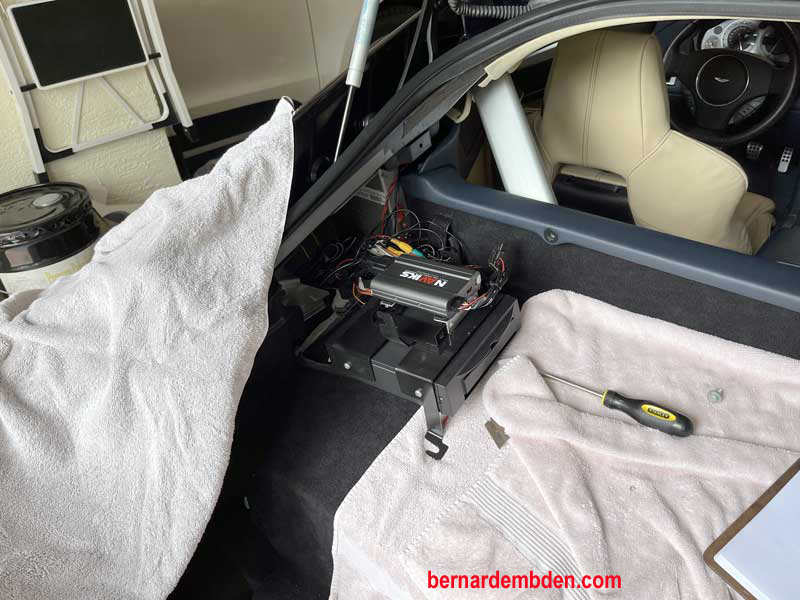
Video interface and bracket installed on top of Navigation DVD unit. Both units are mounted into position in rear fender opening. Blue arrow indicates the wires going to the front camera and front camera video feed switch. White arrow is the plug from gas cap release mechanism which was removed to facilitate removal and installation of the navigation CD and video interface units.

Front camera video feed mounted in ash tray. I retained the same mounting position that Aston Installations had for this switch. (white arrow photograph below). Center switch is for changing the front camera's angles.
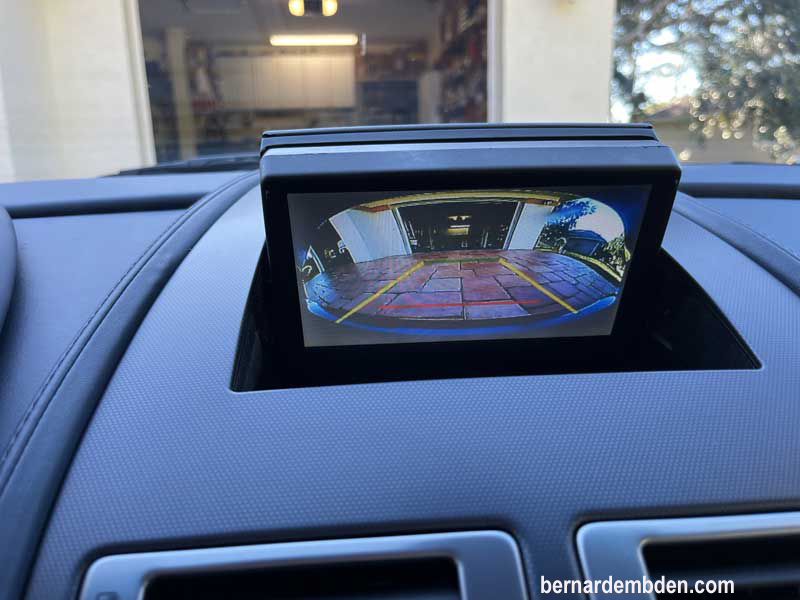
View from front mounted camera
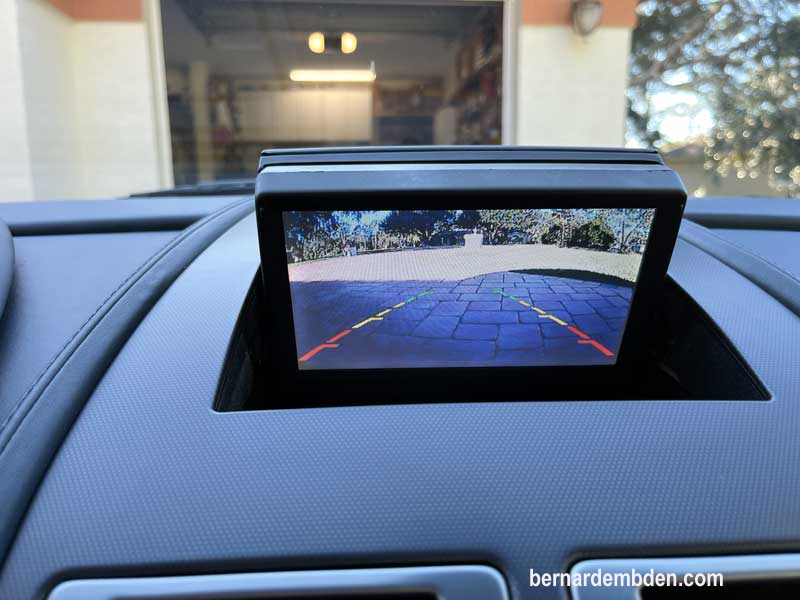
And view from rear mounted camera.
I would like to thank Aston Installations for being part of this project. Note that this is a much easier installation if you get the entire kit and instructions from them.
If however, you enjoy pain and have a couple of days with nothing to do and you are willing to do your own research and procurement, then this project is for you.
Drive safe.
