
As stated elsewhere on this website, The Navigation System for the 2007 Aston Martin Vantage is pretty useless. The good news is that it can be upgraded. Using third party components the system can be upgraded to wireless Apple CarPlay. A proper conversation would also include replacing the low resolution screen. Complicating the process is the fact that an auxiliary audio input would also be needed to complete the Apple CarPlay upgrade.
IMHO it is a worthwhile upgrade. However the small screen size and screen location would still be less than ideal for me.
Perhaps the most important factors are that we would be relying on independent, third party manufactures, whose solutions seldom work seamlessly. In addition, some manufactures that may not be around long term and many that may or may not continue to provide support and or replacement parts for a low volume manufacture such as Aston Martin.
I kept coming back to the inevitable. For me an iPhone mount in the proper location would be the best solution.
Note that I have gone down this rabbit hole before.
I have tried cell phone holders installed in the CD opening. Or installed on the vent louvers or the windshield. All have been deemed lacking for various reasons. The CD location was less than ideal and the mount vibrated constantly. The louver attached mount obscured the HVAC vent. When modified and moved lower it obscured the radio controls. I was not a happy camper. That said, I have come to realize my mistake. My focus was on attaching the various iPhone mounts to existing locations that the cell phone manufactures had predetermined for me.
Essentially attaching the mount to the vent louvers, the CD ROM opening, suction base to the windshield or gluing the base to the dashboard. Because none of those locations worked for me I spent time and effort modifying the mount. That was my error.
What I should have done is start with a clean slate design as to where I wanted the iPhone mount, not where the manufactures determined the mount should be.
Sitting in the driver’s seat (US models) I determined that the only location that did not obscure vents, switches, gauges, controls or the transmission shifter functions were:
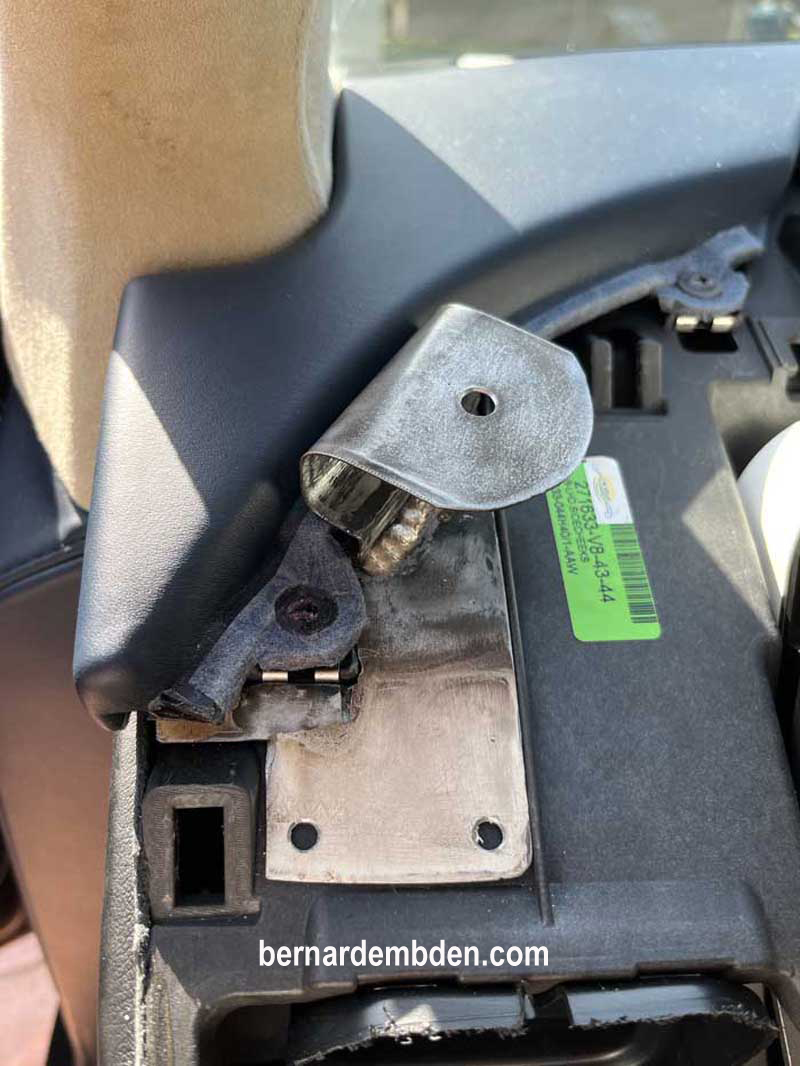
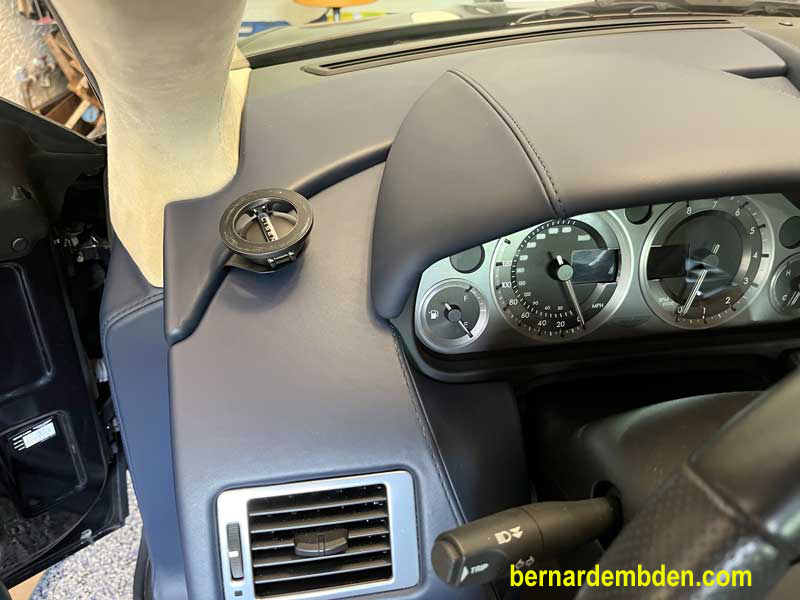
Between the dashboard gauge binnacle and the windshield left pillar.
Mounting a cell phone holder on the windshield glass or the leather panel was not an option. The more I looked at the removable dashboard panels, which do not butt together but overlap each other via a half lap joint, the more I was convinced that there was a small sliver of an opportunity to fabricate a mount that could be attached between the half lap joint.
A critical component of this project would be the iPhone mount. It needed to be unobtrusive, fit in the proposed location and most importantly, it had to look good.
Most Cell phone vehicle holders that I have seen are universally unattractive. Gooseneck devices suctioned to the windshield or distasteful plastic monstrosities hanging from vent louvers or glued to dashboards.
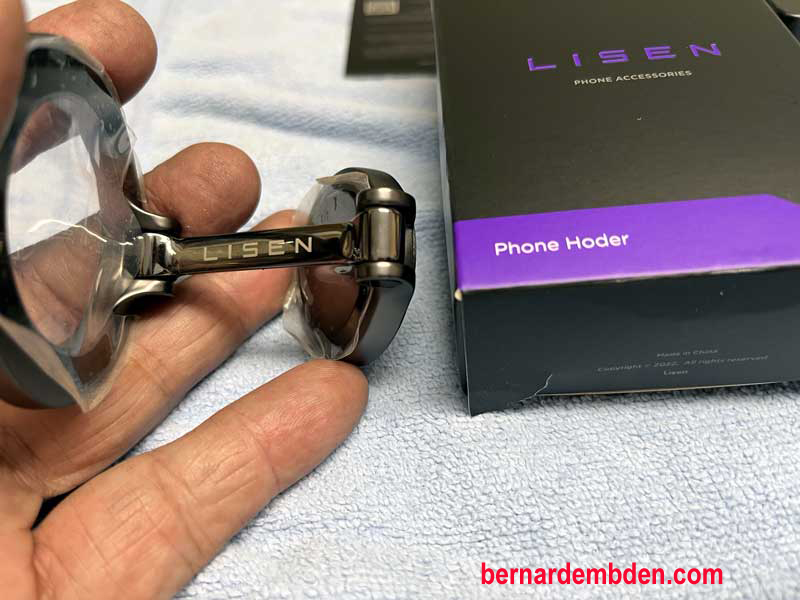
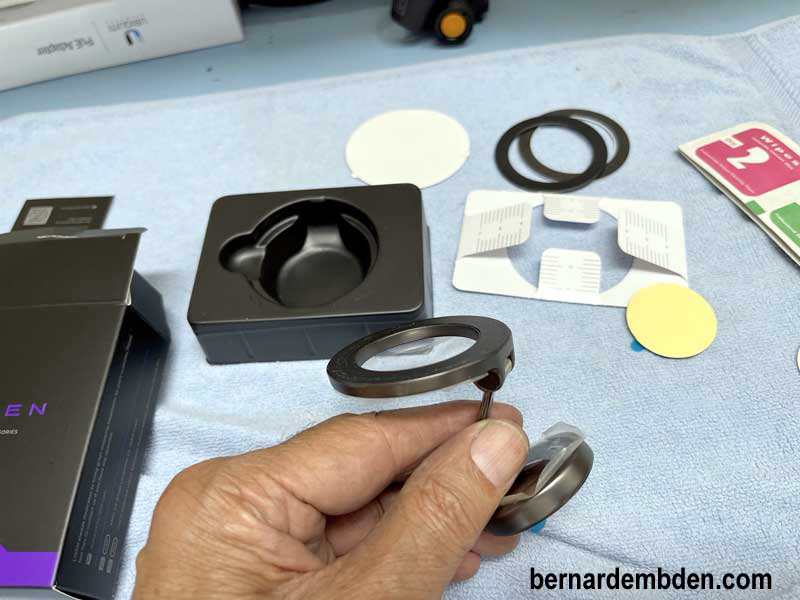
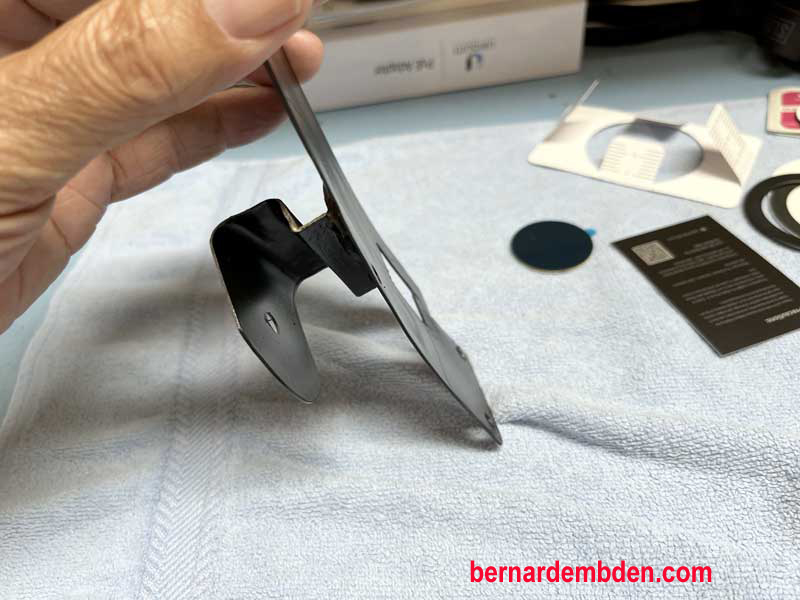
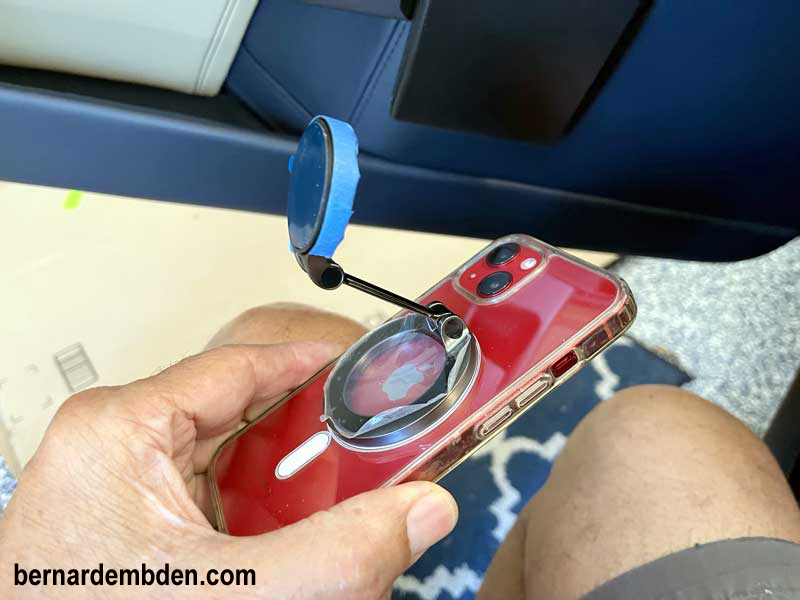
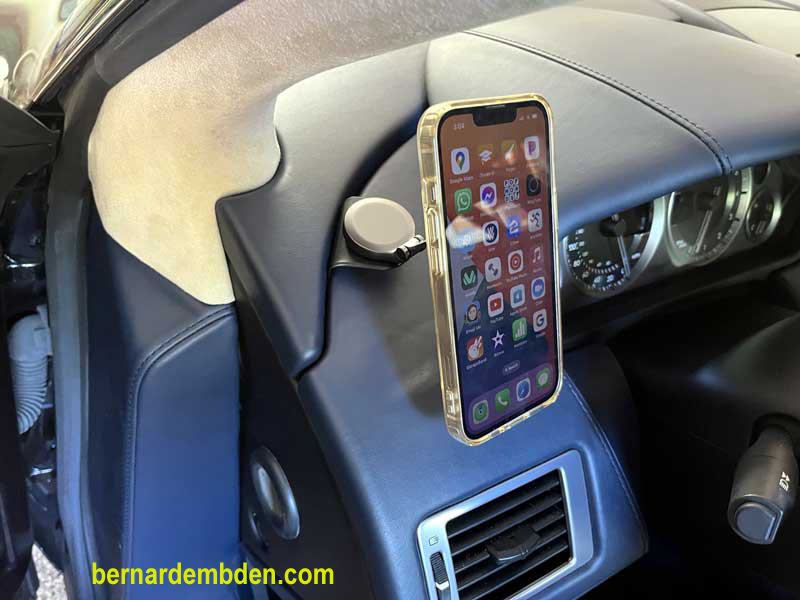
I was fortunate to find the iPhone mount I wanted. Made by LISEN, It was simplistic but elegant and it utilized the iPhone’s MagSafe magnetic ring to secure the phone. For non iPhone users, the kit also comes with metal rings that can be affixed to the back of those phones. (photographs below)
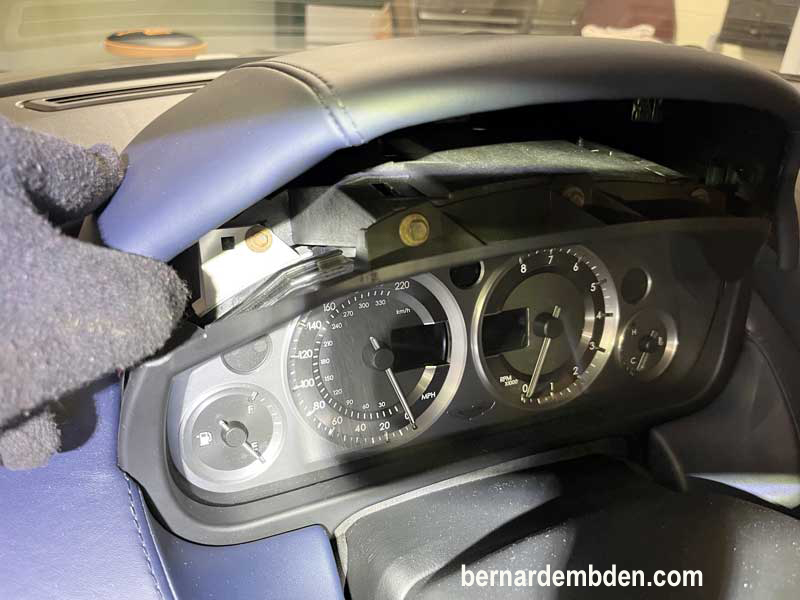
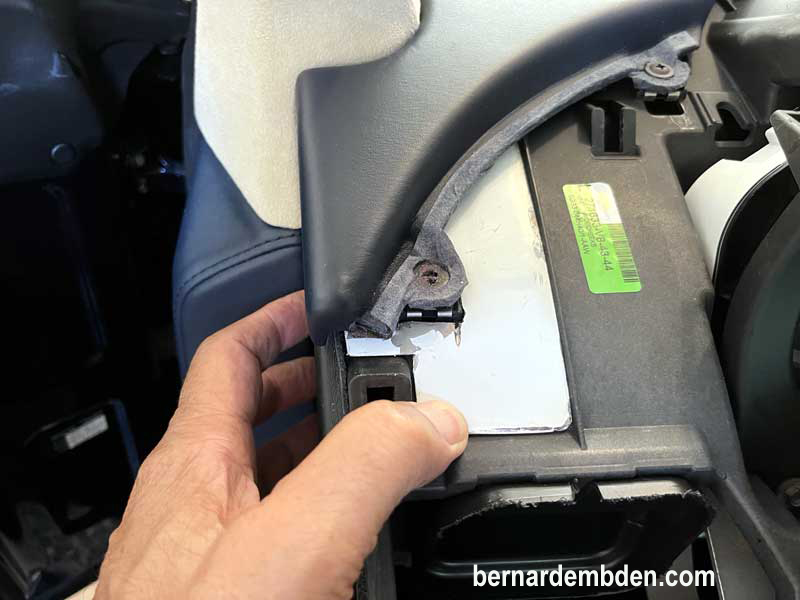
With the iPhone mount selected, the project starts my removing the dashboard gauge binnacle. Grasp firmly and pull up like you rented it. Using a plastic pry tool gently remove the left side panel. (photographs below)
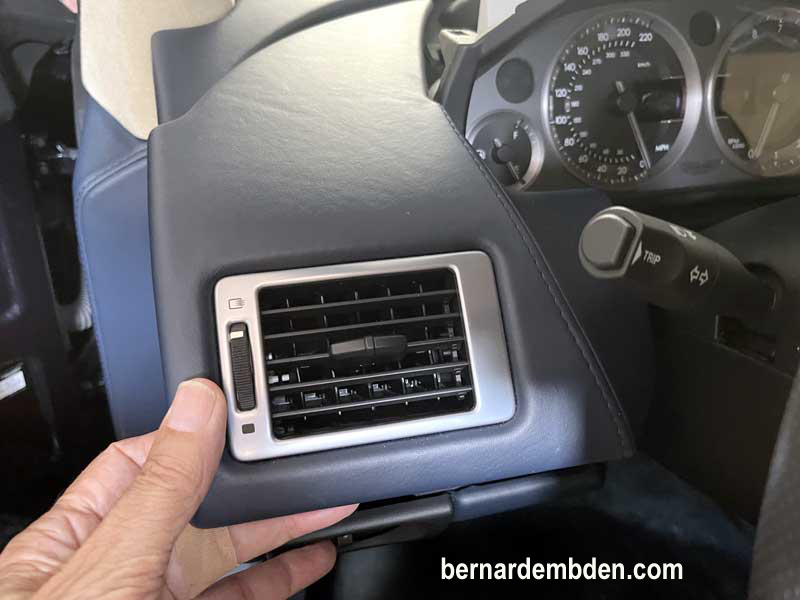
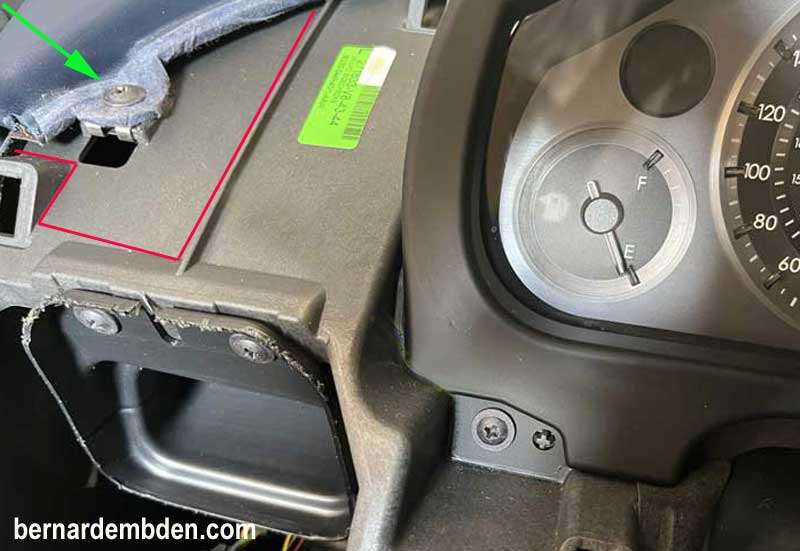
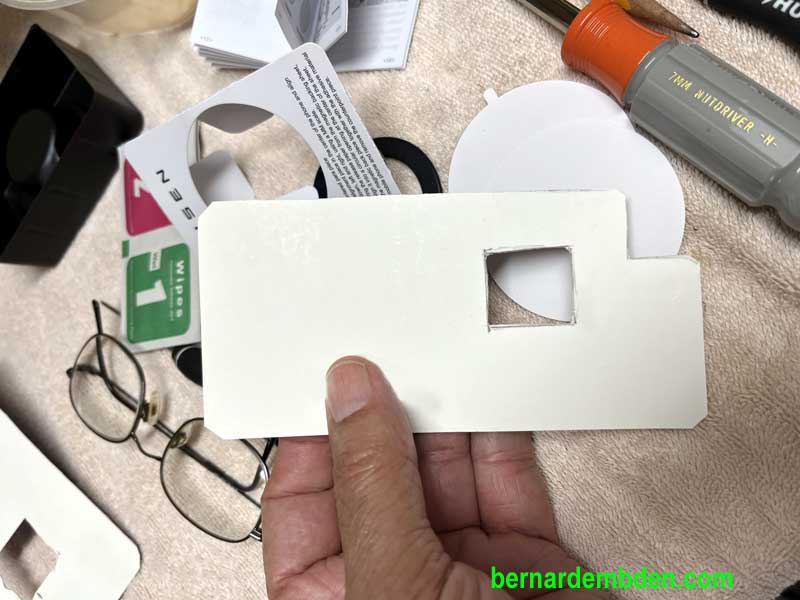
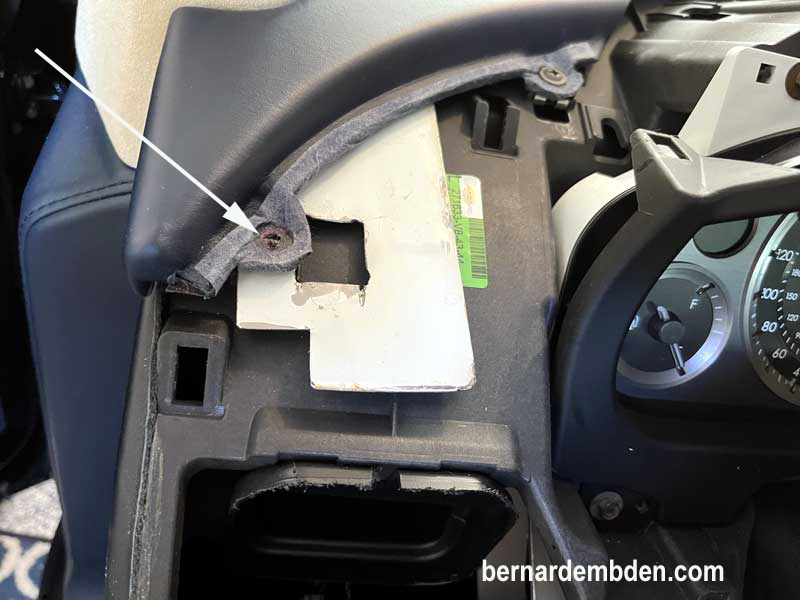
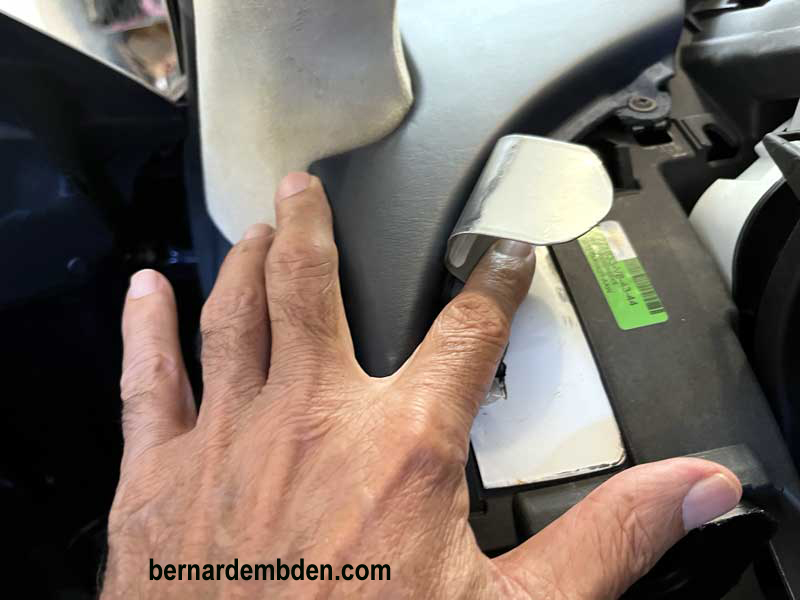
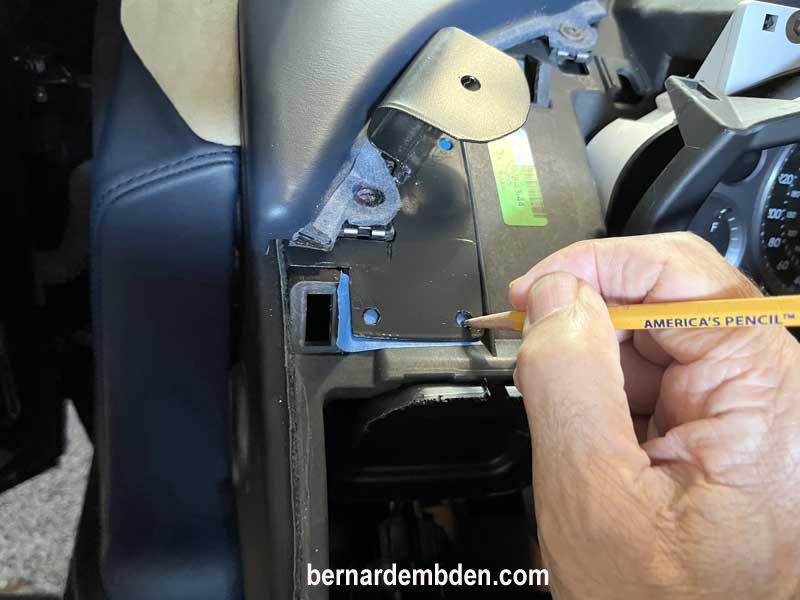
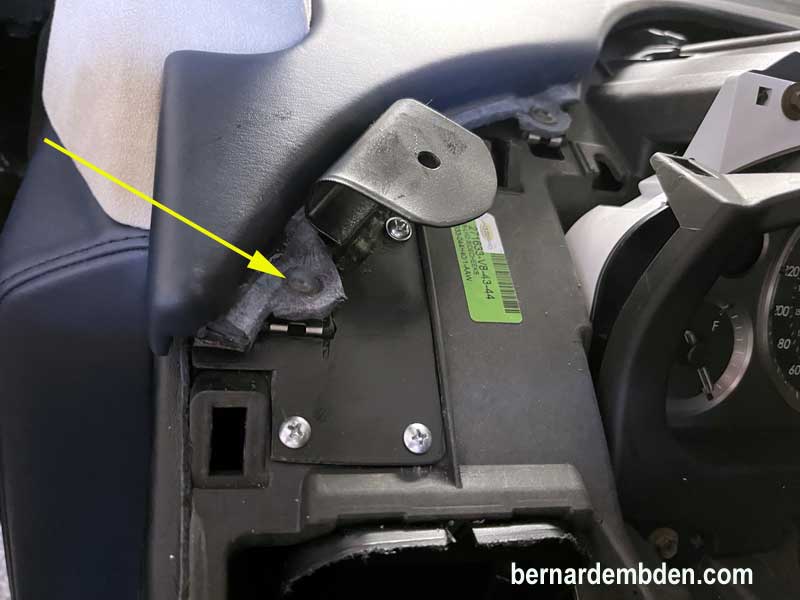
Remove one screw holding down the lower left leather panel, (green arrow) and using heavy weight paper, cut a template that will fit under the left panel and within the area that the fabricated mount base will be installed. (red outline photographs below). The base needs to extend below the left leather panel as the base footprint needs to be as larger as possible to stabilize the mount bracket.
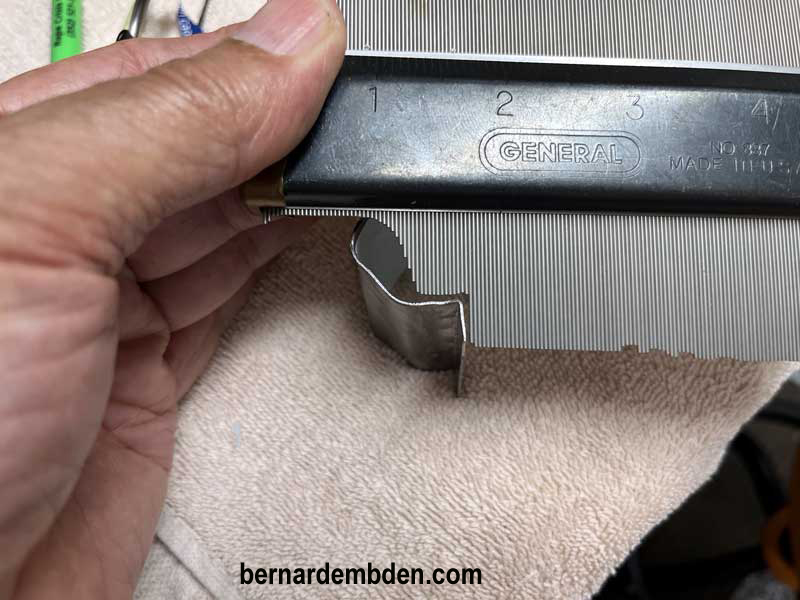
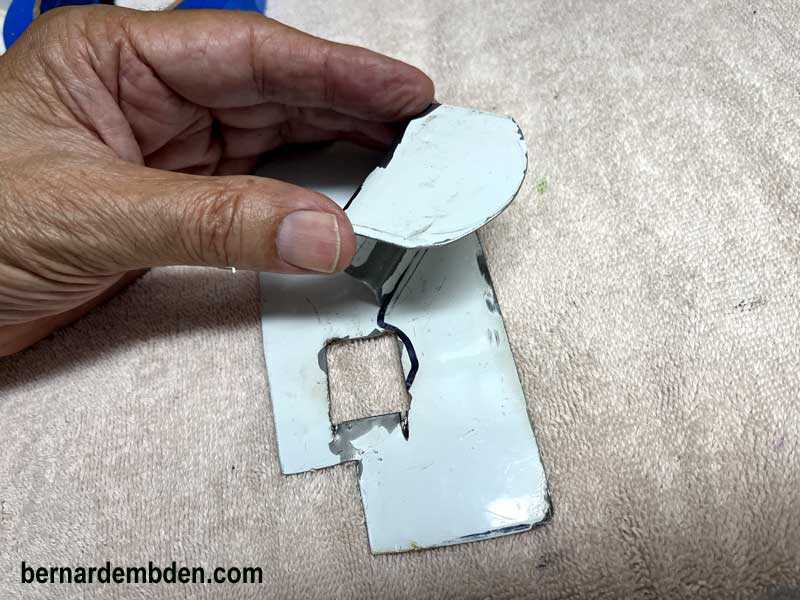
Transfer the paper template to metal stock. Not just any metal stock. Your choice of metal thickness here is critical. You want something that is stronger than sheet metal, but not so thick that it protrudes above the ridge line of the area marked in red. Looking through my assortment of scrap metal (I never throw anything away) I found a fan blade from my house fan that I had upgraded. I had discarded the fan motor but kept the metal blades because you never know when you might need it.
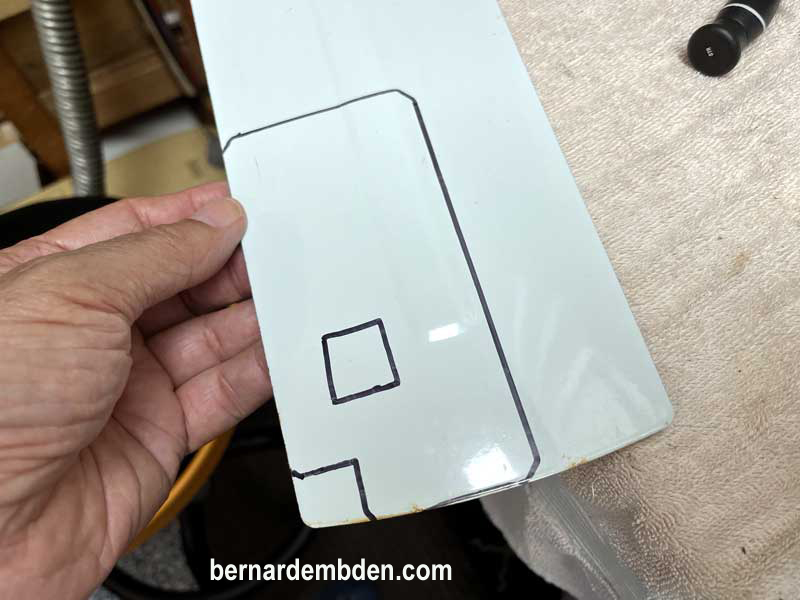
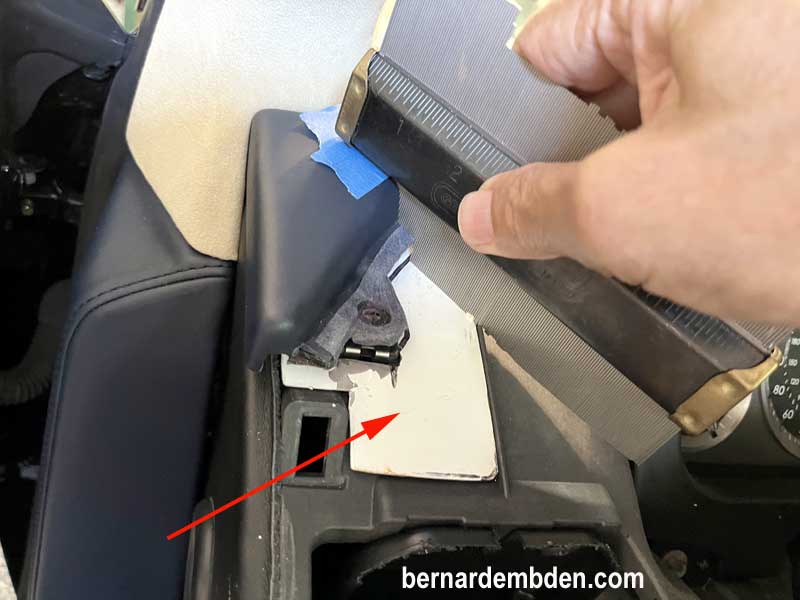
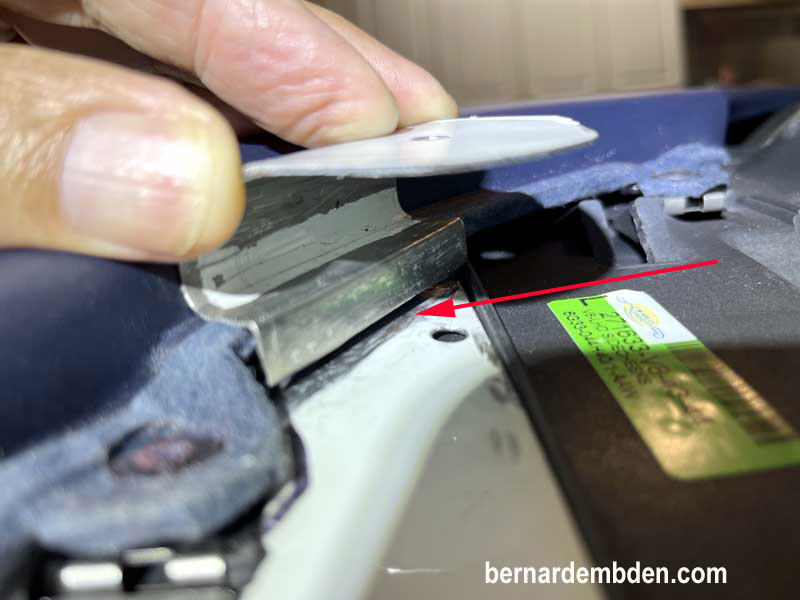
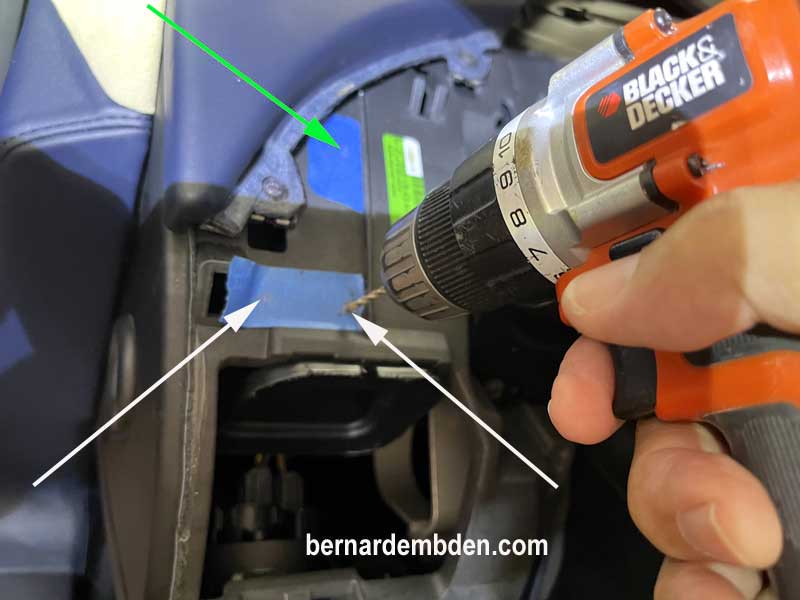
Test fit the metal template and make any adjustments or modifications necessary. Note screw removed from panel (white arrow) to allow the metal base to slip underneath the adjacent leather panel. In addition there is a slight curve to the dashboard base. Ensure that the metal template base conforms to the dashboard base. (photographs below).
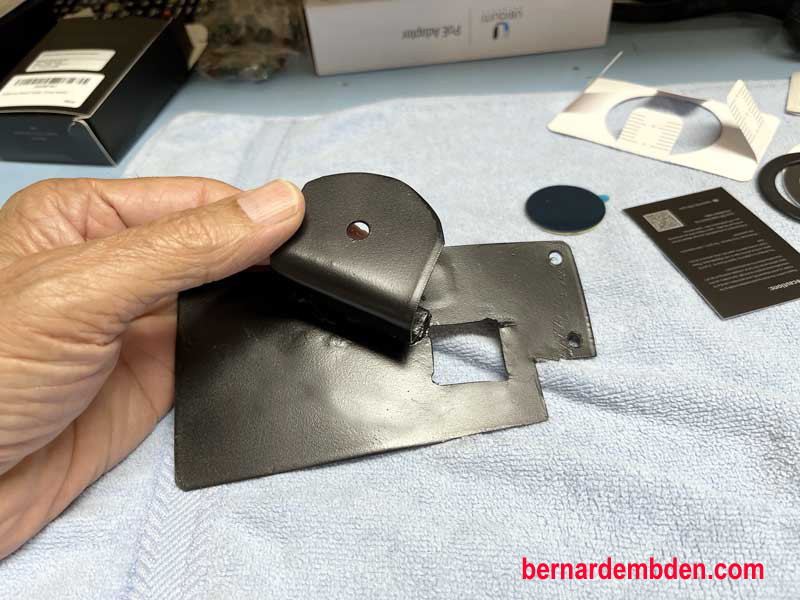
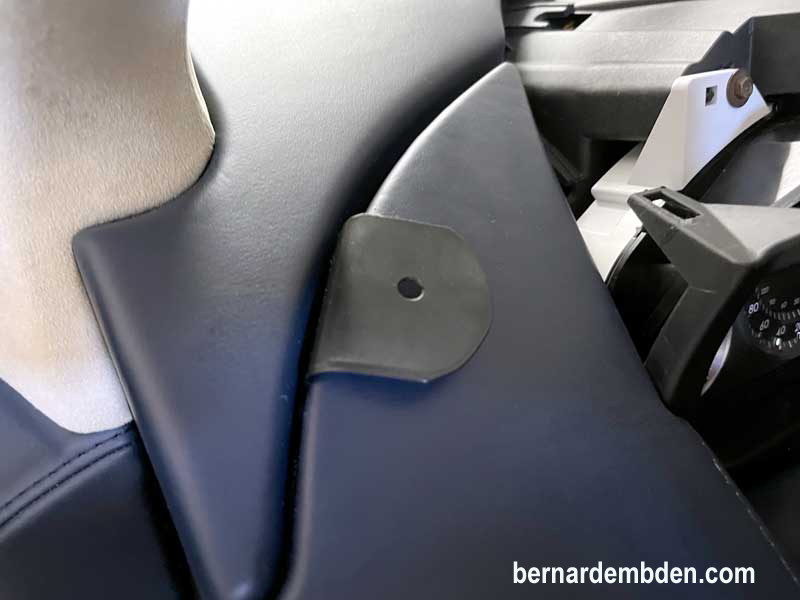
I needed to fabricate an attachment point mounting bracket for the iPhone mount. This bracket will be secured to the base (red arrow) and must be accurate enough to conform to the bends between the panels so that it will fit between the overlap of the adjacent leather covered panels. This required an exact measurement of the first and second angles of the half lap joint. (photographs below)
The second bend need to be curved, as the attachment point mounting bracket has to curve around the overlap joint of the panel next to the binnacle. A homemade jig provided the bend I needed.
Offer up attachment point mounting bracket to base making sure that the bend does not interfere or touch the leather panels. When satisfied of positioning, mark location of bracket to base.
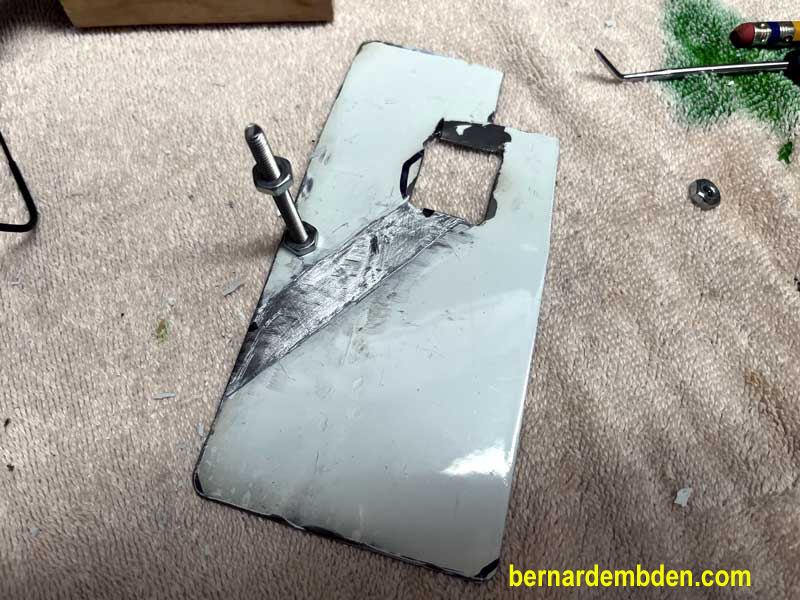
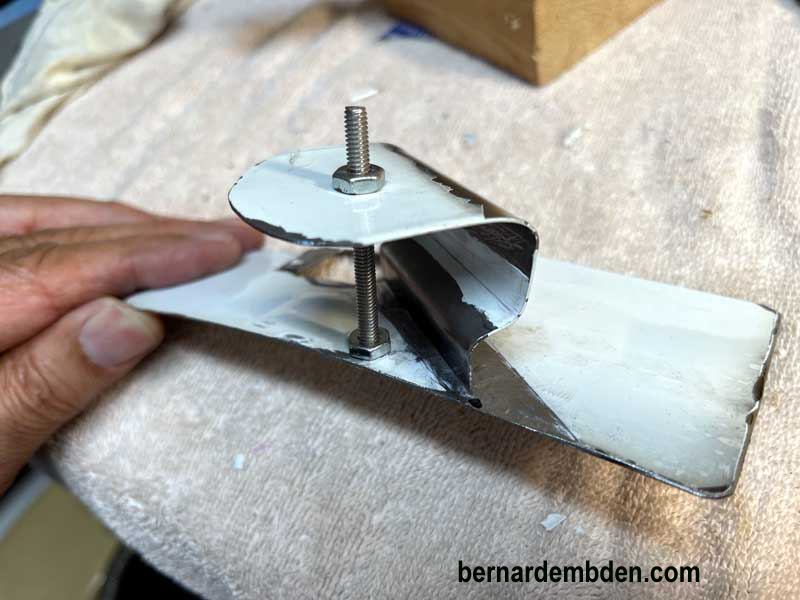
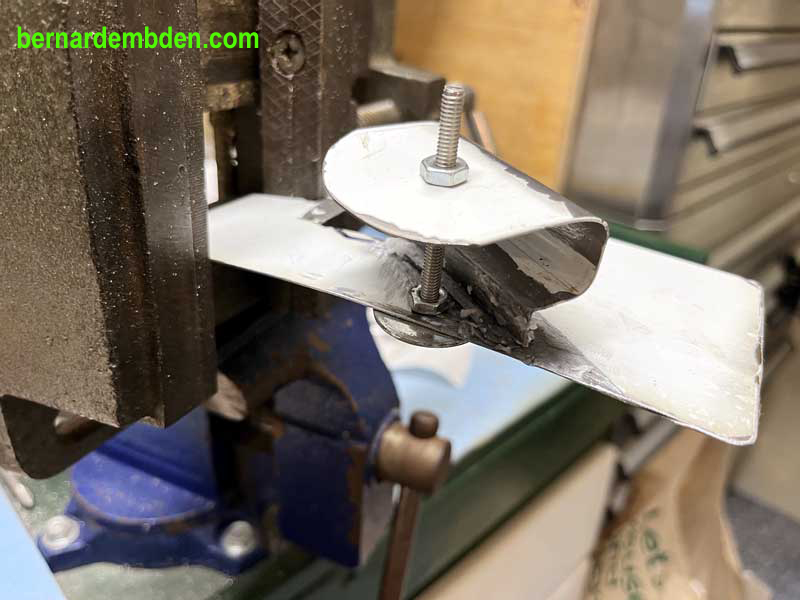
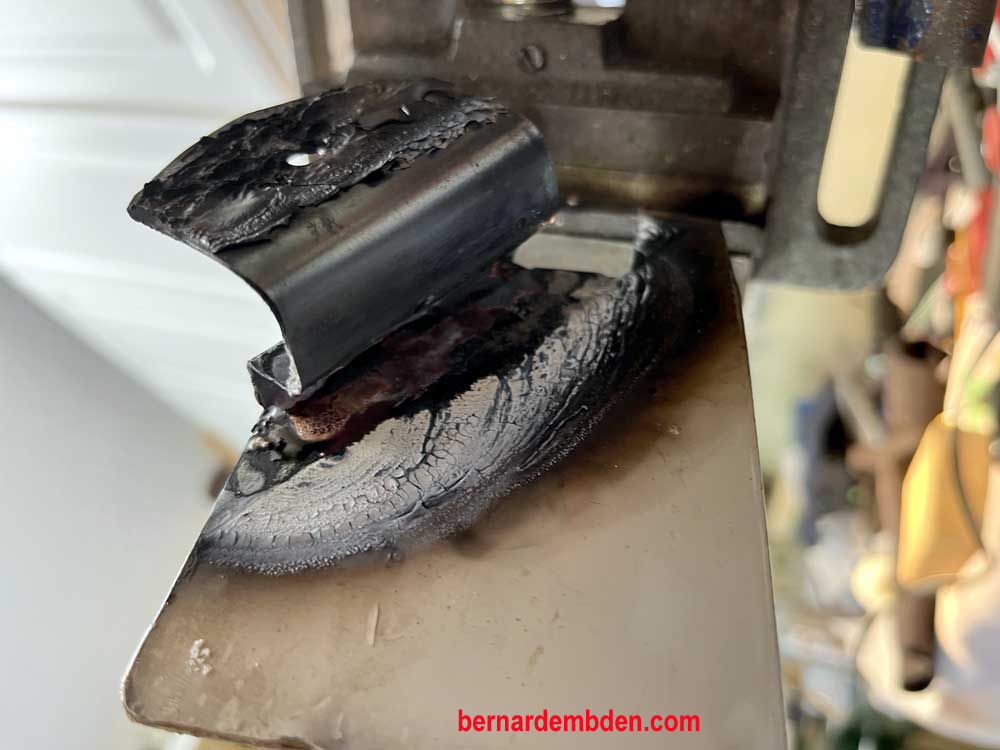
The challenge now was how to securely attach the attachment point bracket to the base. My first thought was to weld it. However welding relatively thin metal, while ensuring strength at the weld line, was tricky. I decided to braze the joint. In order to get as much strength as possible at the joint I deliberately cut the bracket short so I could double up on the metal at that point. (Red arrow photograph below)
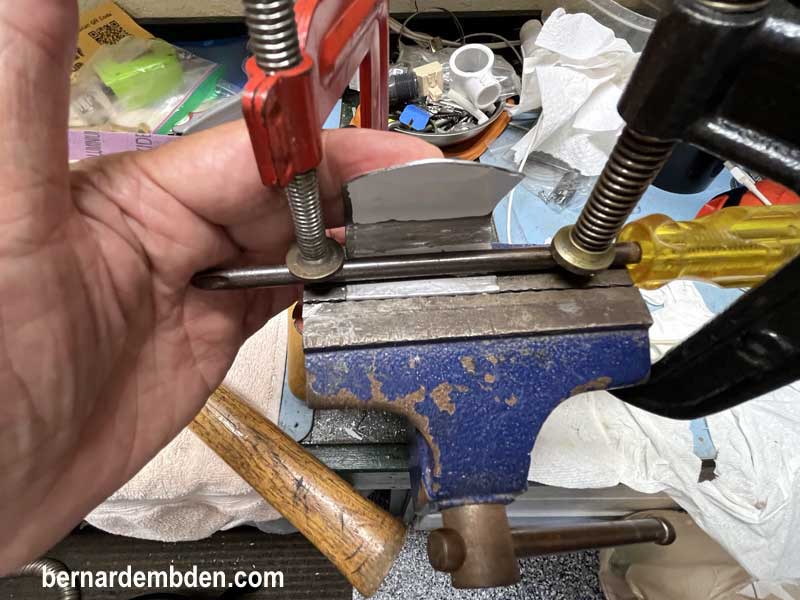
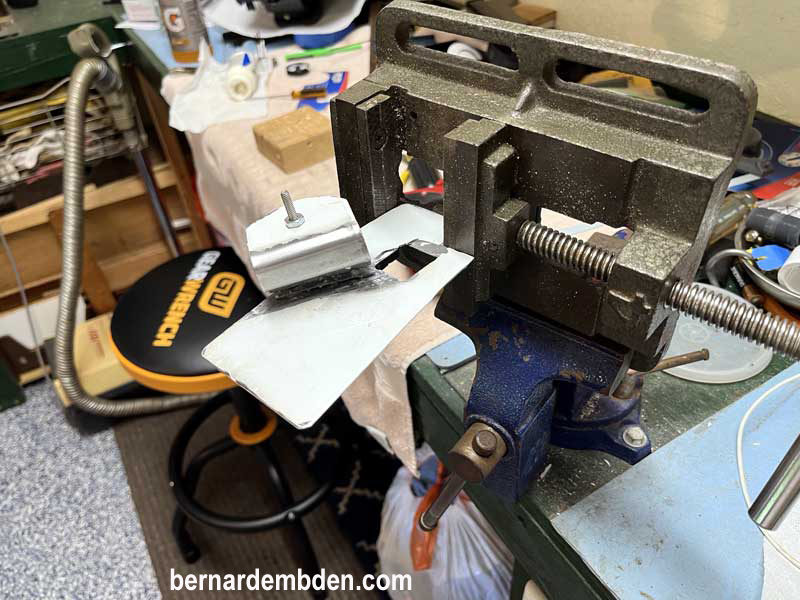
Clean the areas to be brazed and fabricate a jig to hold the bracket in the proper position for brazing.
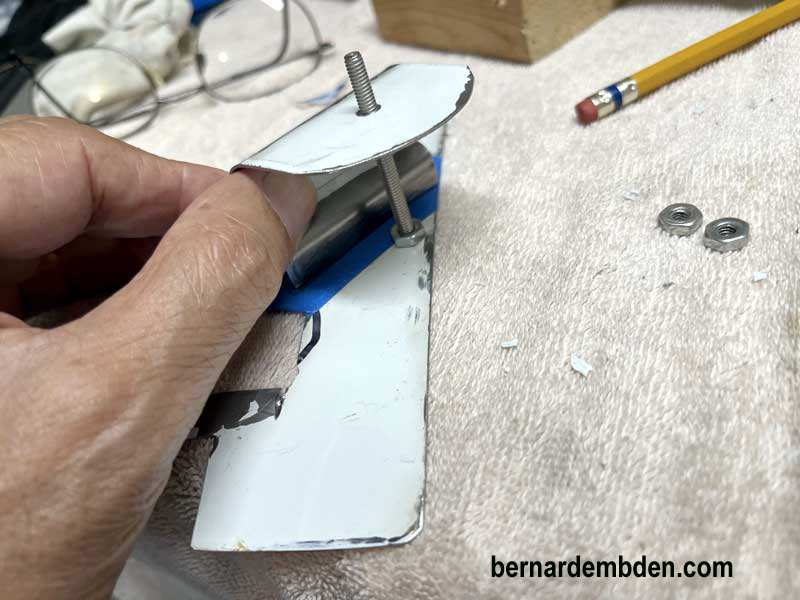
Used my drill press vice and table vice to hold the metal base in the correct location and angle for brazing the bracket to the base. (Photographs below)
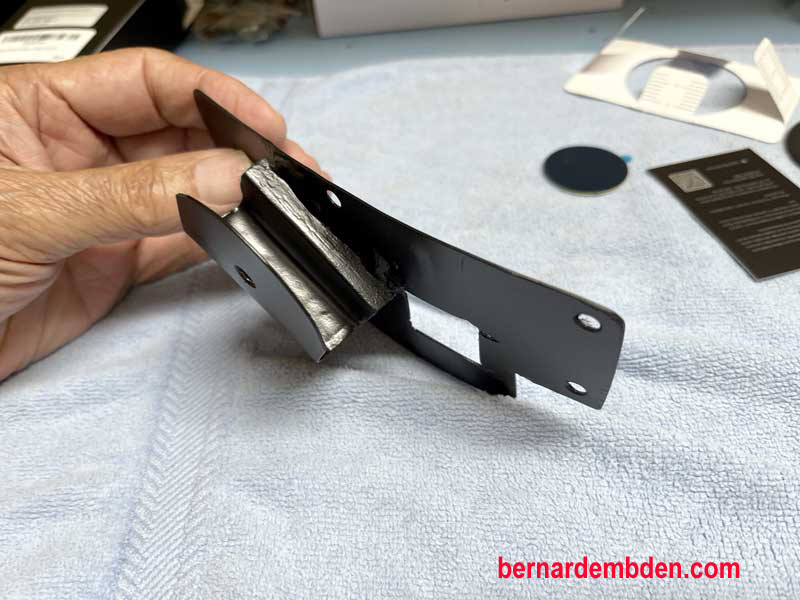
After brazing it looks like crap because the powder coating was burned off. Drill three holes at attachment points. After cleaning a dry fit to the dashboard confirms that the base and attachment point bracket fits properly. Note extended heavy brazing at the bracket base for maximum strength.
Thoroughly clean and degrease. Two coats of primer and three light coats of satin black paint and the custom iPhone mount bracket is now ready for prime time.
Place tape at the mounting screw locations. Offer iPhone custom mount base to location and mark three mounting screw holes. I decided to use stainless steel wood screws to secure the custom mount onto the dashboard's plastic base.
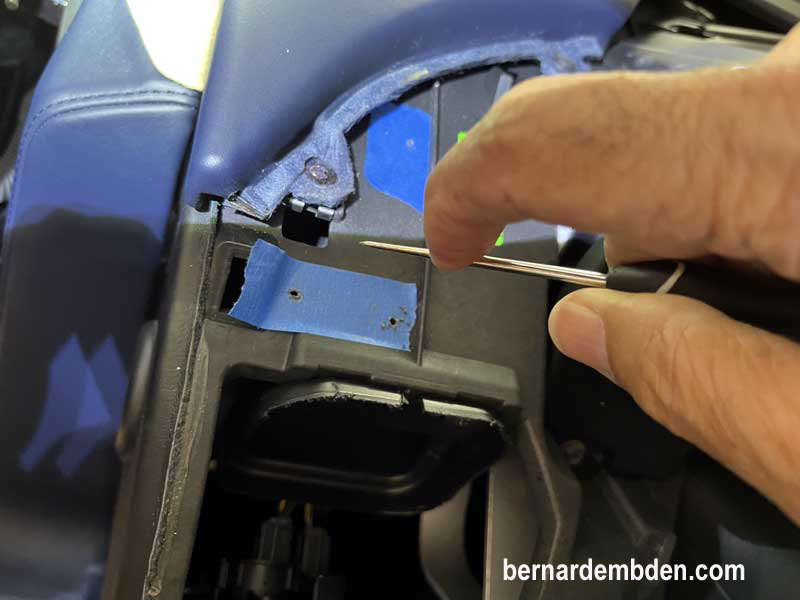
It is essential that you do not drill blind. I used a flexible camera probe to confirm that I had some space below the dashboard base before drilling. Use the appropriate size drill bit for the screws. Be careful of the top screw location (green arrow) as there is significantly less space below the dash panel at that location. Note lower screws mounting positions (white arrows photograph below).
With the three mounting holes drilled to the correct size. Use a probe to accurately check the depth of each hole. (photographs below).

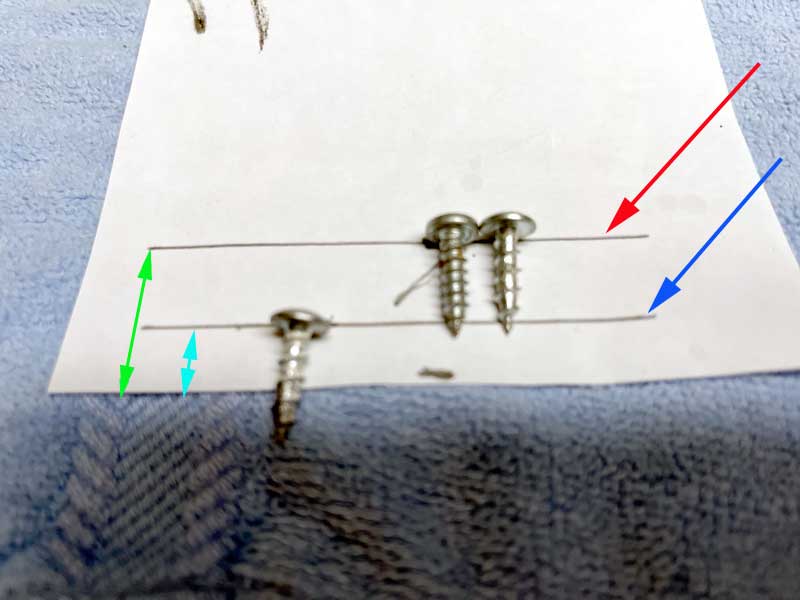
I transferred each hole depth to paper along with the screws that I intended to use to attach the base to the dashboard. The photographs below show the following.
Red arrow. Depth of the two bottom holes as measured from the line to the edge of the paper (green double arrow) and the corresponding two screws.
Blue arrow. Depth of the top hole as measured from the line to the edge of the paper (light blue double arrow) and the corresponding single screw.
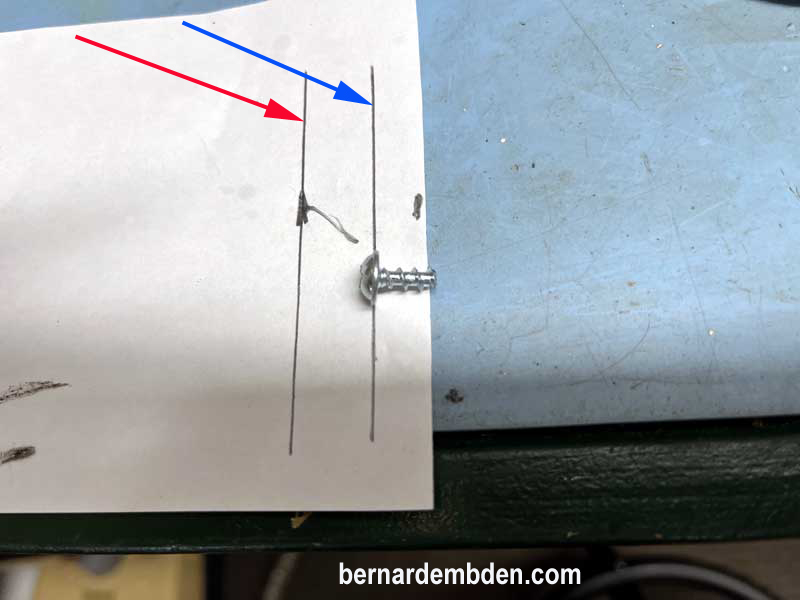
The top screw cut to the proper length. The screw might seem slightly long, however when accounting for the thickness of the base, the screw length is perfect.
Install custom cell phone mount base underneath the left side leather panel and install two bottom screws.
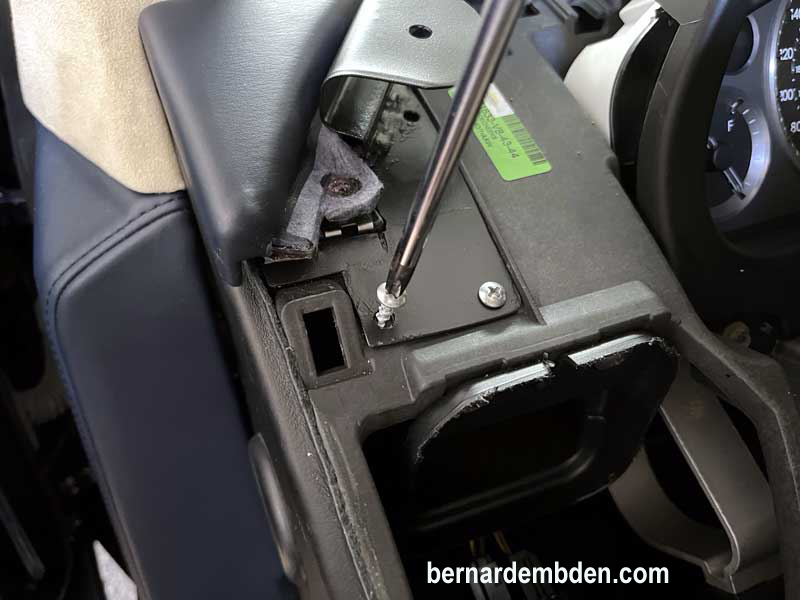
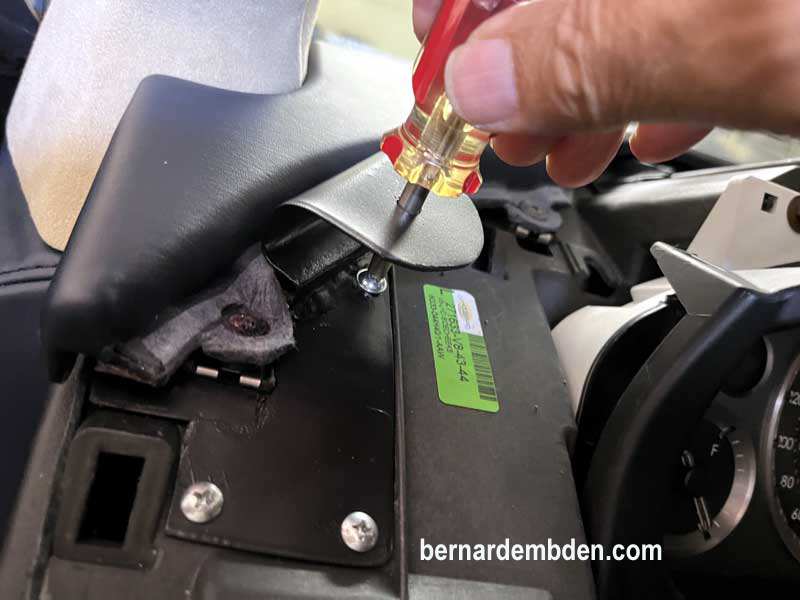
Install modified short screw to top mounting hole. Note hole drilled in iPhone mounting plate to fit rig is now used to access a screwdriver shank through.
Do not forget screw that secures the lower half of the side panel. (yellow arrow photograph below)
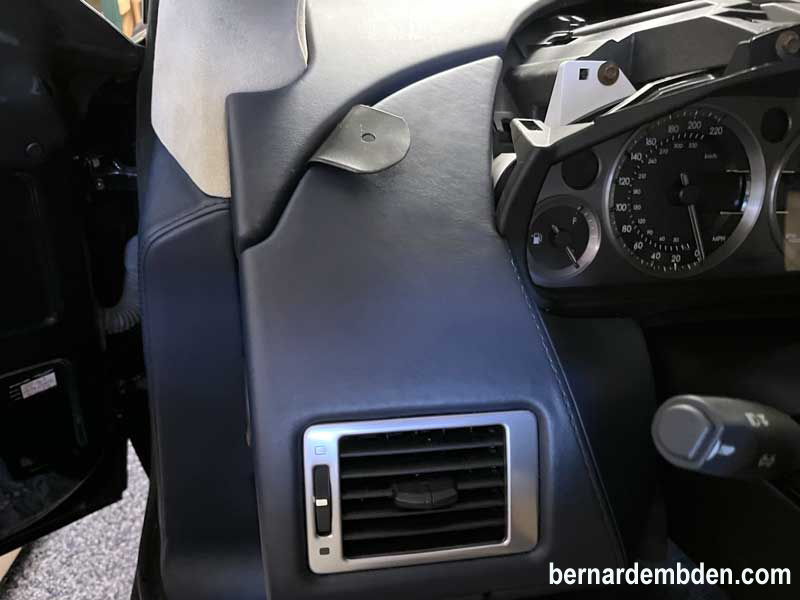
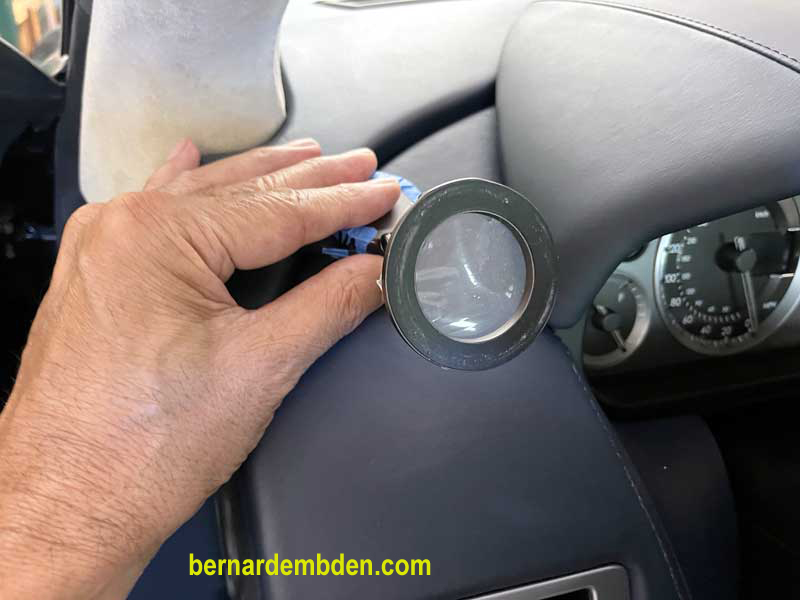
Leather side panel installed. Custom iPhone mounting bracket checked for fitting and clearance between panel gaps. (photographs below)

Install dashboard gauges binnacle. Tape the edge of the base on the iPhone mount and the corner of the custom mounting plate to provide marking surfaces.
With you in the driver’s seat and the iPhone on the MagSafe magnetic ring, position the phone mount base on the mounting bracket at the desired location and mark the iPhone base and mounting bracket. Because the mount will only adjust in and out or up and down, and cannot rotate left to right, this adjustment is critical. You will only get one chance at this so do not screw it up.
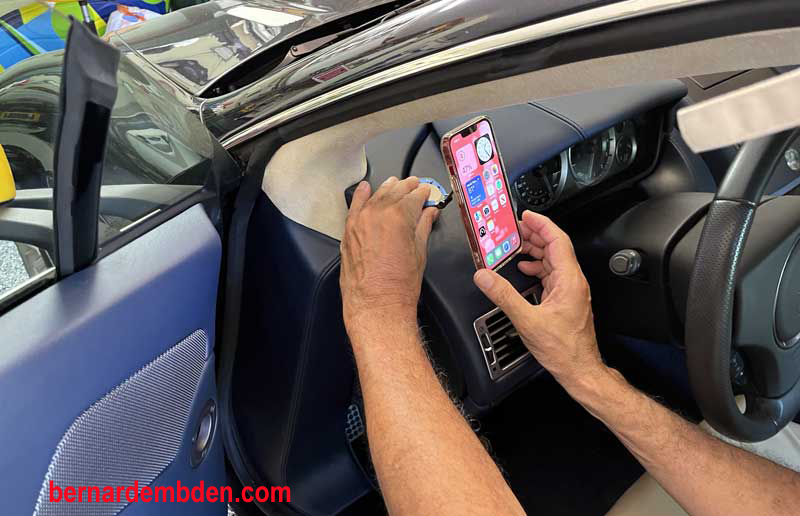

Remove the iPhone from the magnetic ring. Remove adhesive protective tape from the bottom of the iPhone mount. Using the marks created earlier position the iPhone base to the cars custom mounting bracket and apply firm pressure.
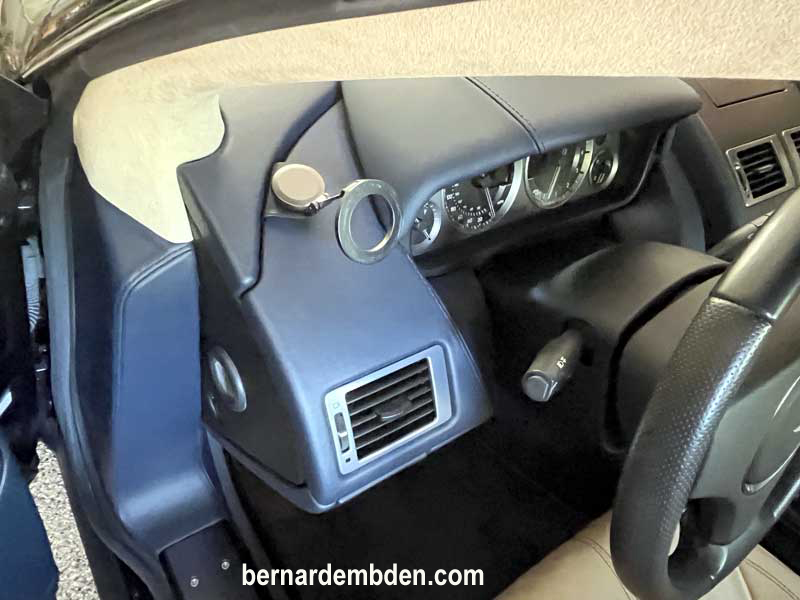
If you have done everything right, the result should looks like the photographs below.
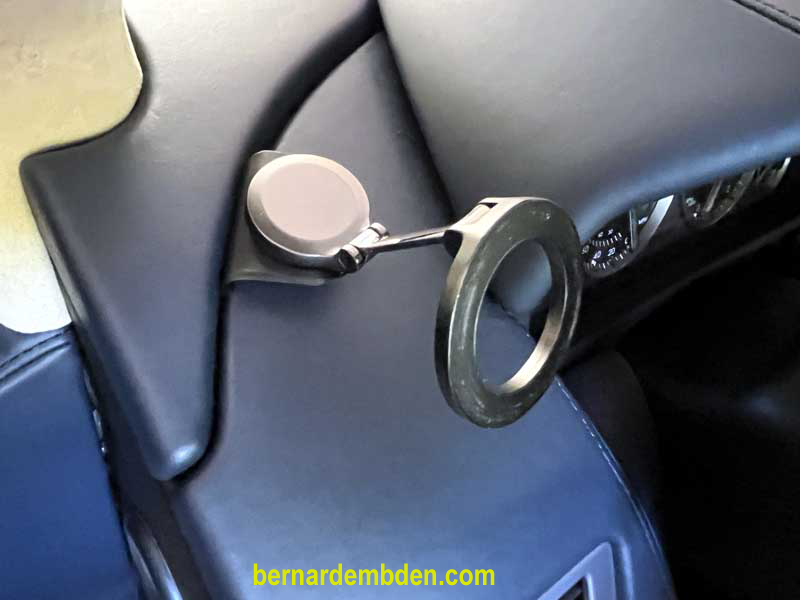
iPhone mount in the fold position.

iPhone on mount in fold position.
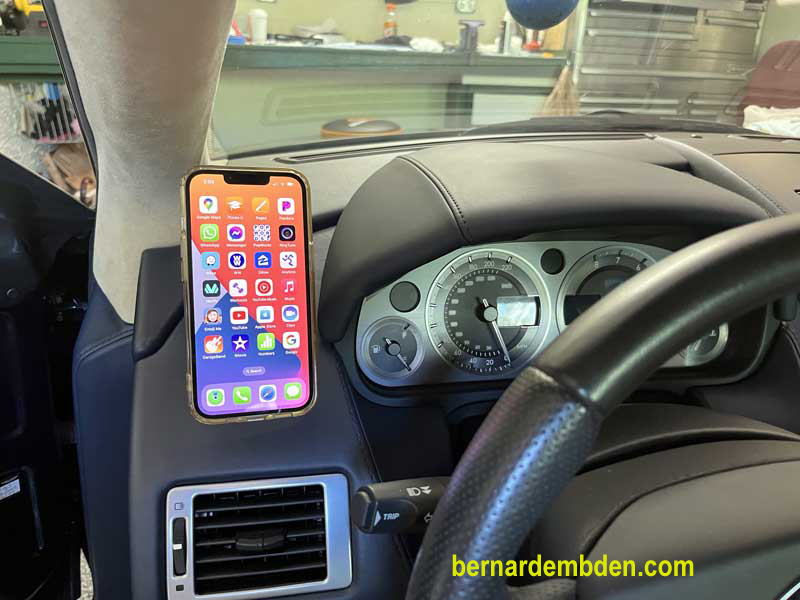
iPhone on mount in view position.
I will admit that this project or solution is not for everybody or for the faint hearted. That said, for me this was the ideal solution.
A phone mount that is completely reversible, does not block or interfere with the cars functions, looks minimalistic with or without the phone. Most importantly I can see the phone while driving.
Drive Safe.
