
The Navigation Screen seems to have a mind of its own. It refuses to rotate from its closed position within the waterfall. Once activated it vibrates, moves slightly, pops up an inch or so and then resumes its closed position.
It appears to want to rotate up but it is unable to do so. The only solution is for me to manually pull it up when it is struggling.
Normally I would not care. This navigation unit is legendary for being useless.
The problem was that I had installed front and rear cameras that utilize this navigation screen and these cameras were vital to parking this vehicle.
To be fair, the navigation screen had rotated to its semi vertical position for many years. The project now was simple.
Diagnose and fix the problem permanently.
This project starts by removing the waterfall.
If you have accessed my other links about repairing the Dashboard and Radio displays you know my position on removing the waterfall. For convenience I will repeat it here.
You will no doubt hear conflicting advice about removing the waterfall.Example :
1) Do not use a trim tool between the waterfall and leather sides. If you do the leather will be destroyed. Instead, remove the clips from the navigation door; open the door to get access to the navigation door's opening, and grasp firmly and pull straight up like you rented the vehicle until the four clips are released.
2) Remove clips from navigation door. Use a trim tool right below the starter button and pry the waterfall out.
3) Remove clips from navigation door. From the navigation door insert your hand, or a long screwdriver/pry tool and reach toward the front clips. Twist or pry the screwdriver to release the front clips. Duplicate for the back clips.
4) Use a J hook through one of the vent openings and pull straight out to unlock the clips.
In my opinion option 1 is a terrible idea. The waterfall is subject to breaking/cracking by the navigation's door opening. This method would only hasten that.
Option 2 is asking for trouble. Scratching the waterfall or radio surround is a real possibility.
Option 3 has some merit, but you are working blind.
Option 4 is the best option for most people. (but not for me). The problem I have with the J hook is that it might slip and wipe out the vent louvers, thus creating a bigger problem.
Below is my suggestion. Use it at your own risk.
First lift up the navigation unit’s top cover and release the two spring clips. This only applies to cars with the earlier clips. (photographs below)
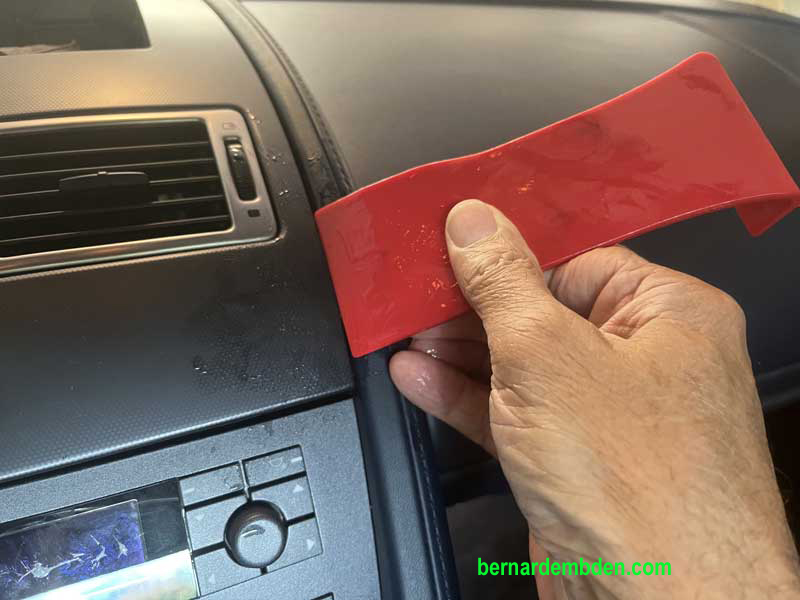
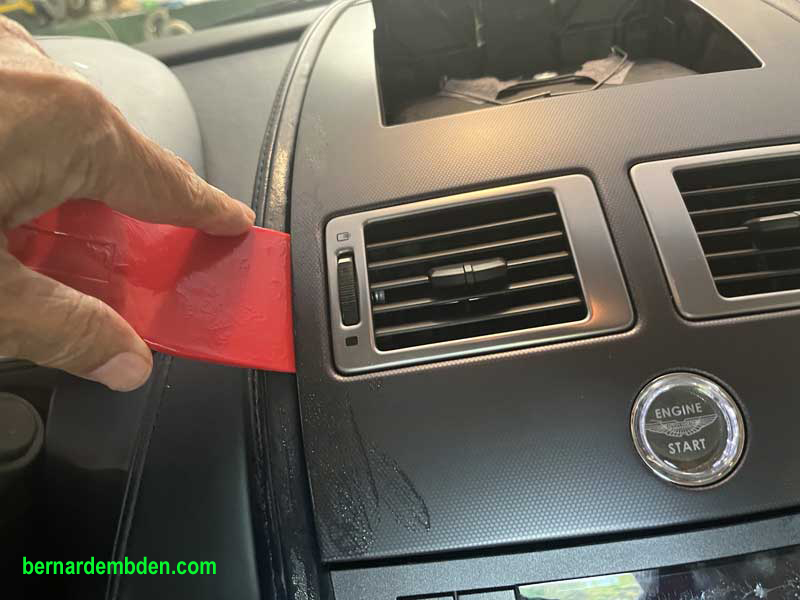
Next step is removing the waterfall. IMHO, The most effective way of removing the waterfall is with a plastic trim tool. That said, scratching the adjacent leather is a real possibility.
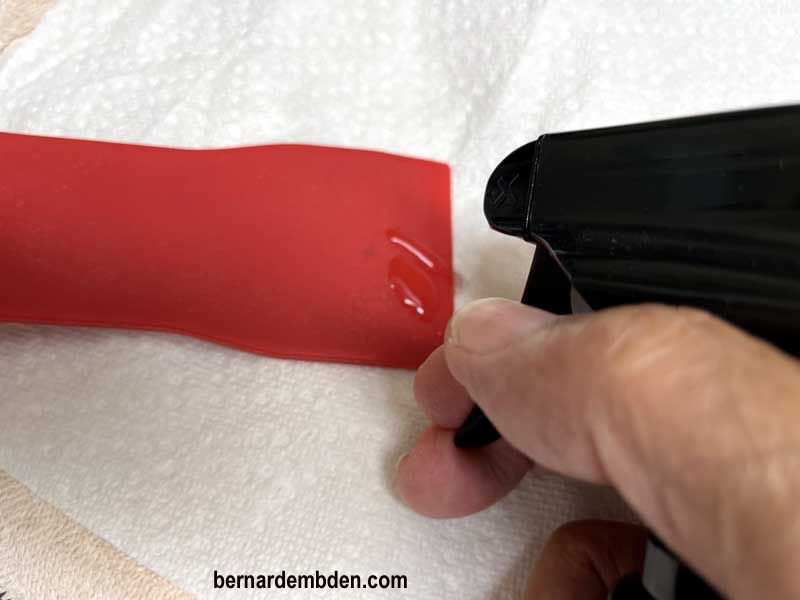
To mitigate that possibility, I liberally coat the trim tool and the adjacent leather with a leather conditioner. Not just any leather conditioner, but one with the consistency of syrup. The one I recommend is Meguiars Gold Class Leather Conditioner. I apply it liberally, like it’s a free sample, to the trim tool and the leather at the locations that the trim tool will be used. (see photographs below)
After applying the Meguiars Gold Class Leather Conditioner magic syrup liberally to the trim tool and the adjacent leather, insert the trim tool between the waterfall and adjacent leather trim and pry up at all four corners. I use a wide trim tool to spread the load and minimize potential damage to the adjacent leather. (photographs below)
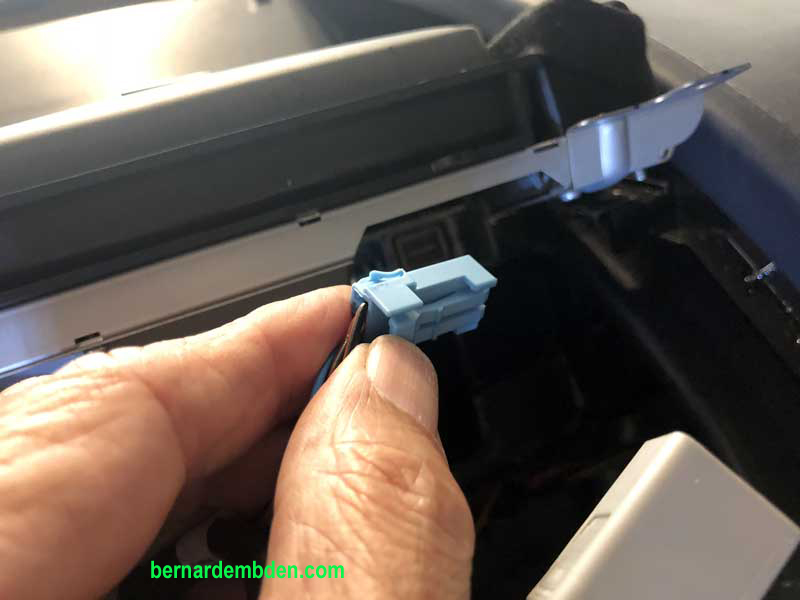
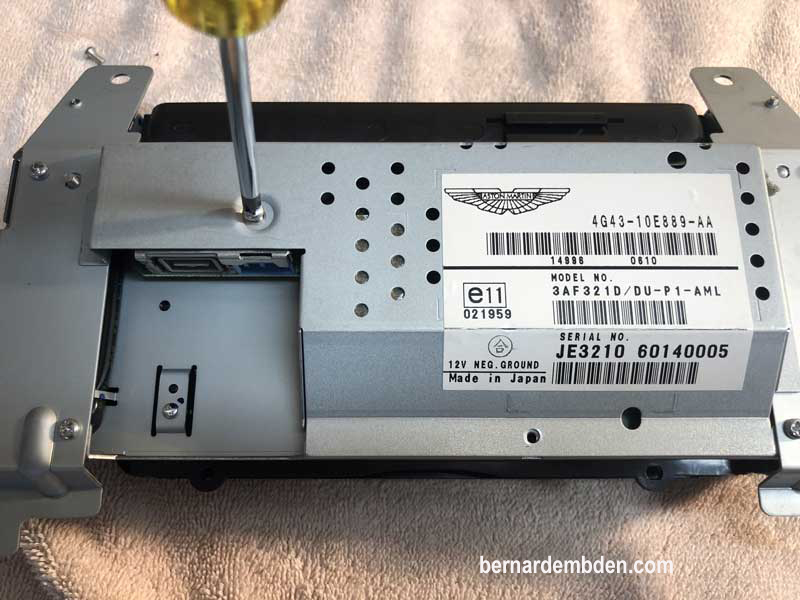
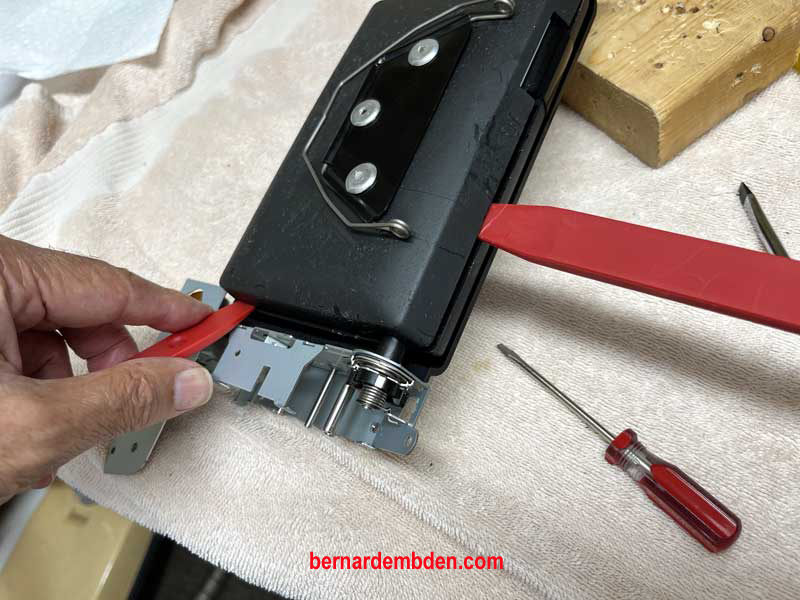
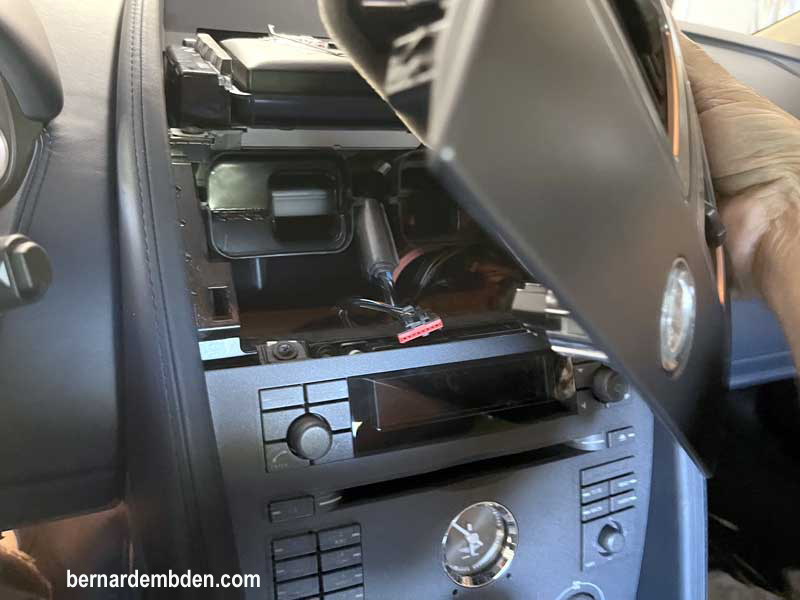
Unplug the wiring plug from the starter button. (Sport shifts cars will have four more connections.) and remove the waterfall. (photograph below)
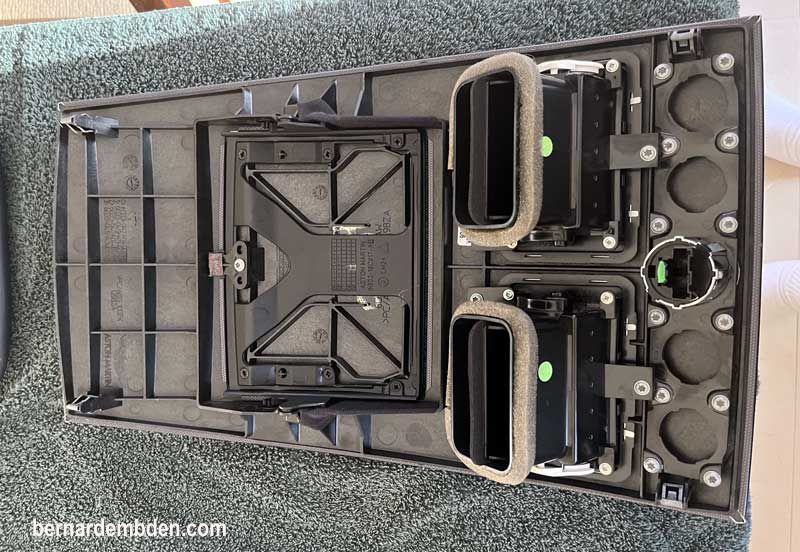
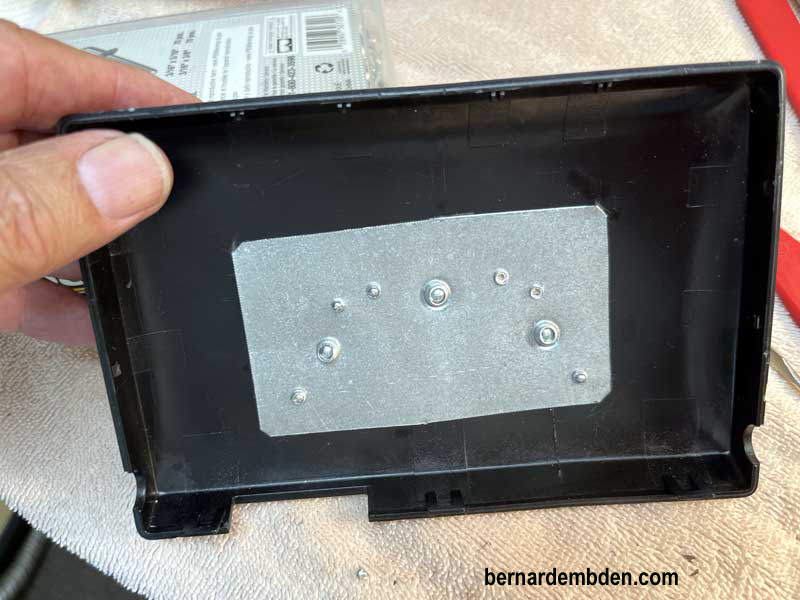
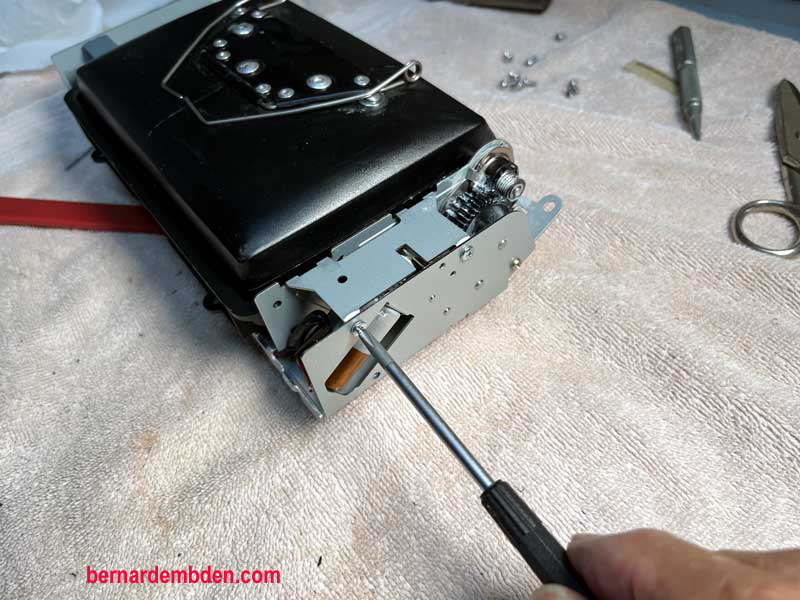
Remove four Phillips screws that secure the navigation unit and remove the electrical connection plugs. (Photographs below)

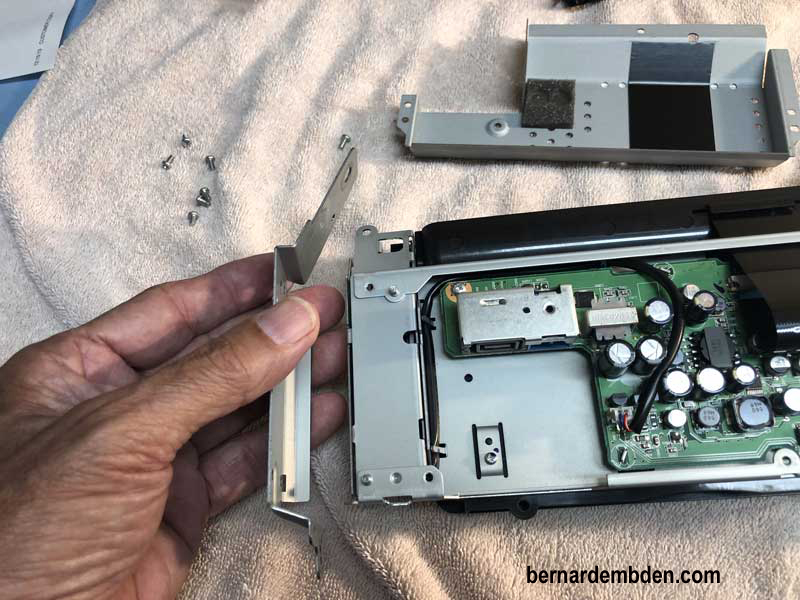
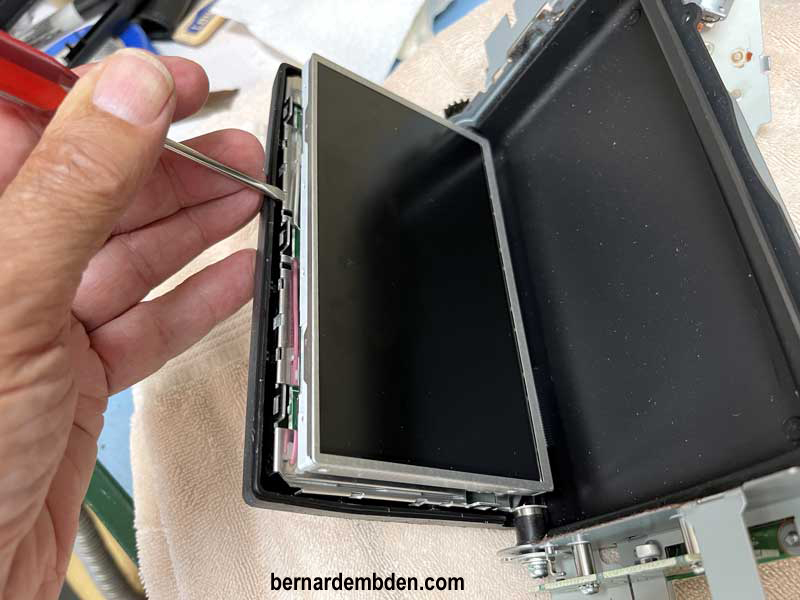
To fully diagnose the problems, the navigation unit would have to be taken apart. First remove the tape and end caps.

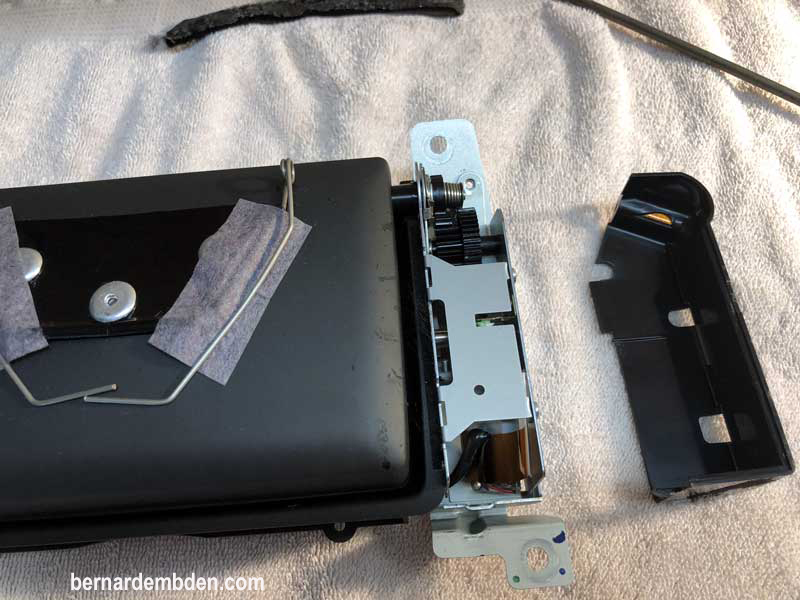
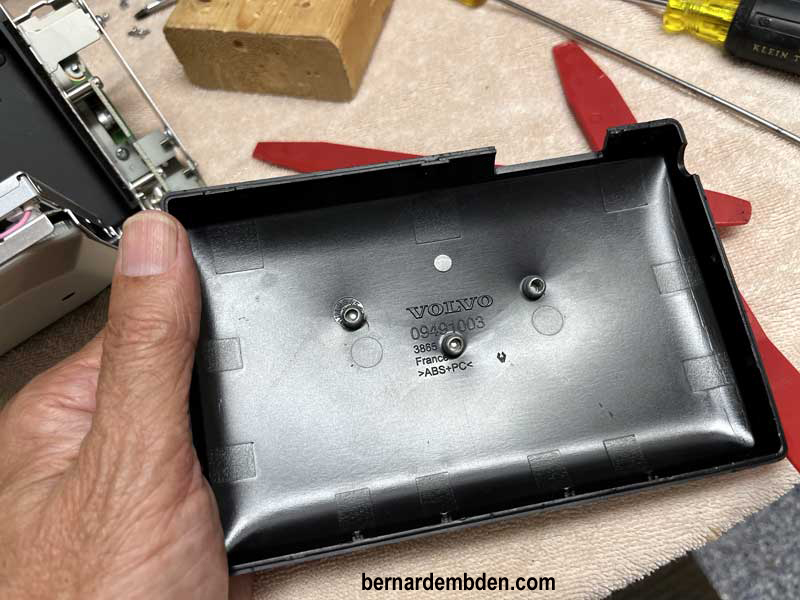
Remove screws from back cover. Remove back cover and two end cap supports. (photographs below)
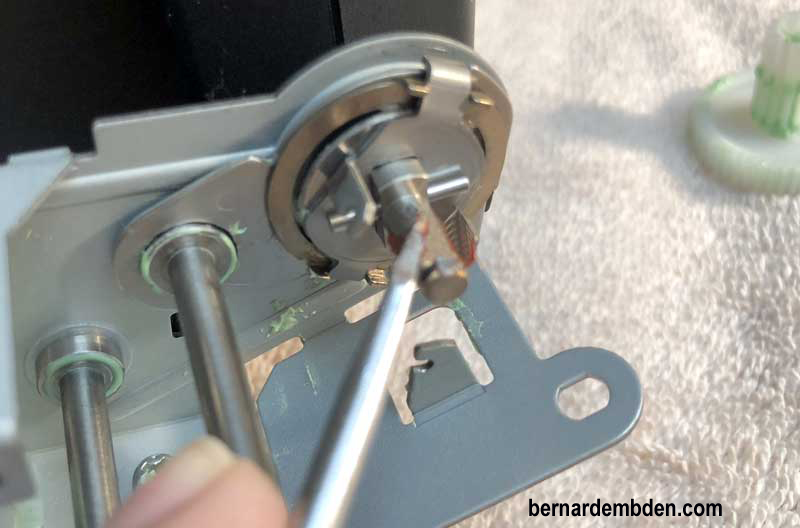
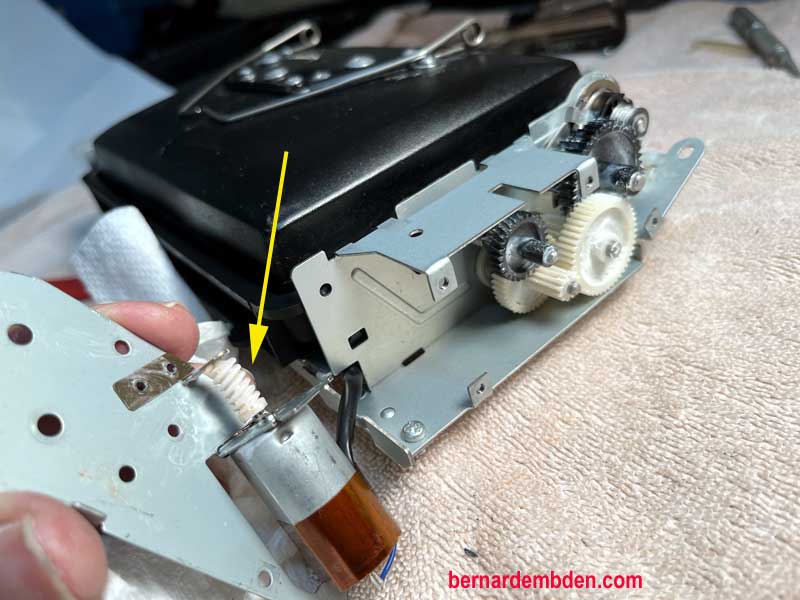
Remove end bracket from motor and gear assembly. Loosen screw that holds motor and remove / swing motor and end bracket out. (photographs below)
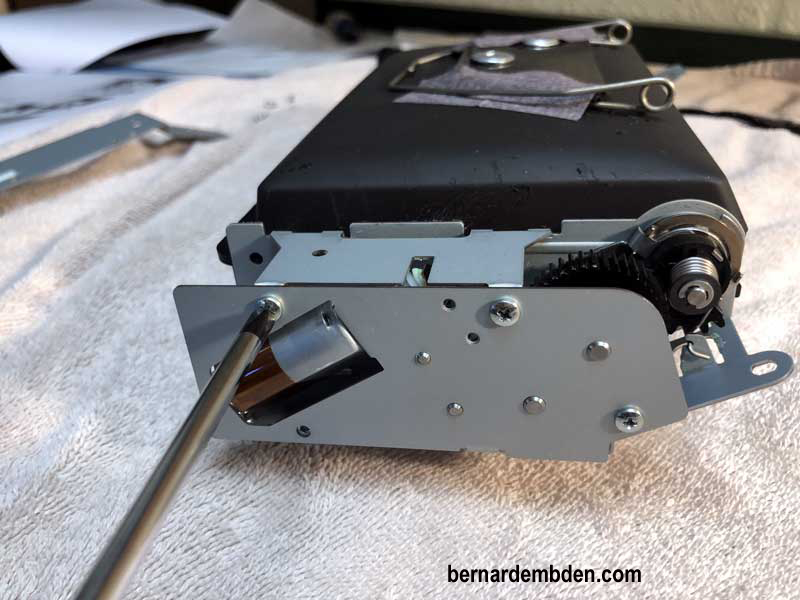
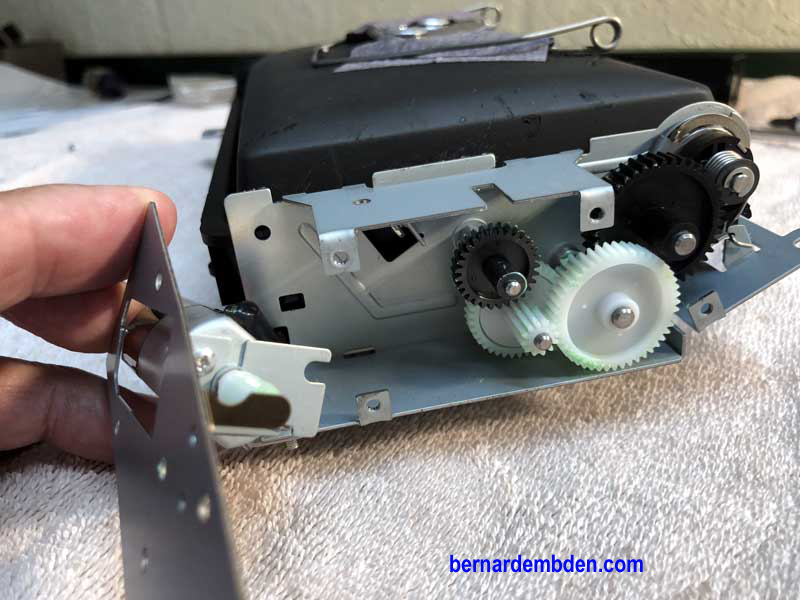
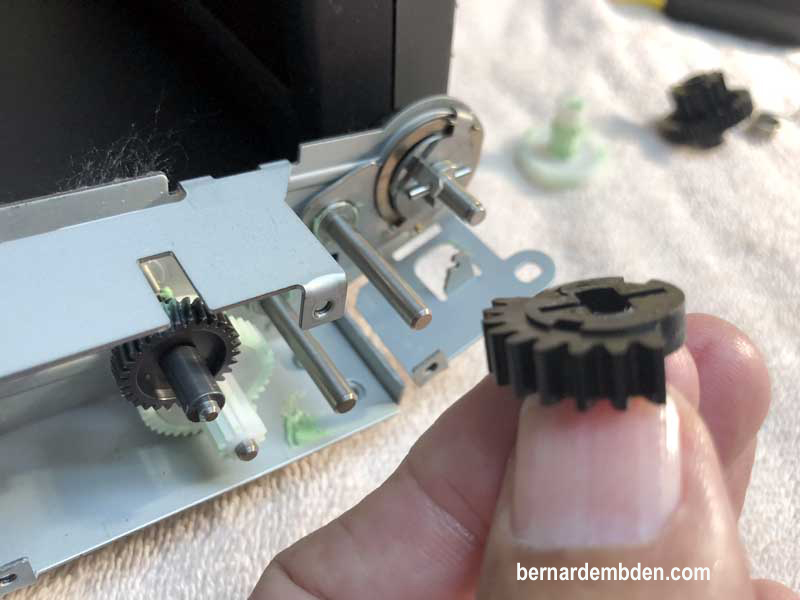
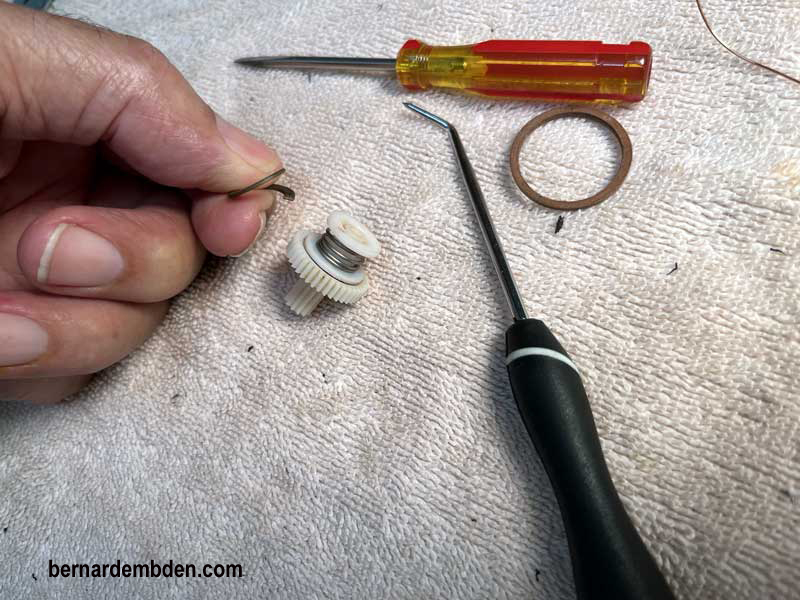
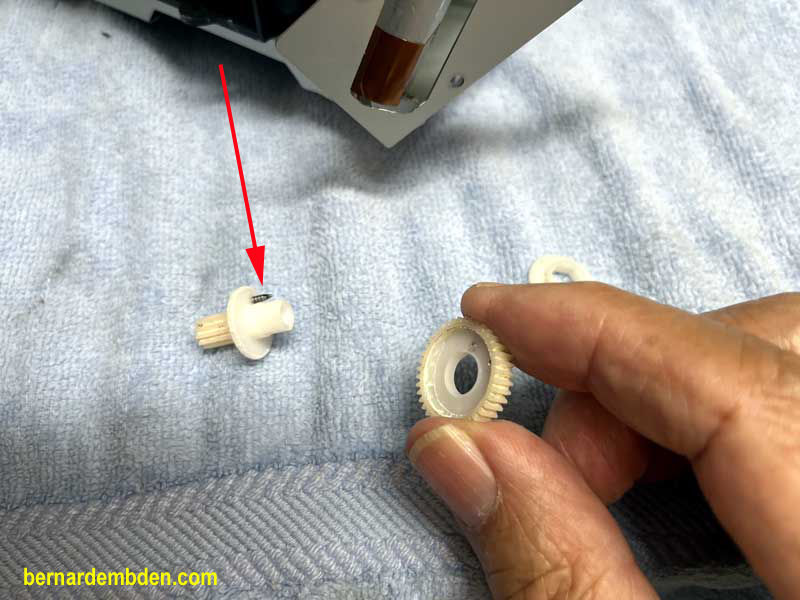
Remove black gear first. Then the large white gear. At this point the clutch gear can be removed.
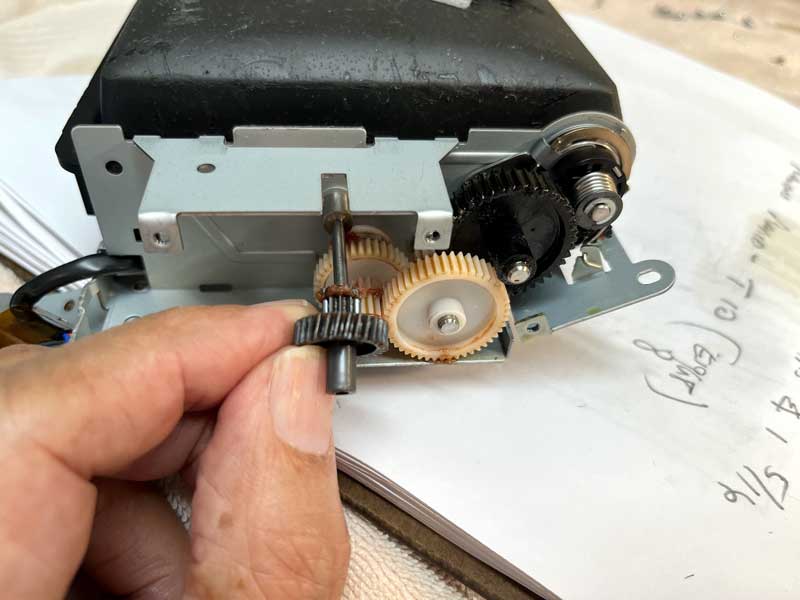
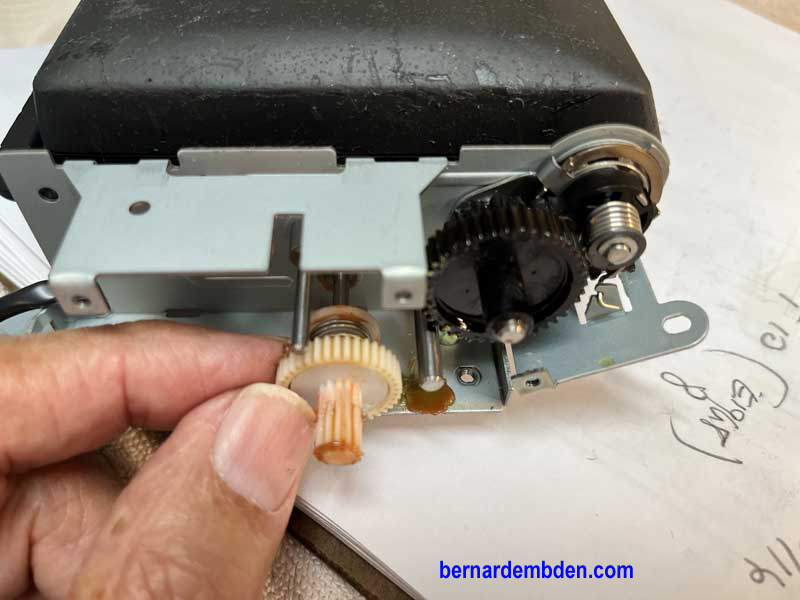
Continue disassemble of the gears including removing the gears attachment to the navigation screen. The objective it to thoroughly clean everything including any grease from the gears and spindles.
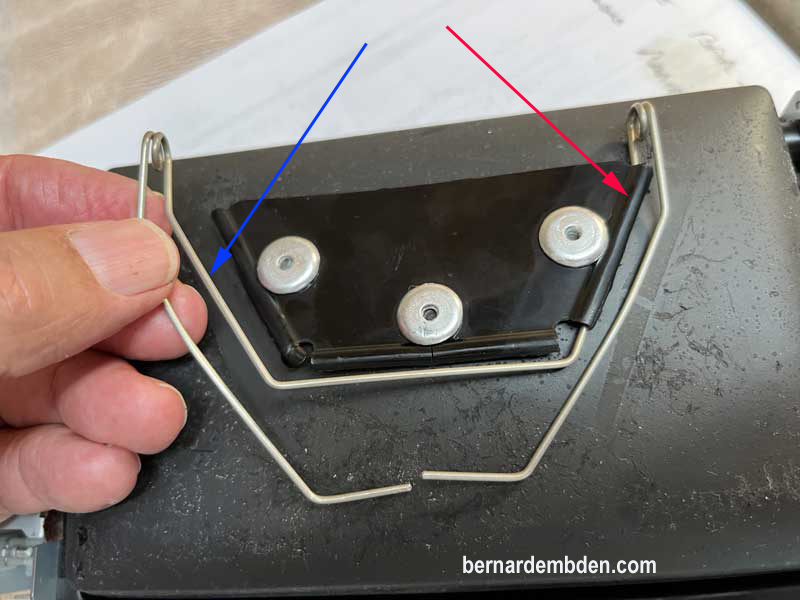
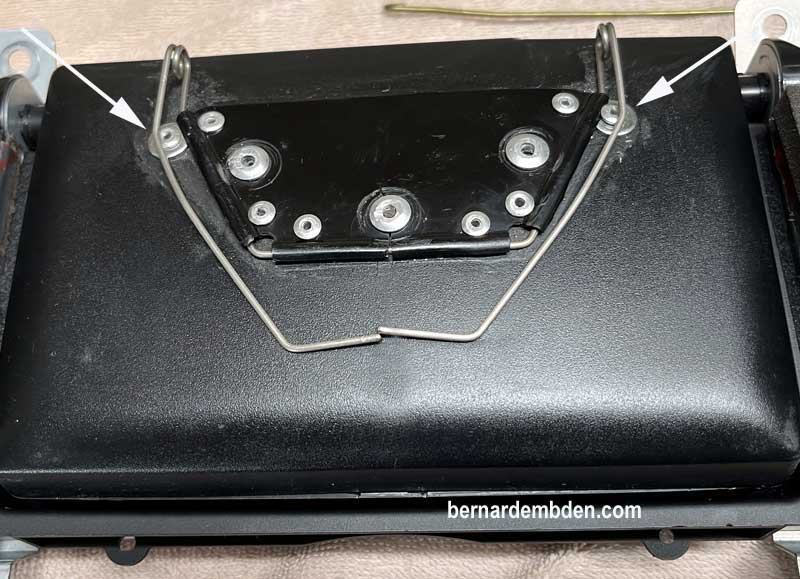
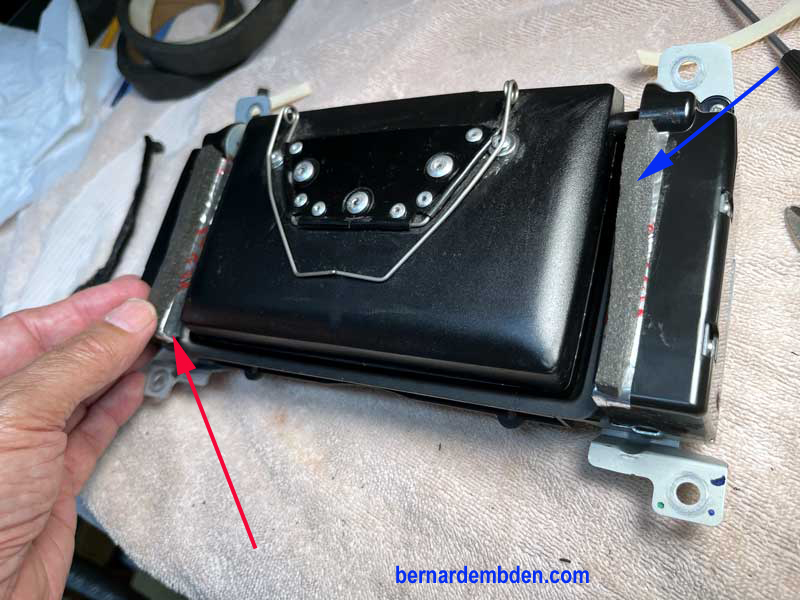
With the gears removed the screen can be rotated freely. I removed the tape from the spring base. Examination of the top of the navigation unit revealed a problem with the wire spring thingey (whatever it’s called). One side of the spring base had slipped out from its original positioning at one corner (red arrow) and was swinging in the breeze at the other corner (blue arrow).
This would absolutely cause a problem as the navigation motor would be met with increased resistance from the twisting spring attachment due to the uneven pressures applied to moving the navigation lid that is attached to the waterfall.
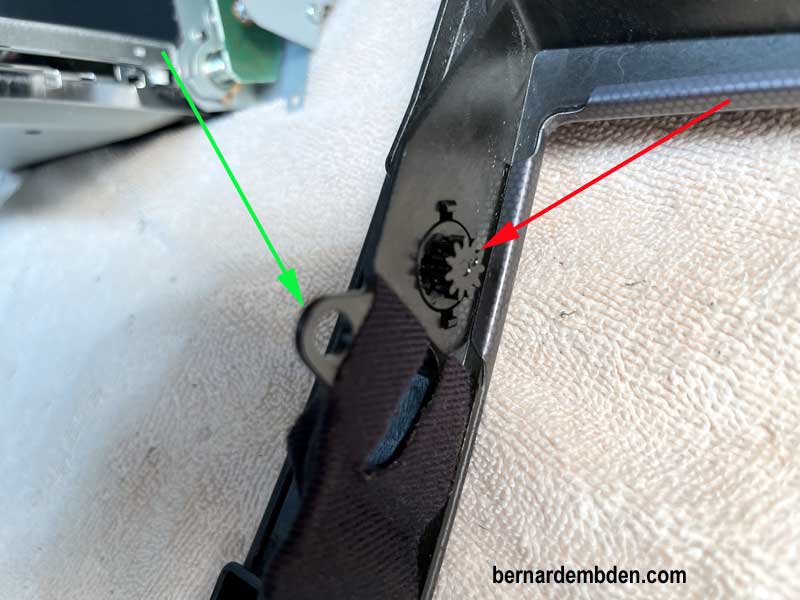
To further understand the issues with the navigation rotation process, I examined the waterfall navigation lid. The part that rotates with and attaches to the navigation screen. This lid has two damping gears that the lid gear meshes with. Its purpose is to provide a smooth opening. But by design they also provide some resistance to the lid opening and closing.
I decided to remove them.
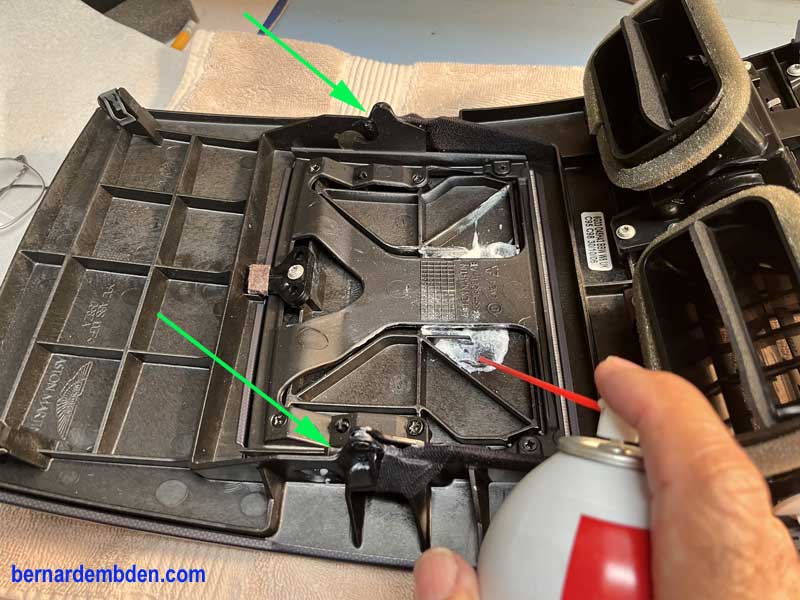
Removing the lid from its notches (green arrow) allowed me to remove the two damping gears from the waterfall. (red arrow)
The next issue was the spring thingey on top of the navigation screen. For this problem the navigation screen housing would have to be removed. Using plastic trim tools, carefully pry the back housing from its clips. Move the screen vertical and then release and remove the front housing surround. At this point the screen can be pried from the back housing. (photographs below)

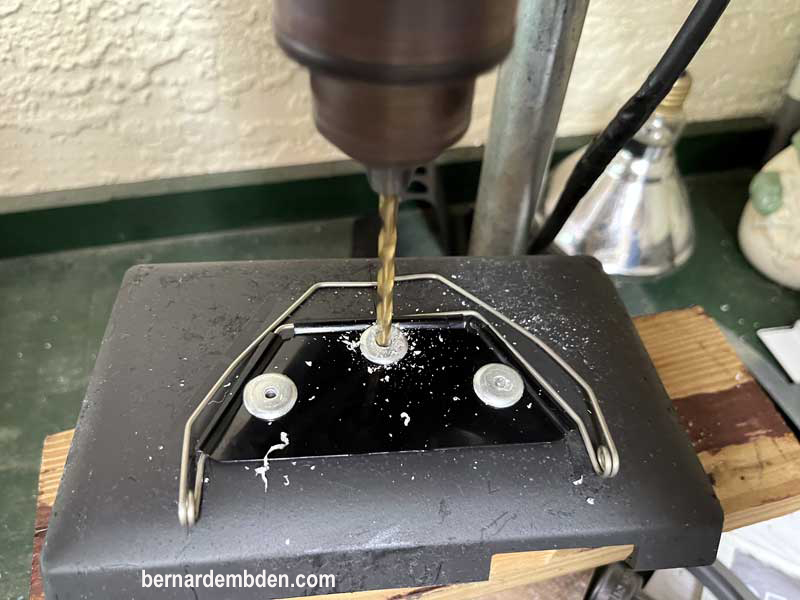
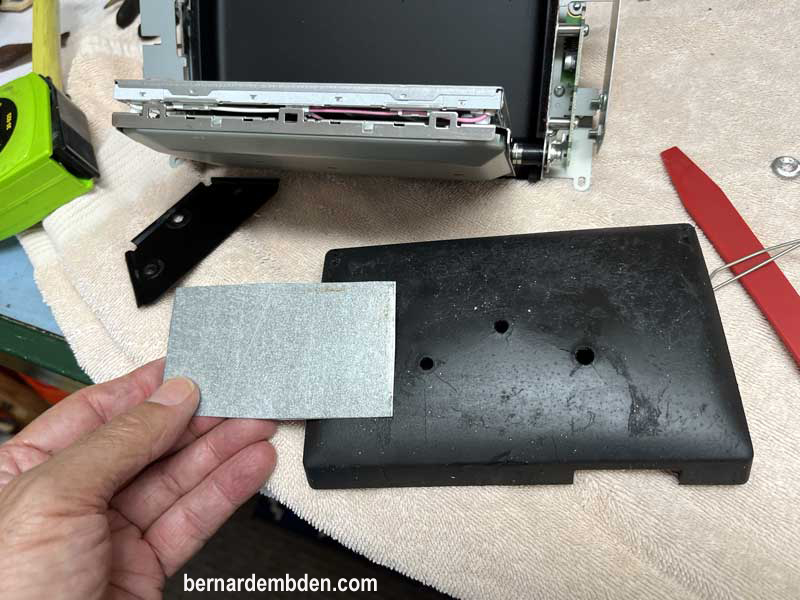
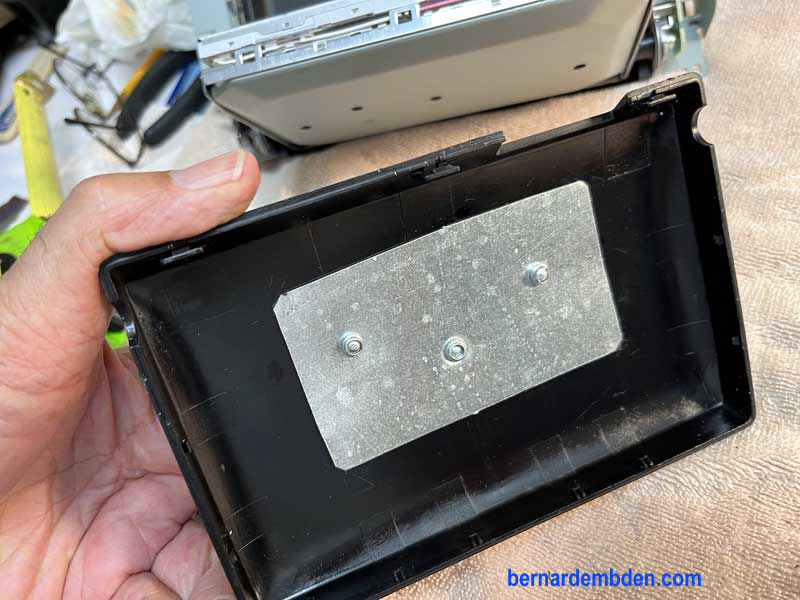
Examination of the back housing revealed three blind rivets holding the plastic bracket for the spring thingey in its place. After drilling out the rivets I decided a backing metal plate was needed to prevent flexing and to add strength and rigidity the housing and bracket. (photographs below)
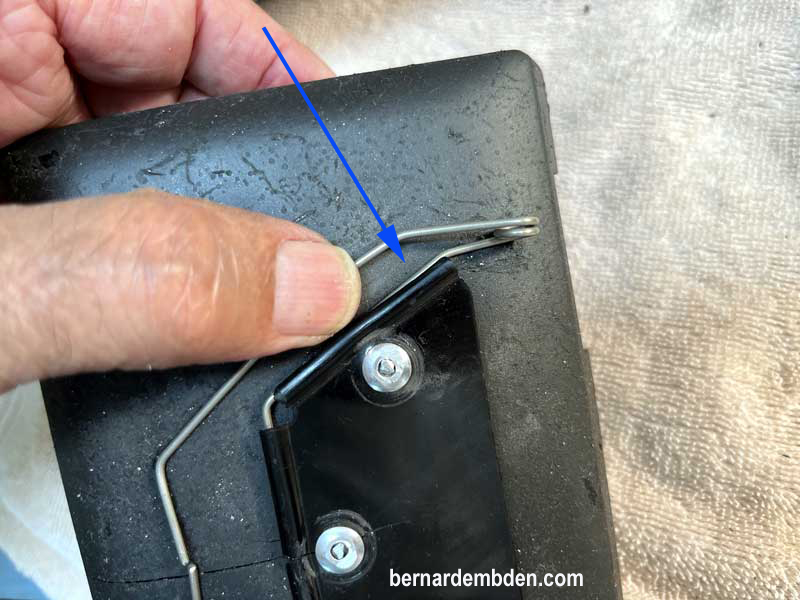
Re-riveting the bracket with a backing plate did not completely resolve the problem. The plate that holds the spring base is made out of plastic. It lacks the strength to hold the spring in the slot it is designed to go. (Blue arrow photograph below)
Let’s be honest. This is a piss poor design. Proof of which is that Aston Martin modified this design in the later cars by incorporating the screen assembly as part of the waterfall. This modification is not backward compatible, so I needed to fix this.
In an attempt to solve this problem, I riveted everything everywhere in trying to keep the spring base under the plastic bracket.
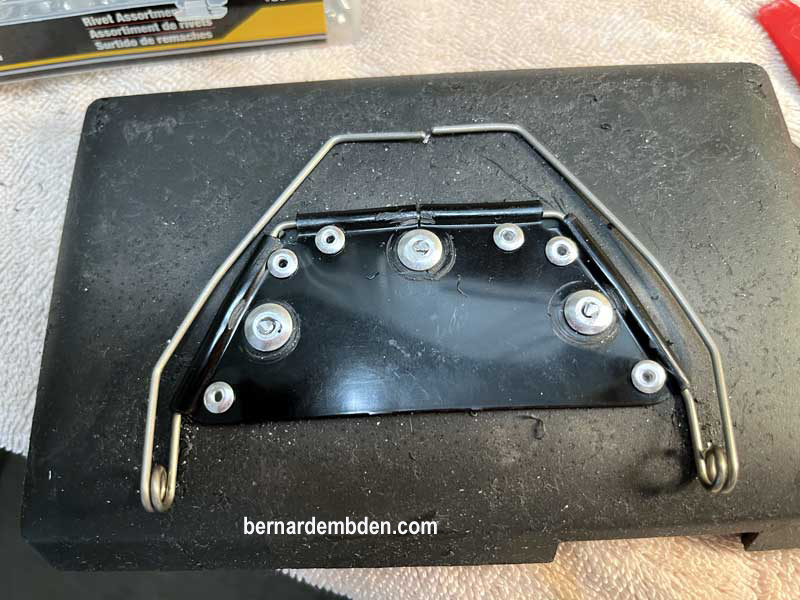
In spite of my excessive riveting, under testing and twisting that simulated installing the spring into the waterfall's lid, the spring would slip out as the channel in the plastic bracket would flex. At the very least, the hold down bracket should have been made out of metal.
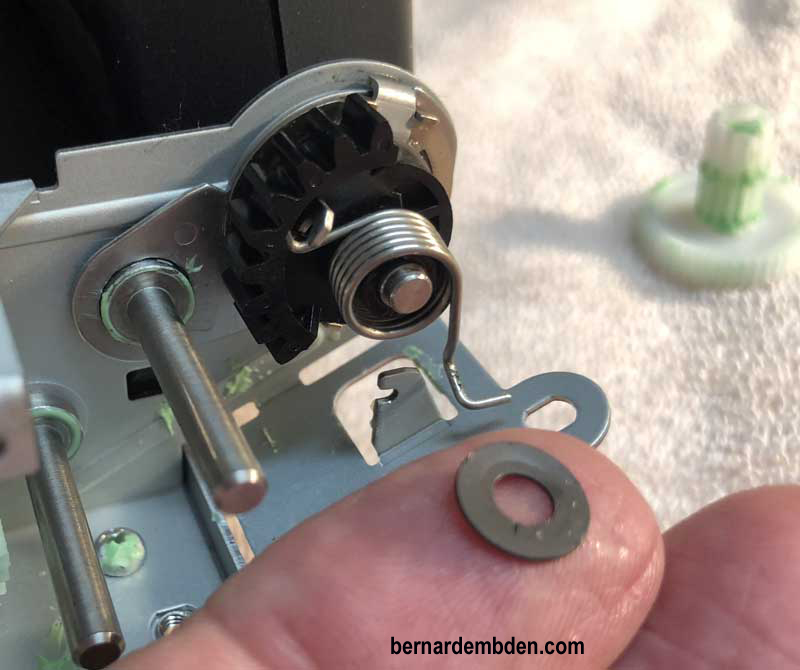
My solution was to grind off a portion of two washers to form two flat end washers. I then riveted these two washers, with the flat ends up against the spring base, to keep the spring arms securely under the bracket. (white arrows photograph below)
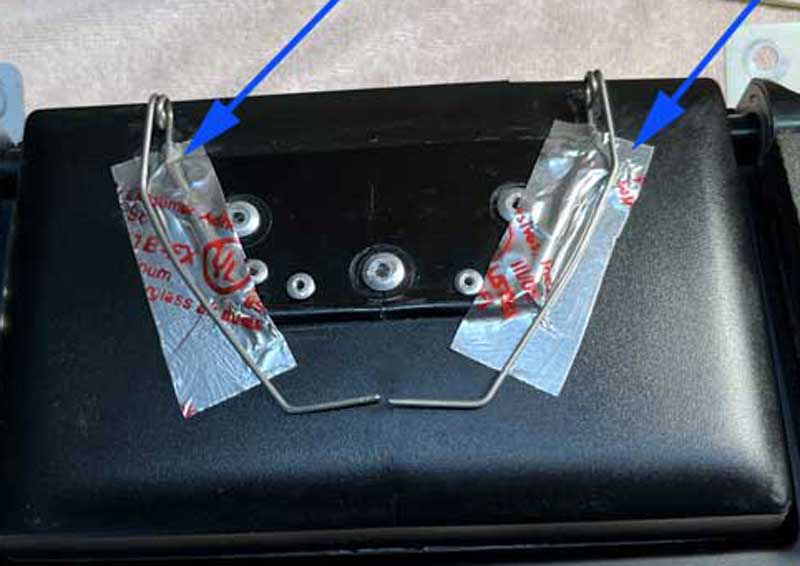
Reassembly the housing to the screen. Front bezel first then the back housing. To mimic the original, I attached metal taping over the spring brackets. (blue arrows)
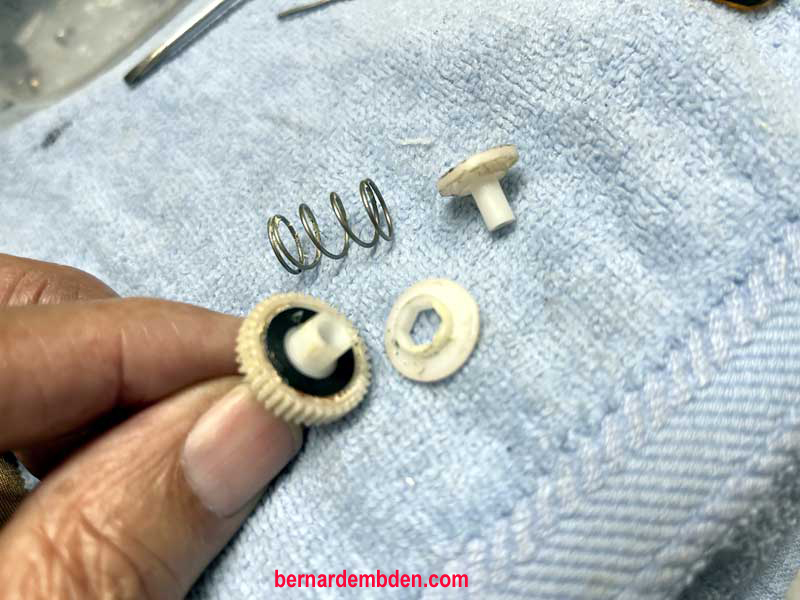
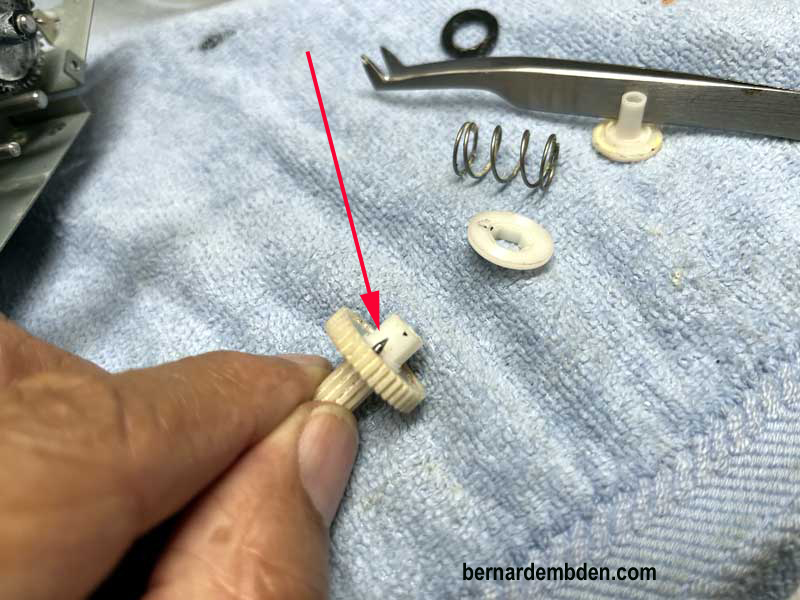
The last issue was the clutch gear that prevents the screen from rotating when the resistance it deemed is too much. It works by a spring exerting pressure against the gear face.
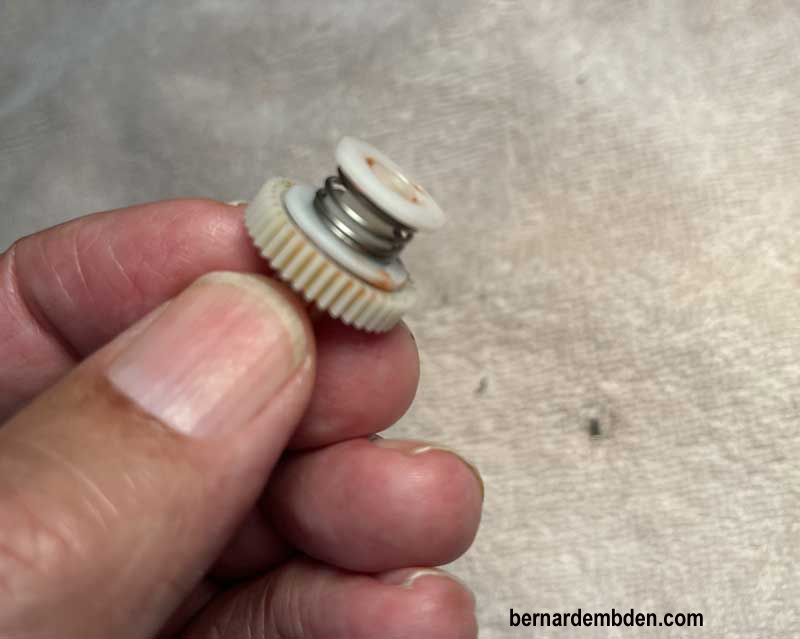
I believe that after 15 years the clutch spring had lost some of its pressure. This part was no longer available. The challenge then was to make the clutch slip at a higher force. Essentially to increase the spring pressure.
Ideally I would just install a stiffer spring. But disassembling the clutch would destroy it. A split washer installed at the end of the spring would not stay in place.
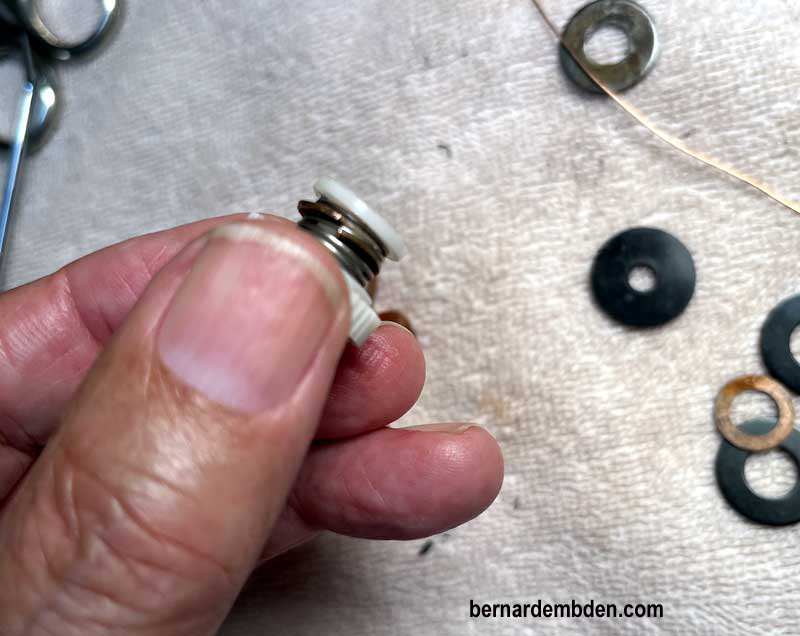
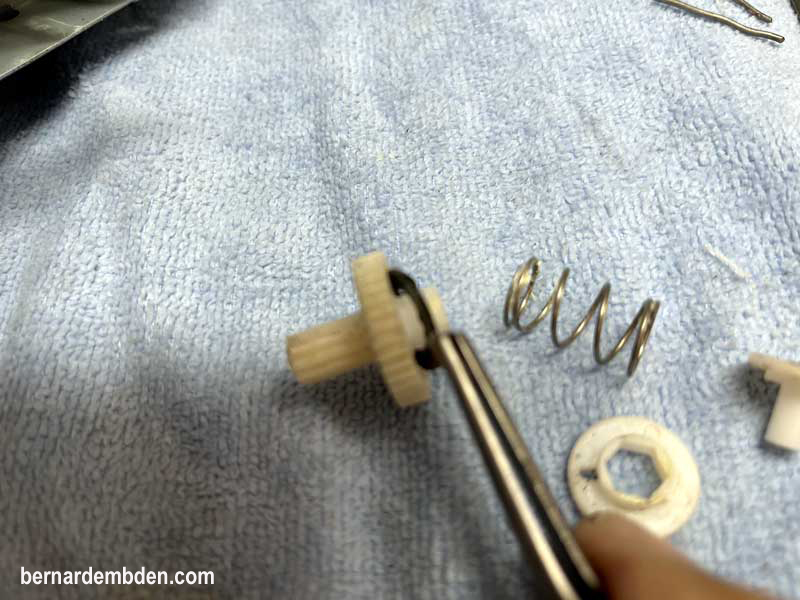
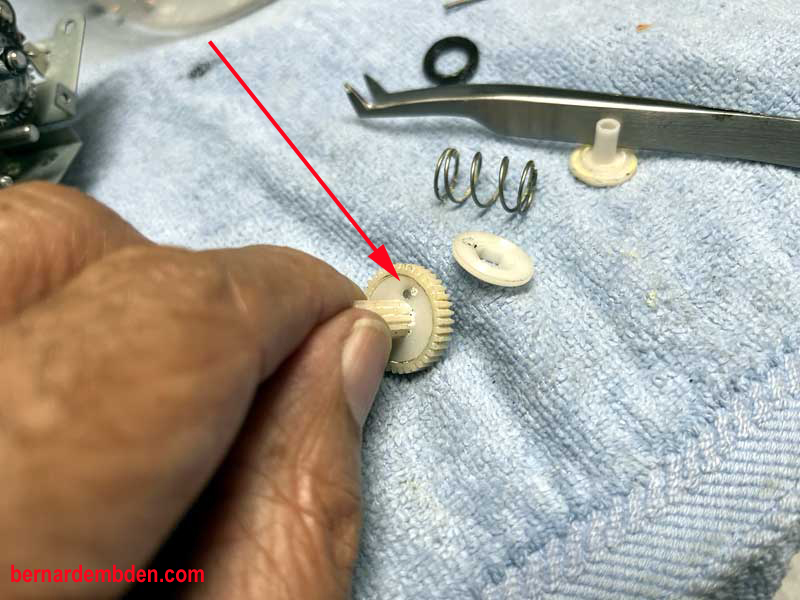
The final solution was to split a copper washer and install it, between the coils, in the middle of the clutch spring. This accomplished the desired goal in making the spring stiffer. (photographs below)
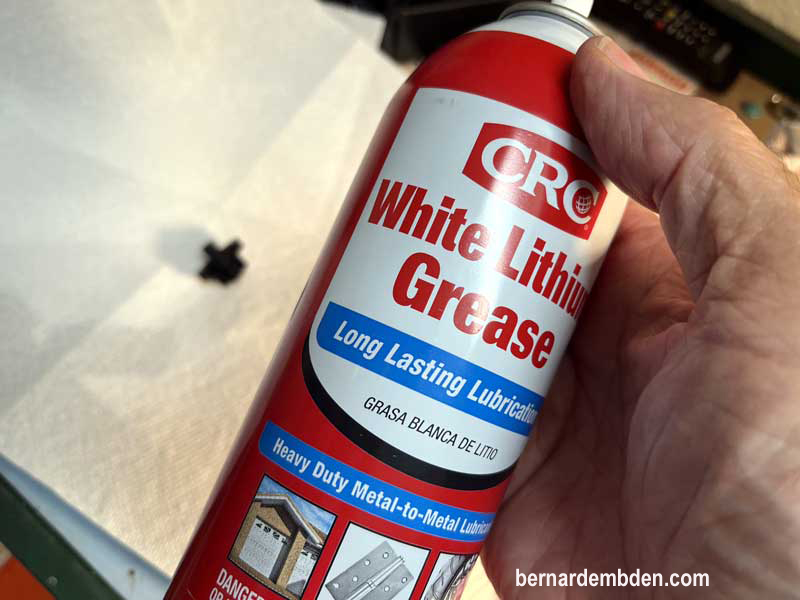
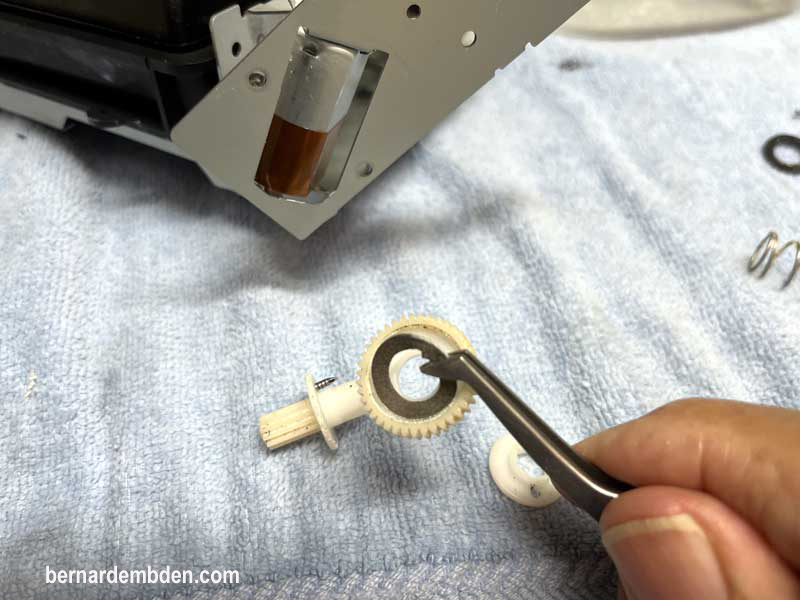
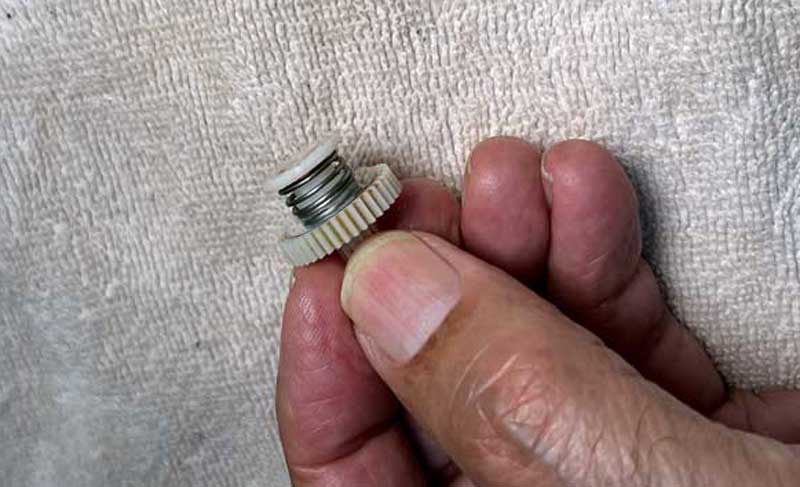
Obsessively clean all gears and gear shafts. Regular grease can offer some resistance to the gears. I recommend white lithium grease. (photographed below)
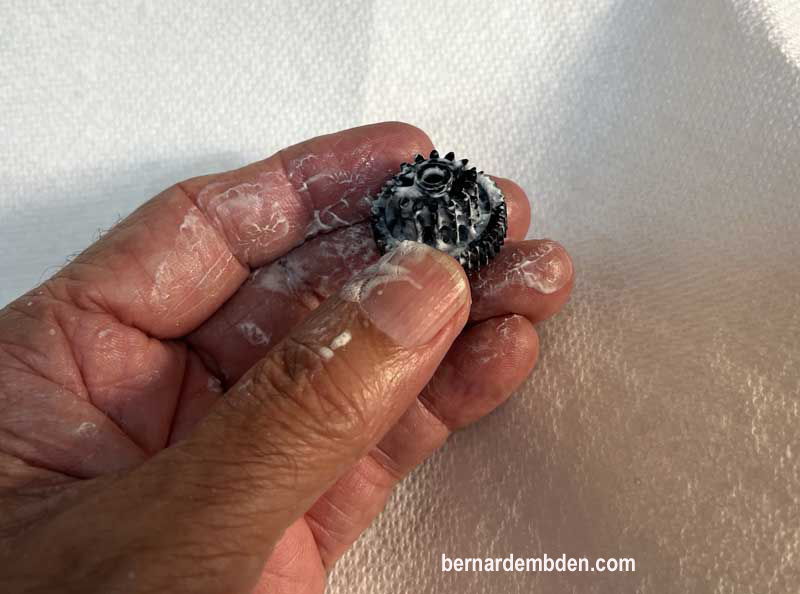
Use some caution when applying Lithium grease to the clutch gear. Apply only to the gears surface and spindle. (photograph below)

For the rest of the gears apply lithium grease like you stole it. Do not forget the rotating gear surface of the motor. (yellow arrow photograph below)
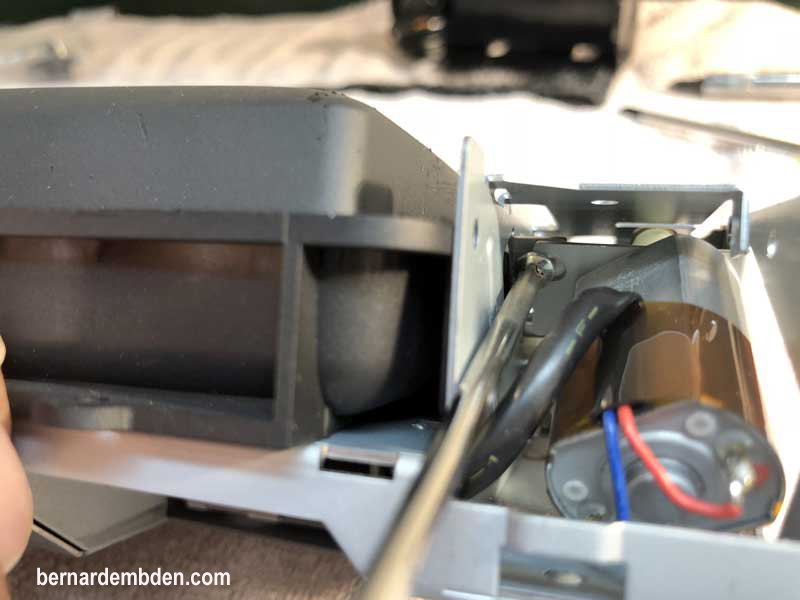
Install gear motor. Install gear assembly end plate. Install end caps. Install bottom cover. Note metal tape over end caps openings (red arrow) and anti-rattle foam on end caps. (blue arrow)
On the Waterfall navigation lid, I squirted some lithium grease on the navigation lid hinges (green arrows) and inside the openings that the spring thingey clips to for no other reason than I think it might help.
Plug in navigation units electrical plugs and install unit with four Phillips screws.
Offer up the waterfall. Plug in starter electrical plug. Engage the waterfall's two rear clips. Position waterfall's front clips and press down on the waterfall firmly like you rented it.
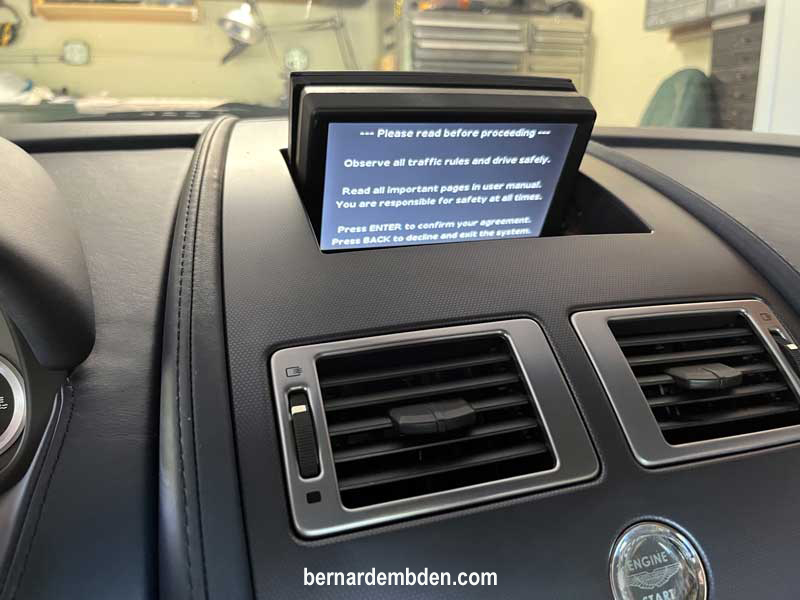
Say a prayer and start vehicle. Activate the navigation unit. If you have done everything right you have reduced the resistance to rotating the screen, and increased the friction capability of the clutch gear.
So I was not be surprised when the navigation unit rotated and raised again from the waterfall.
And then it did not.
A couple of days after this project, after driving the car for about 45 minutes, then parking the vehicle, the navigation unit refused to rotate. It whirled and groaned and grunted but stayed resolutely closed.
I immediately knew what the problem was. The gear clutch spring modification had proved to be inadequate.
I was now forced to go to DEFCON 5.
This was Deja vu all over again. Waterfall removed. Navigation Unit removed. Gears removed. Modified gear clutch removed.
The DEFCON modification was to permanently disable the navigation's gear clutch function. This decision was not arrived at lightly. That said, the electronics instructs the gear motor to stop at pre-determined locations up and down. This meant that unless there was some obstruction during the rotation process the gear clutch was not a factor.
I could only envision two scenarios where the rotation would be obstructed. 1) A broken gear, 2) Something placed on top of the navigation unit.
1) Was highly unlikely. The unit had been upgraded with the revised gears.
2) Never going to happen.
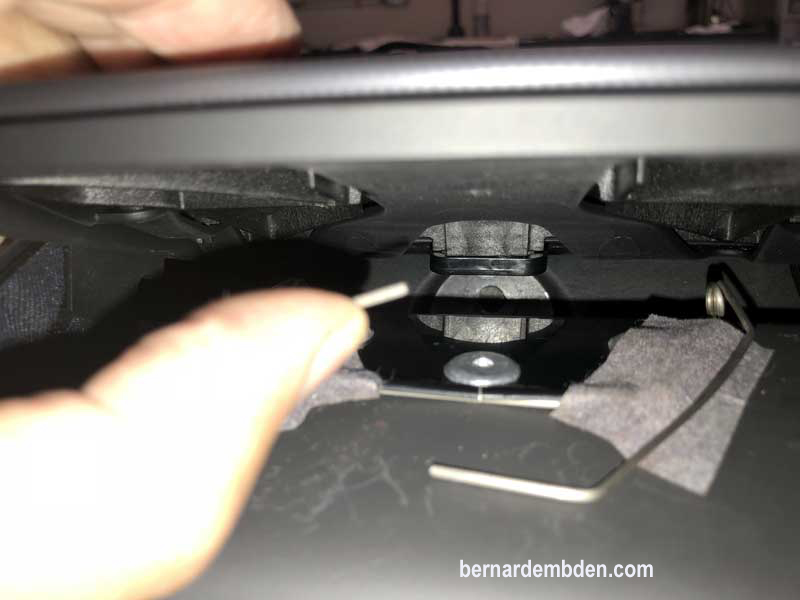
The navigation gear's clutch capability was disabled by inserting a pin through the two halves. This was not satisfactory as the spring against the pin put the gear slightly out of alignment. Now getting a bit annoyed I completely disassembled the gear clutch.(photograph below)
The gear clutch works by the spring exerting pressure and creating friction between the inner and outer plastic faces and two rubber gaskets. These gaskets were no longer necessary and removing them allowed both plastic surfaces to lay flat against each other.
Note disassembled gear clutch and location of the disabling pin (red arrows photographs below)
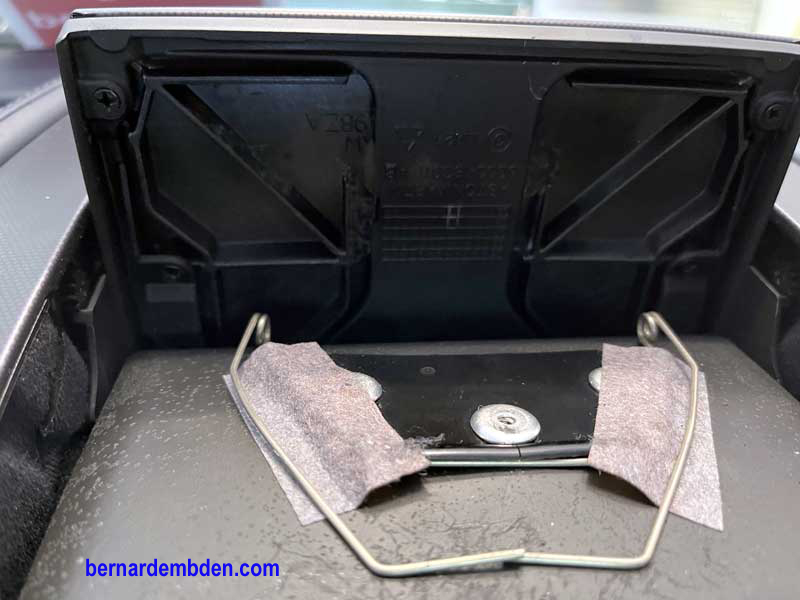
Photograph below show assembled navigation gear clutch (with some assist from crazy glue) with the clutch function disabled.
Modification of the gear clutch also meant that the removal of the waterfall's lid damper gears were no longer necessary. I re-installed them in the waterfall lid.
The navigation unit is re-assembled with the modified clutch gear. Unit and waterfall installed.
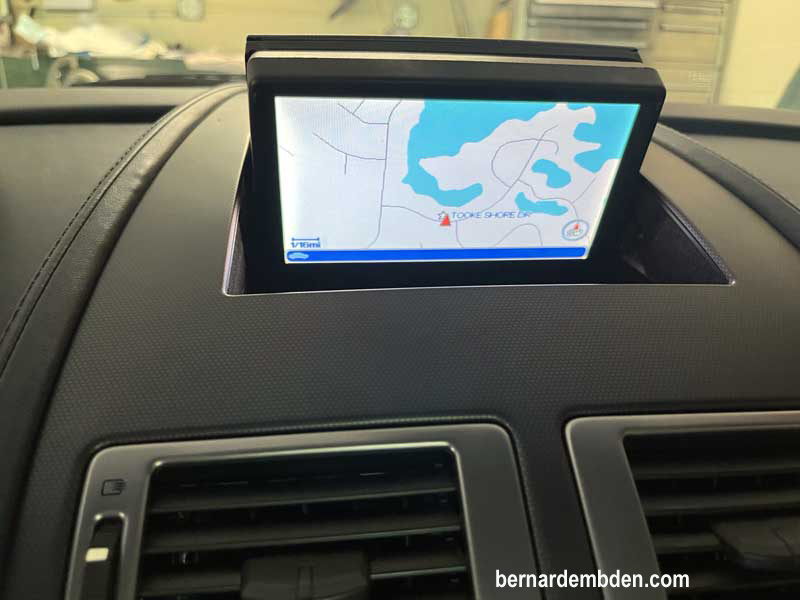
The navigation unit now rotates and rises from the waterfall and returns to its closed position at shutdown every time. After many years this navigation unit was again working as designed.
Drive safe.
