
The information and content in this website is not a recommendation of this product or the installation process. Any reliance on this product or the installation described herein is solely at the users risk.
This modification is not for everybody or for the faint hearted.
When driving my Macan (as opposed to my 6 speed manual Vantage) I left brake occasionally. More importantly, with the Macan I cover the brake constantly.
Brake cover for those who might not know is when you put your foot over (cover) the brake pedal in anticipation of having to stop without adequate warning.
Some of my examples.
I am on a highway with intersections and traffic lights. I, along with a line of vehicles approach the traffic light that is green at 60 MPH. I do not know how long the light has been green or when it will change. As we approach the light there is a time when I expect the vehicle in front of me to go through the light even if it’s starting to change. But I am not sure. If the light changes, and the vehicle ahead of me suddenly stops, do I have enough time to stop as well? In this scenario, I will cover the brake pedal until I am sure that we will not stop.
I approach an interaction. There is a vehicle preparing to make a left or right turn in front of my vehicle. I am not sure if the driver sees me. I am concerned that at the last moment the driver might turn in from of me. I cover the brake until I am sure that the driver sees me or I am actually past the intersection.
Someone squeezes into your lane at highway speeds. You cannot brake because a truck is on your bumper. You are not comfortable because you are too close to the vehicle in front of you. Covering the brake saves you the split second of moving your foot from the accelerator to the brake pedal if the need arises as you carefully drift back to an adequate distance.
Going into a corner at an intersection and going over a drain gutter while in the corner. A tap on the brake with my left foot will usually settle the vehicle down as I progress through the corner.
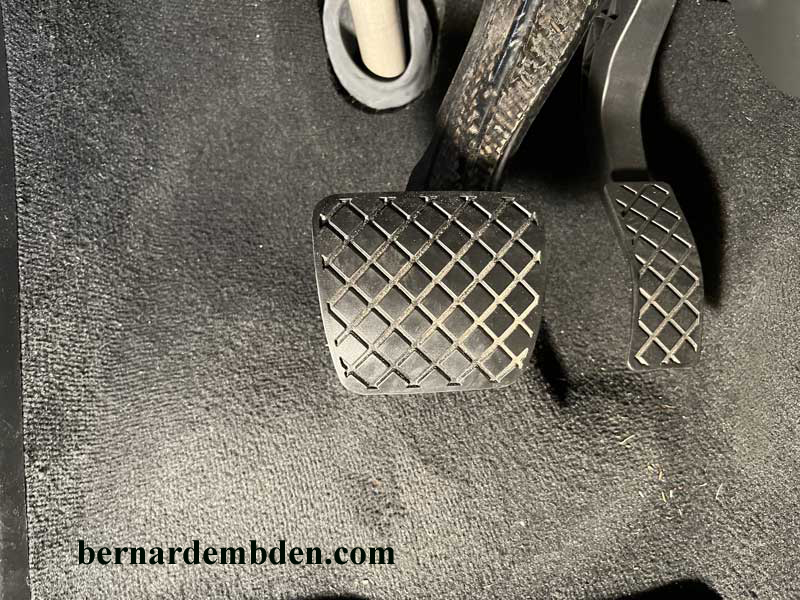
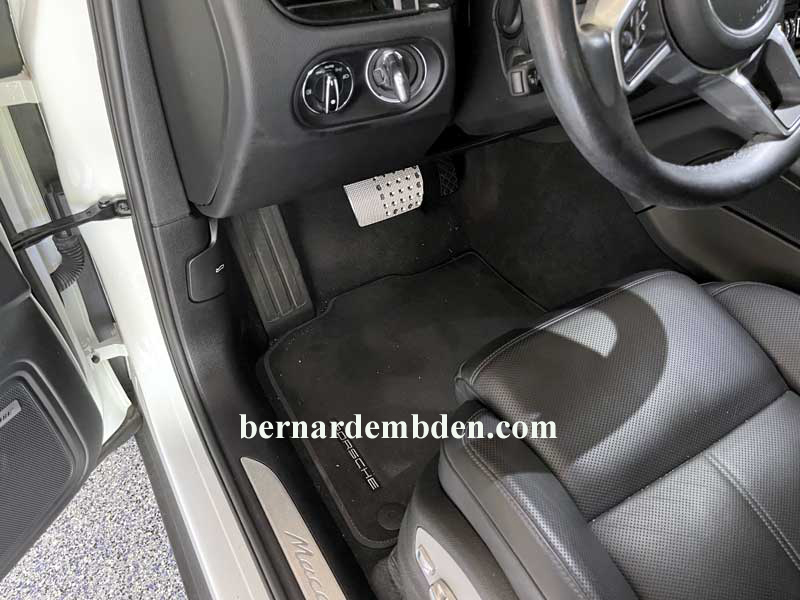
The problem for left foot brakers (and those who brake cover) is that modern vehicles, with pretty small brake pedals are not designed for us. (Macan brake and accelerator pedals in photograph below).
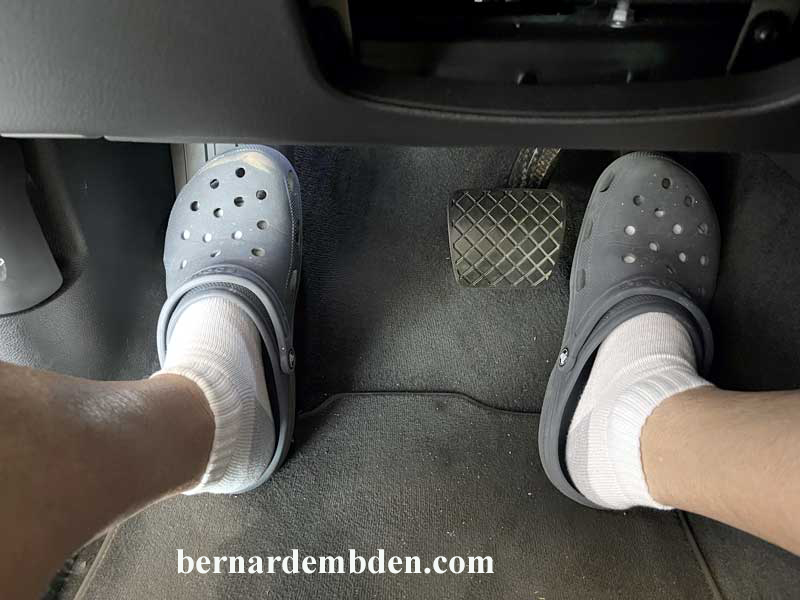
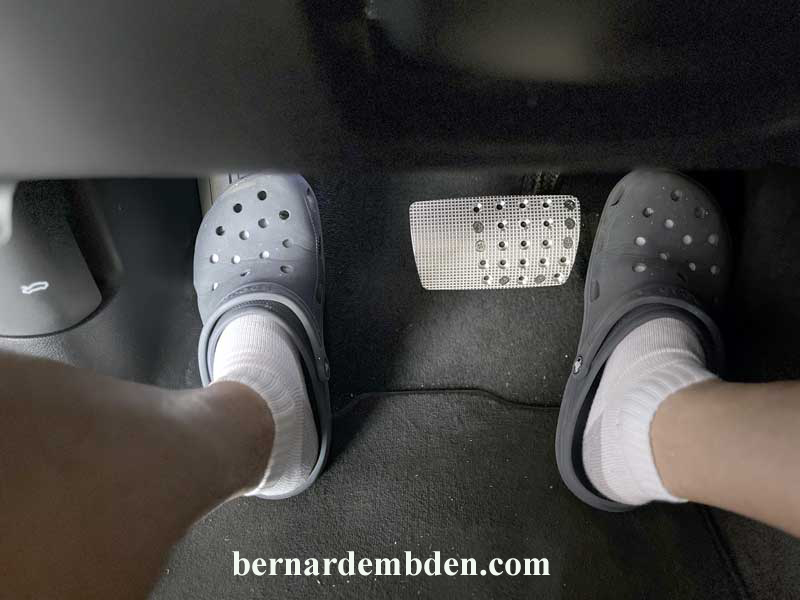
Apologies for the Crocs footwear. I do not drive with them, however these were my foot gear during the modification.
Normally my left foot is on the dead pedal on the left. Getting my left foot on the brake pedal by just pivoting off the dead pedal and over to the brake pedal is not possible. (Photographs below)

For street driving this is a minor inconvenience.
For race car drivers this is a problem, as most race car drivers left foot brake.
Finding the small narrow brake pedal an inconvenience I started to explore the possibility of making the brake pedal wider. And that was when I discovered that this was a problem for race car drivers who not only left foot brake but heel and toe as well. In many cases they need custom width and height pedals and a company actually manufactures custom brake pedals that fills this need.
The company is called Ultimate Pedals LLC and manufactures brake, clutch and accelerator pedal covers, specific to your vehicle and your specifications. The custom pedal cover is CNC machined out of Billet aluminum and is curved to fit your specific brake pedal. The pedal cover is custom manufactured with any height, width or finish specified. This cover replaces the rubber pad on the brake pedal and is bolted to the brake pedal. The necessary bolts, washers and locking nuts are also supplied.
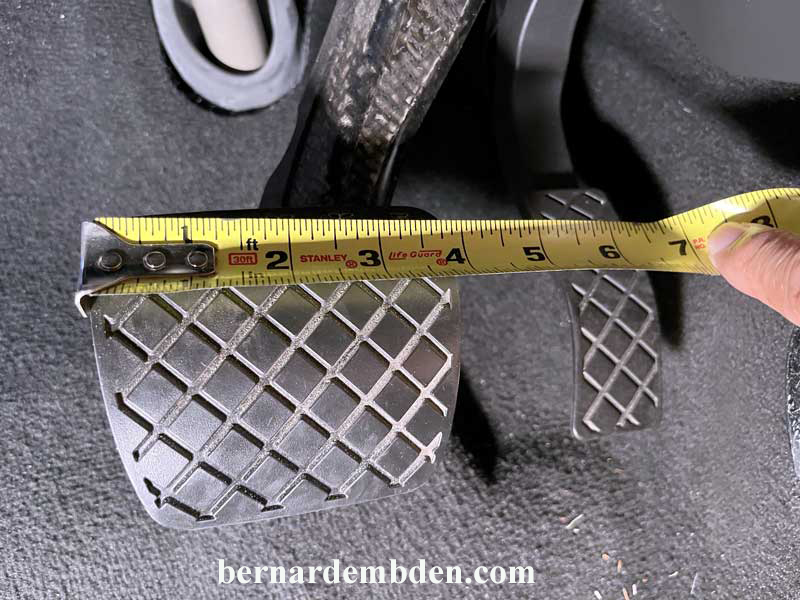
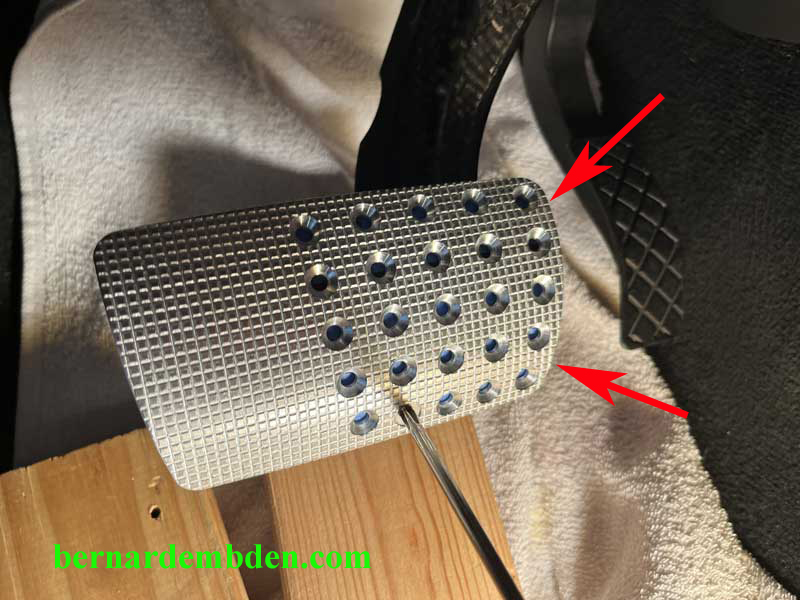
My current 2020 Macan's brake pedal is tapered from approx. 4 inches at the top to approx. 3.5 inches at the bottom. (Photograph below)
I ordered a custom brake pedal cover with the same height but two inches wider. Cost with shipping $161.84 US dollars. These covers are not kept in stock. They are custom manufactured for each order and takes a month or so to arrive.
I have never been more nervous about a modification than this one.
The idea of drilling holes (even small ones) in my brake pedal was somewhat terrifying. The more I thought about it, a few small holes in the brake pedal surface area would not comprise the structural integrity in any way. If race cars did not have a problem then why was I worried?
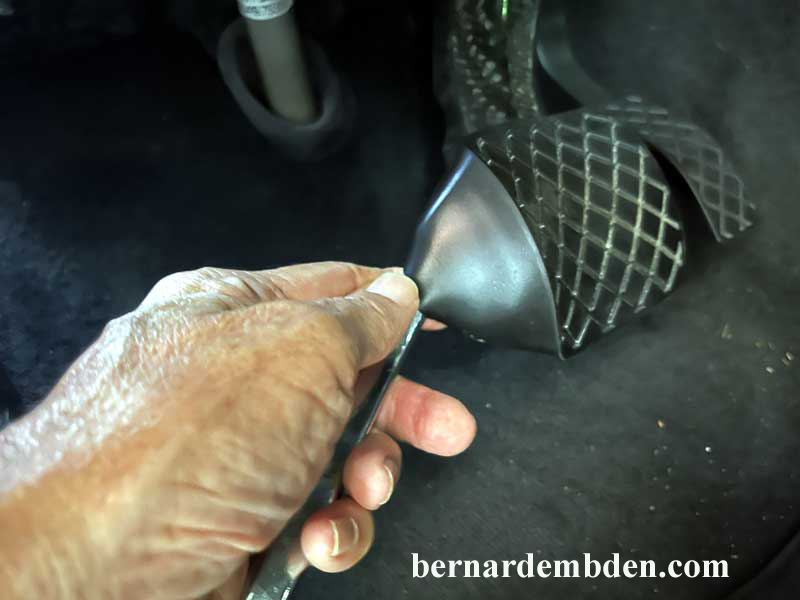
The process starts by removing the rubber pad from the brake pedal and it’s a bitch. The side flanges are underneath the pedal and fought me courageously. I admitted defeat and used an old brake adjusting tool to get between the pad and the brake pedal and lever it off. (Photograph below)
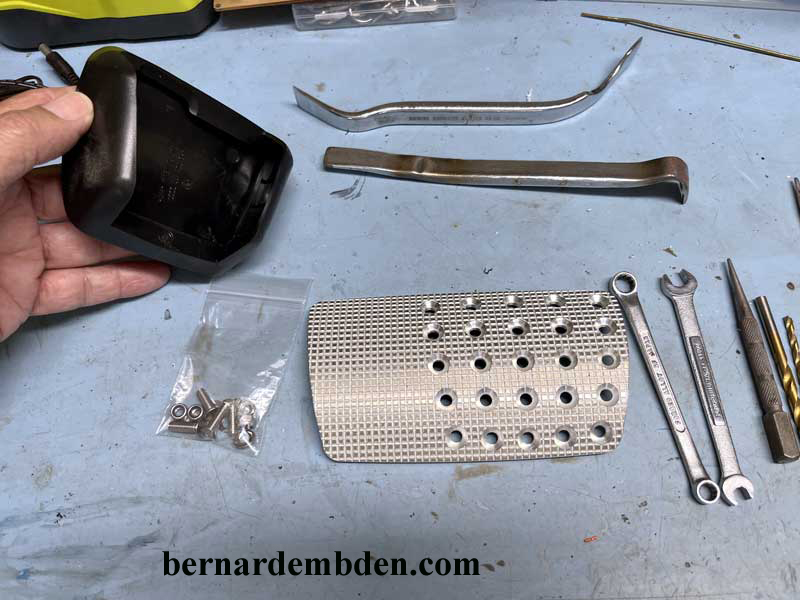
The photograph below shows the following.
1) In my hand, the back view of the brake pedal rubber cover.
2) Four bolts, washers with locking nuts for bolting the cover to the brake pedal.
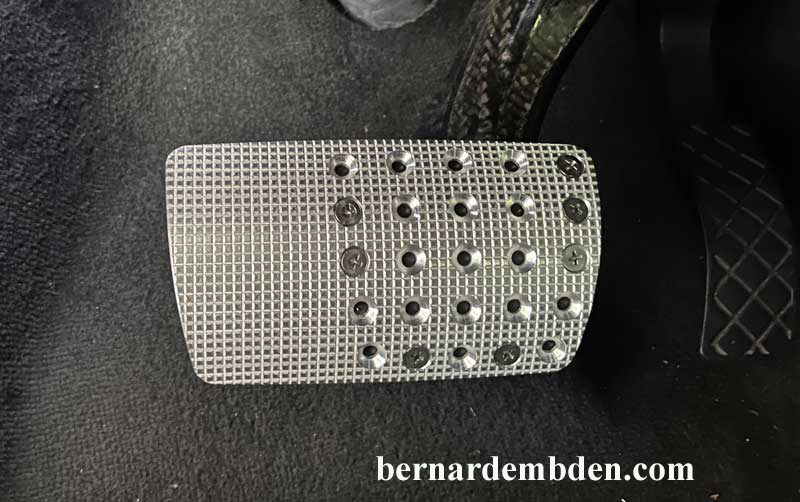
3) The aluminum brake pedal cover with the finish I specified and a plethora of bolt holes drilled and counter sunk that essentially covers the entire surface of the Macan’s brake pedal.
4) 8 millimeter box and open end wrenches.
5) Punch, drill bits. (one small the other the correct 7/32 size.
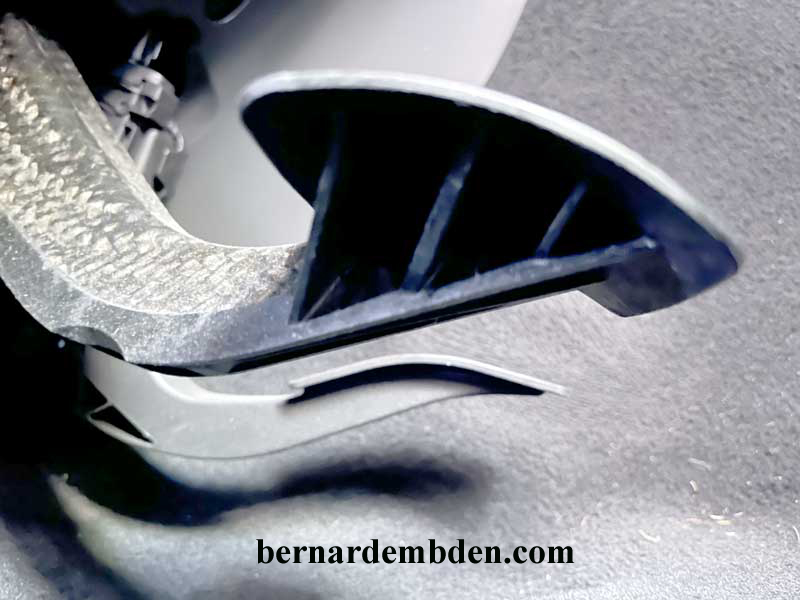
Brake pedals are pretty important. I was expecting a robust piece of bullet proof iron; however the Macan brake pedal assembly is made from what appears to be stamped metal. The plate is fairly thin and reinforced by a number of ribs welded to the rear of the pad. (Photographs below)

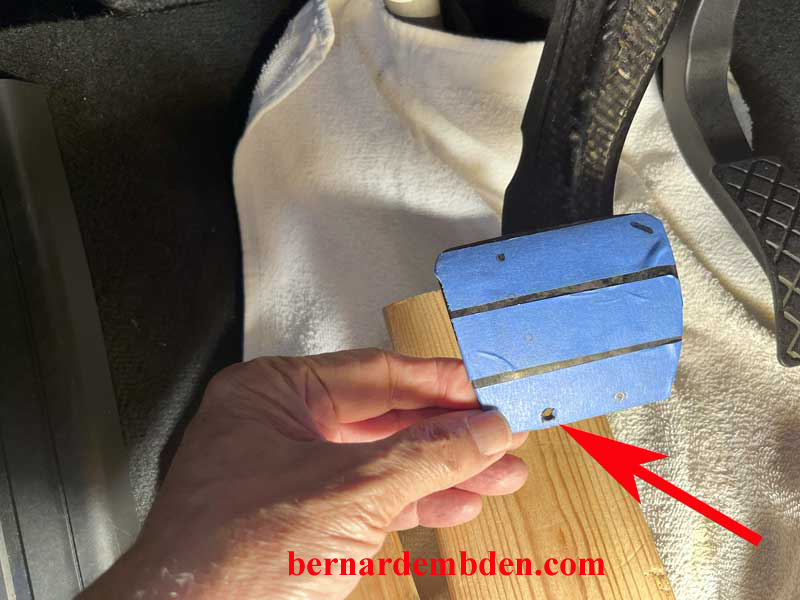
Fitting the aluminum cover to the pad is easy, as the cover has the exact shape and contour of the existing pedal. As per the instructions I first taped the pad with blue tape, fitted the aluminum cover to the brake pad and marked four drill locations.
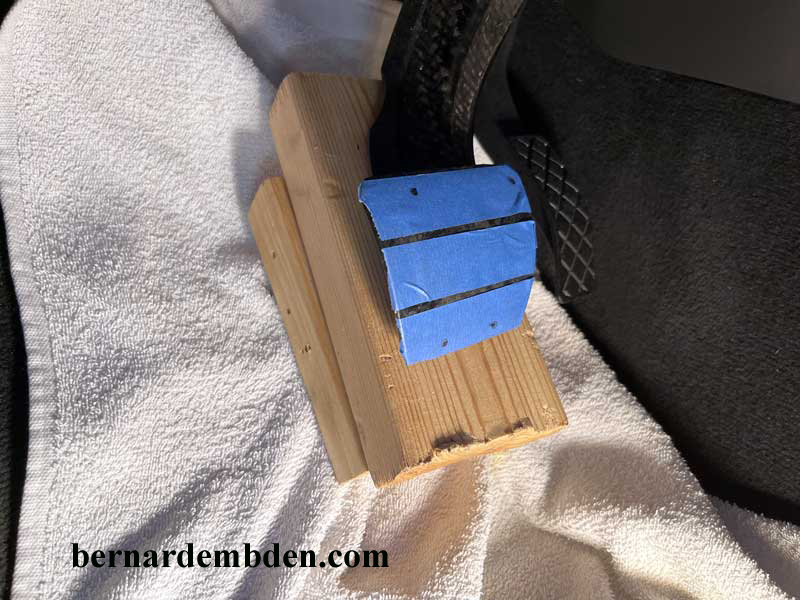
Be aware that the locations for drilling will be influenced by the ribs on the rear of the brake pad.
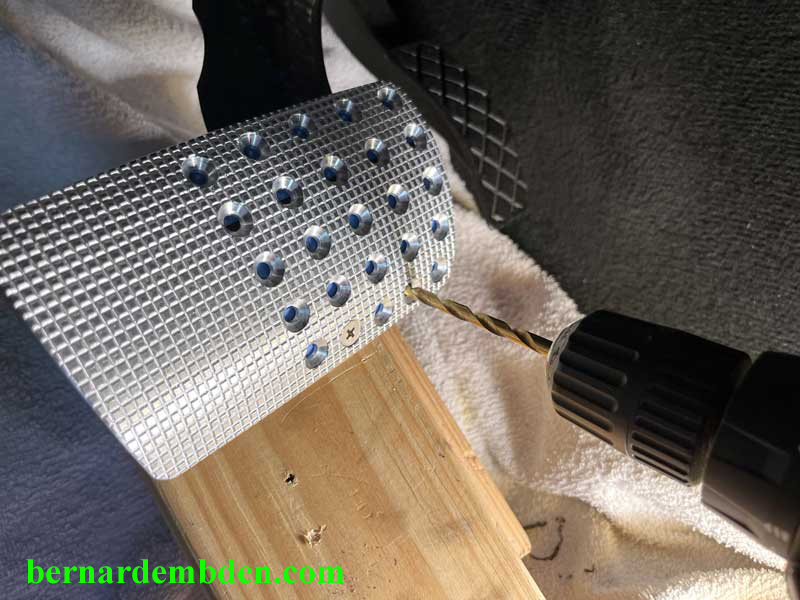
Due to the location of the ribs on the back of the brake pedal, you will not be able to get four perfect drill locations. The photograph below show drill locations between the ribs. Note the wood backing of the brake pedal. I believed I needed this to hold the brake pedal firm while I applied pressure with the drill.
I drilled one hole that was the easiest to get to. Started with a small bit and two bits later the correct size. I was surprised at how thin the metal was and how easily the hole was drilled (Photograph below).
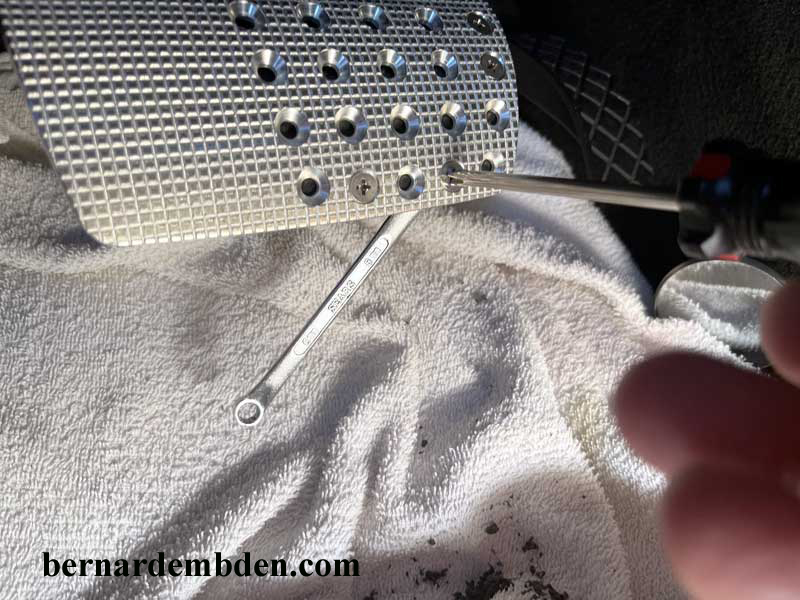
I removed the blue tape, fitted the aluminum cover and installed one of the supplied bolt, washer and locking nut. Because the cover is contoured exactly to the curvature of the brake pedal once the screw is torqued up, the cover cannot move.
In lining up the aluminum cover prior to marking the drill locations, I made the right side edges flush with the existing brake pedal. (Red arrows photograph below)
With the aluminum cover not being able to move on the brake pedal I able to drill with the correct size bit using the existing holes in the cover as a guide. The 8 mm wrench was needed for the back nuts. Note the non-slip finish on the cover. Also I discovered that the wood backing was no longer necessary. (Photographs below)
All holes must be drilled as close as possible at a right angle to the pre-drilled hole in the brake cover. This meant that, for the top holes, there was not enough clearance for my drill. Due to this lack of clearance, for the top of the pad I needed a right angle drill or a right angle drill adapter.

This is where I lost my mind.
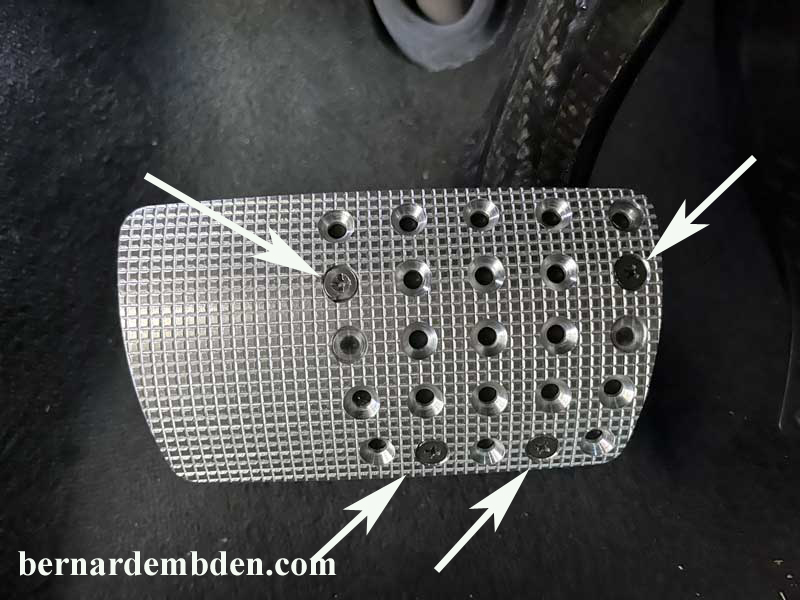
In retrospect four screws are more than enough to attach the cover to the pedal. At the time of this modification, and against the advice included in the instructions, I was convinced that more was better. I ended up installing seven (yes seven) screws. (Photograph below)
Seven bolts and nuts were not a problem, it was just not necessary. Four bolts and nuts in the locations below would have been more than enough. (Photoshopped the extra bolts out for clarity. White arrows Photograph below)
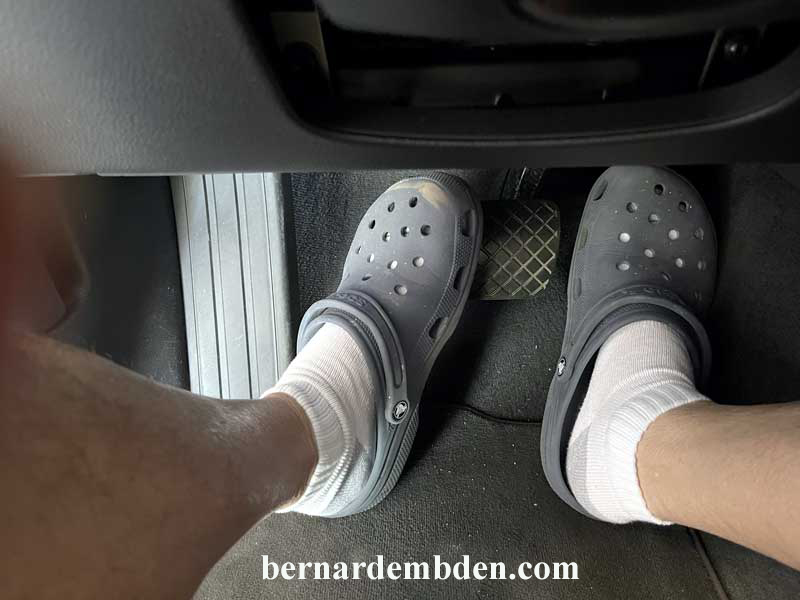
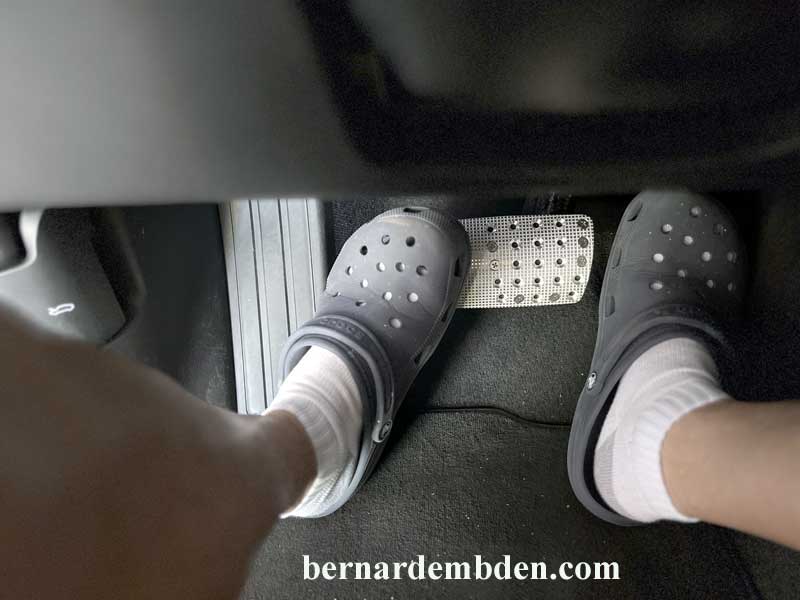
Test left foot braking confirms what I had hoped. I no longer had to lift and move my left foot to press the brake pedal. I could just pivot my left foot while keeping my heel stationary. (Photographs below)
Project complete. This modification is not for everyone. For me it’s exactly what I wanted.
Drive Safe.
