The Porsche Macan has no storage.
This is not some idle rant. There is virtually no storage in this vehicle. While the door pockets provide some relief, itĺs not enough. The console bin struggles to hold my iPhone and the small cubby hole beneath the front passenger seats insult my intelligence.
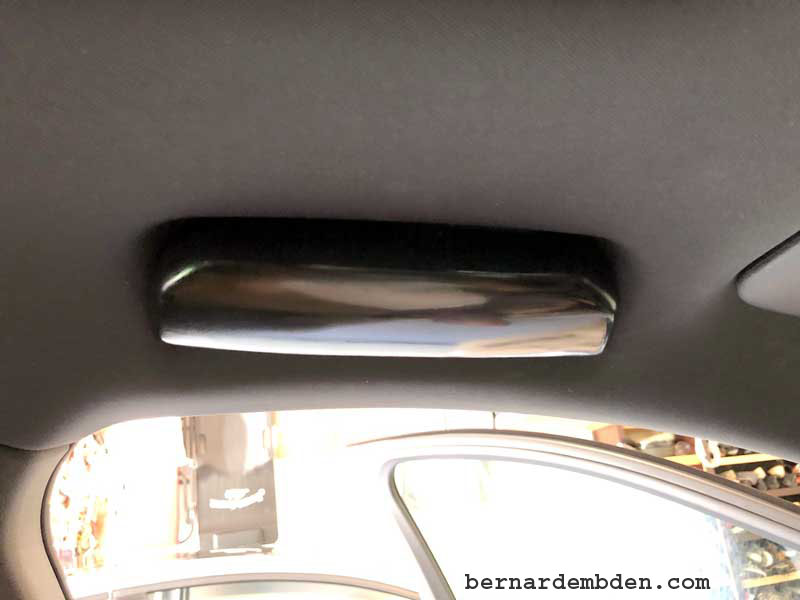
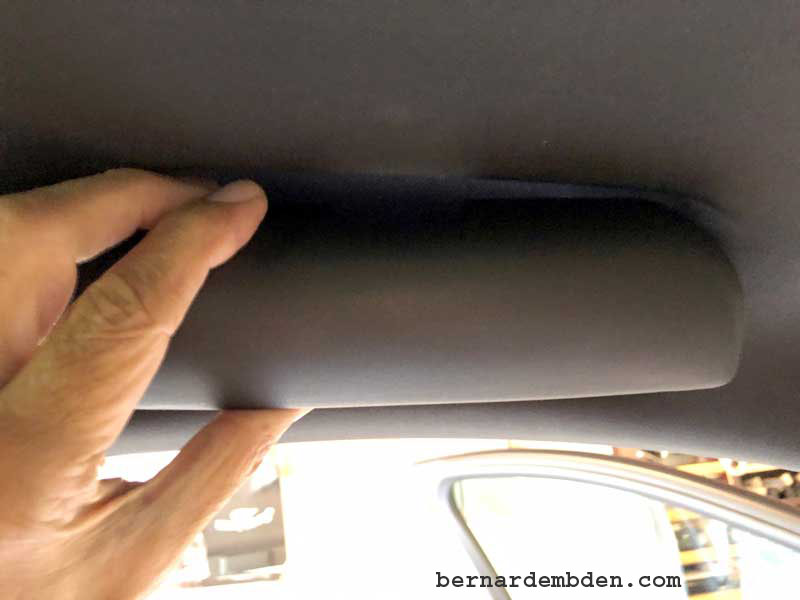
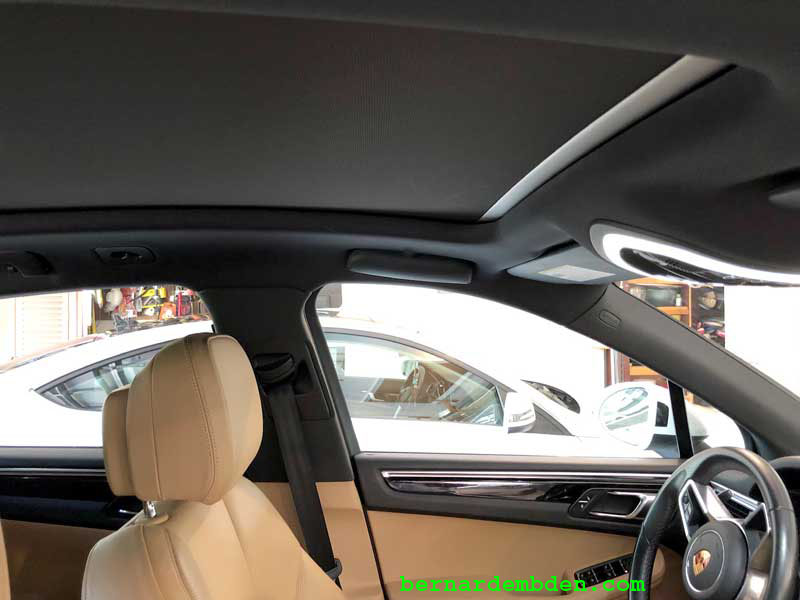
The breaking point for me was when I discovered that no provision was provided to store my sunglasses in the overhead console.
All is not lost, because Volvo has a solution.
The solution requires replacing the driverĺs door grab handle with a sunglass holder. Itĺs not an ideal solution and it will require some work, (a lot of work) but it is a solution never the less.
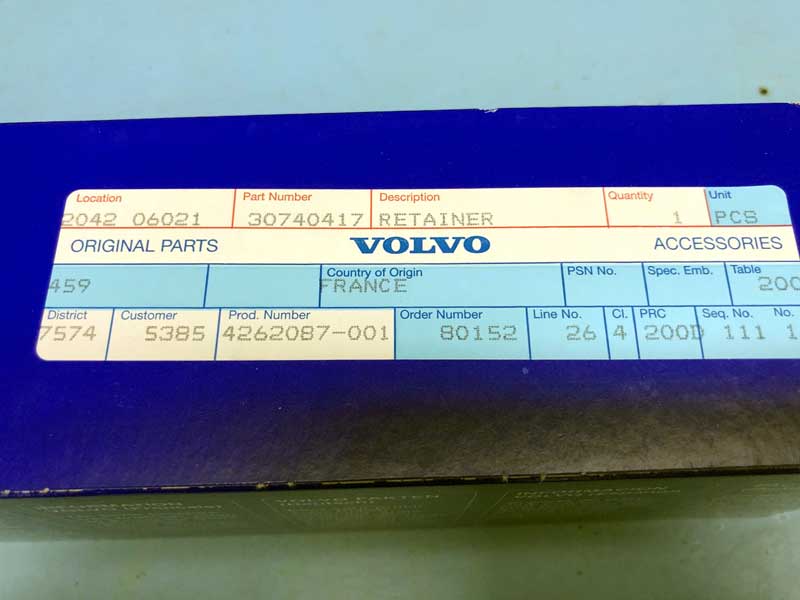
The first step was to acquire the sunglasses holder. A visit to Volvo Parts of Phoenix website and part number 30740417-1 (Genuine Volvo Sun Glasses Holder Color Light grey) was ordered. Cost $48.00 US.
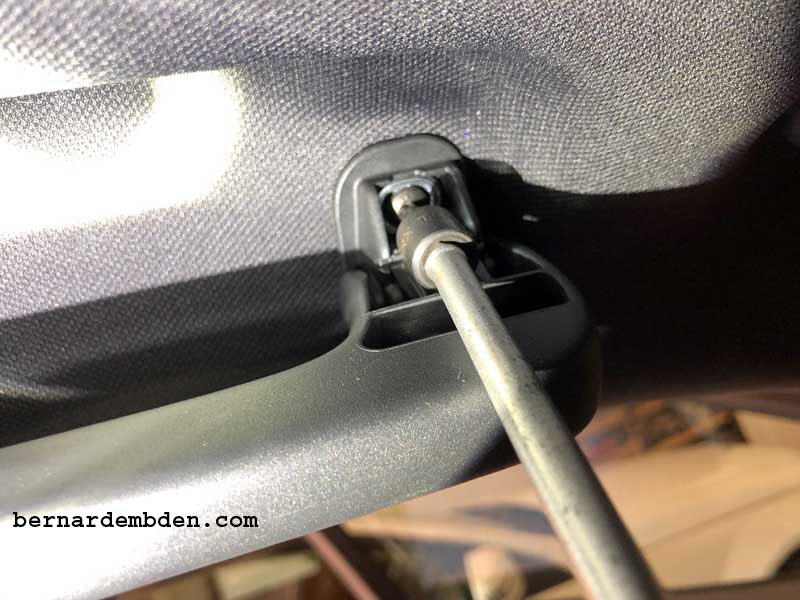
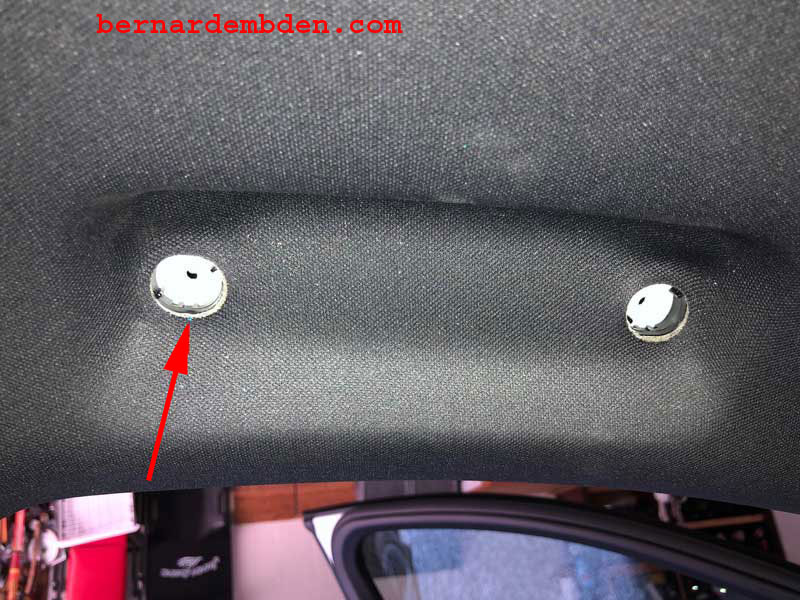
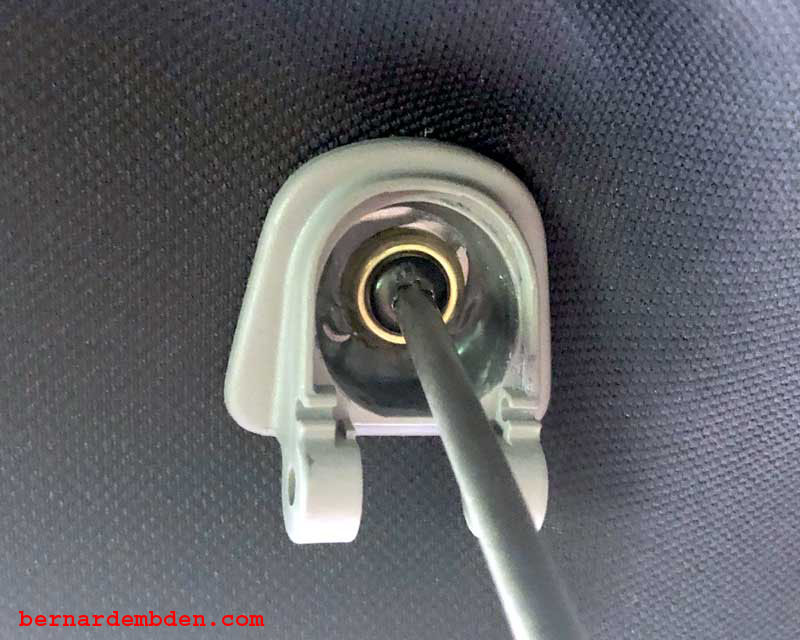
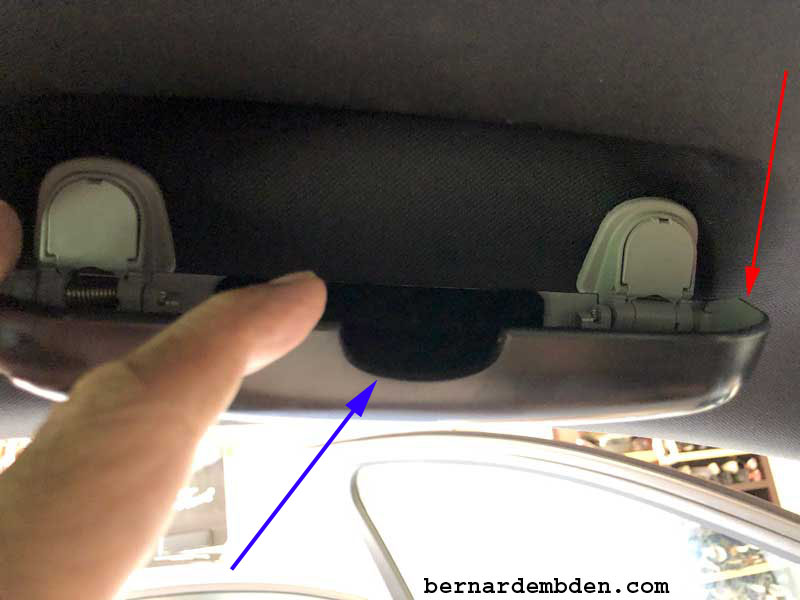
Removal of the driverĺs side (US) grab handle is straightforward. First use an angle pick to pull the screw cover back and a T-25 Torx socket to remove the two screws. (photographs below)

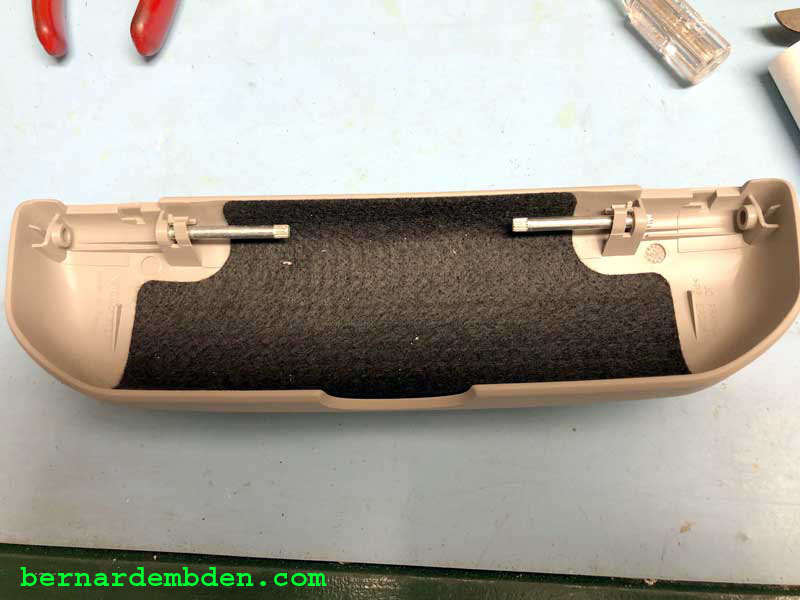
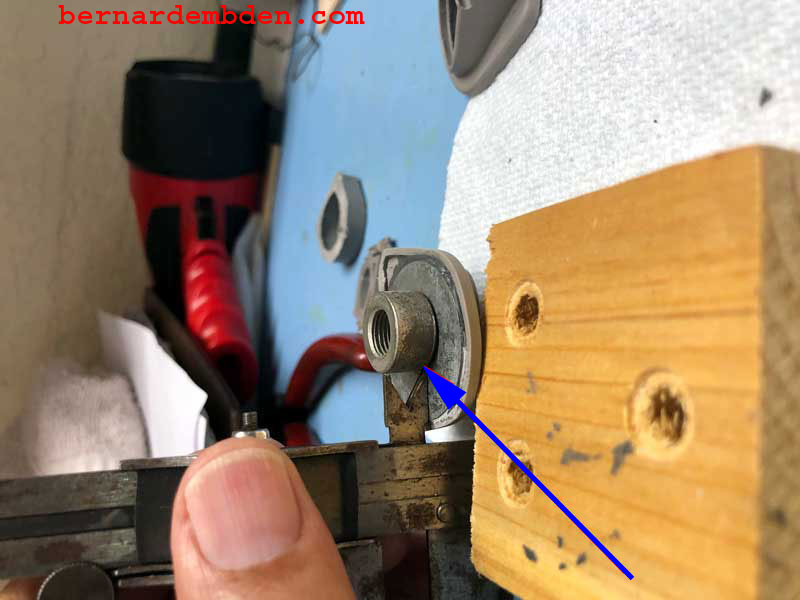
The good news is that preliminary examination of the grab handle and the Volvo sunglasses case revealed that the distances between both screw openings appeared to be the same. (red and blue arrows photograph below).
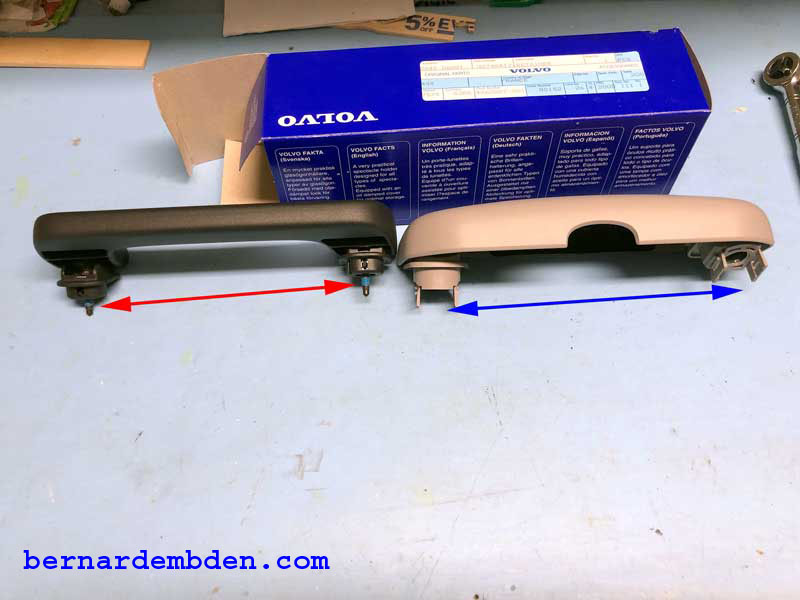
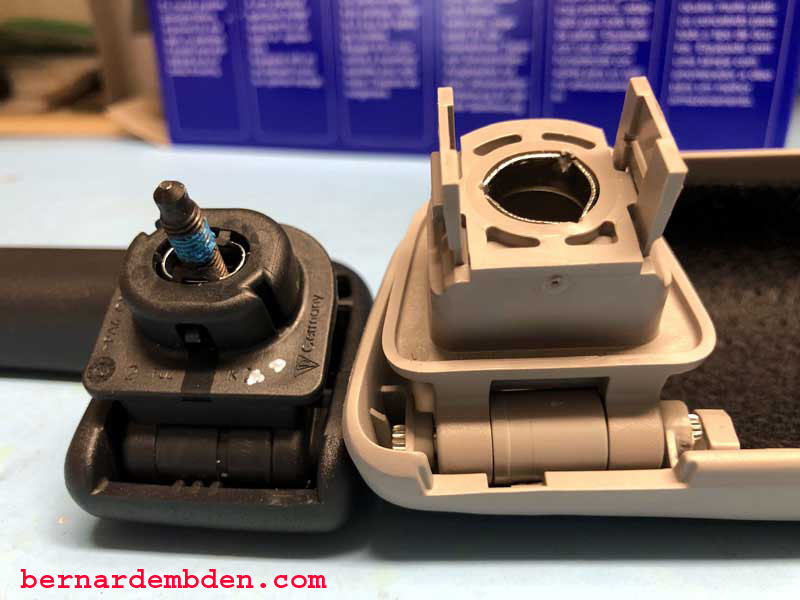
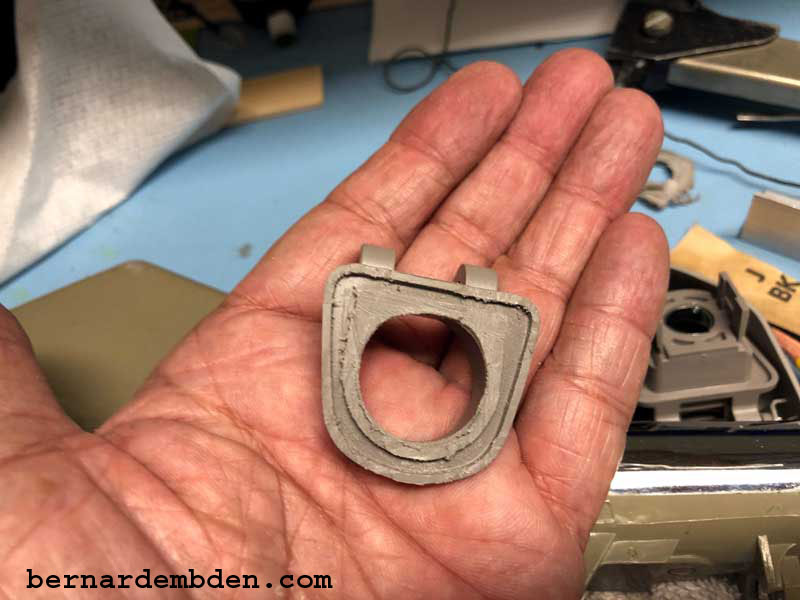
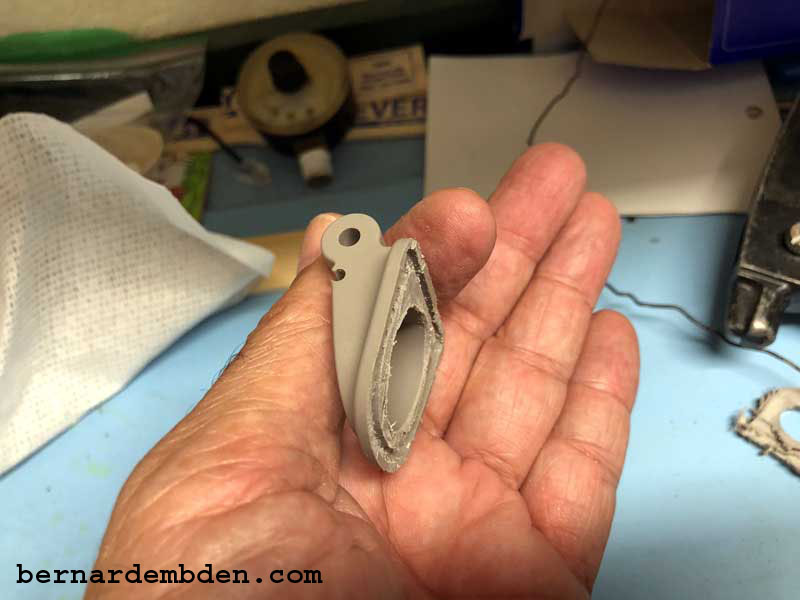
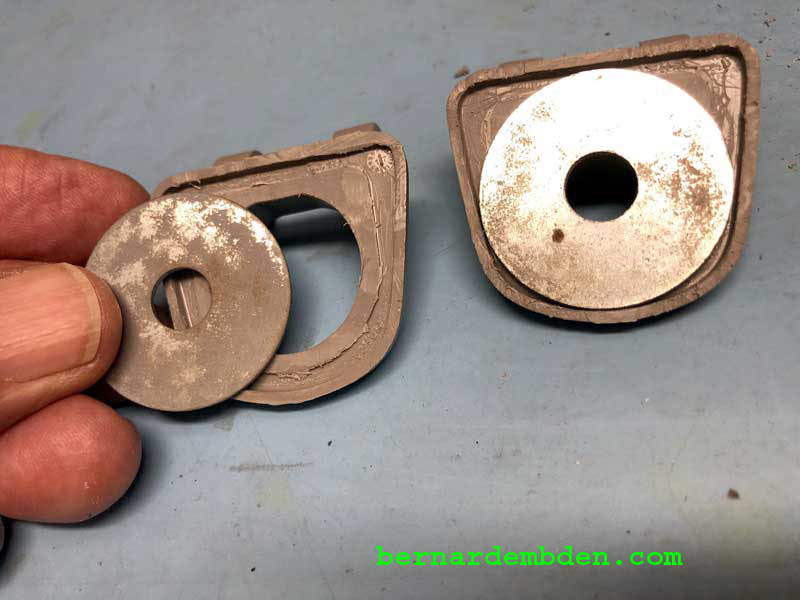
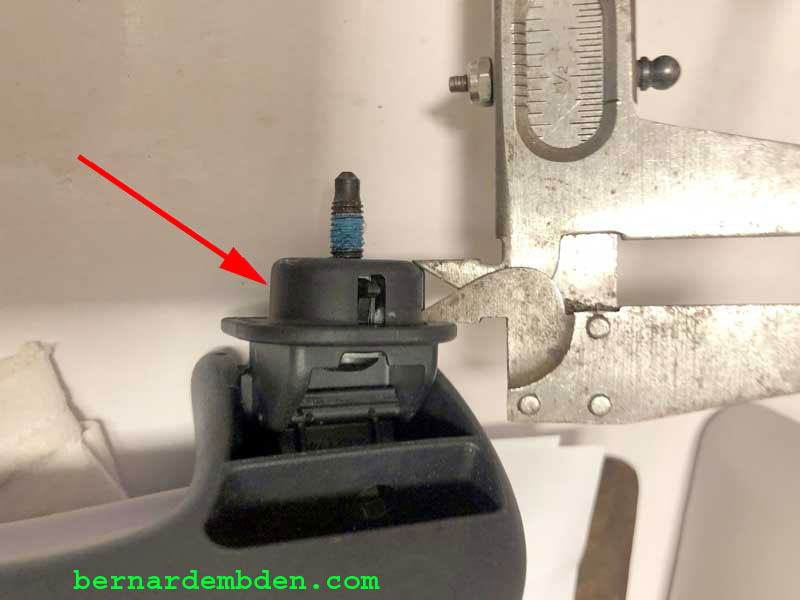
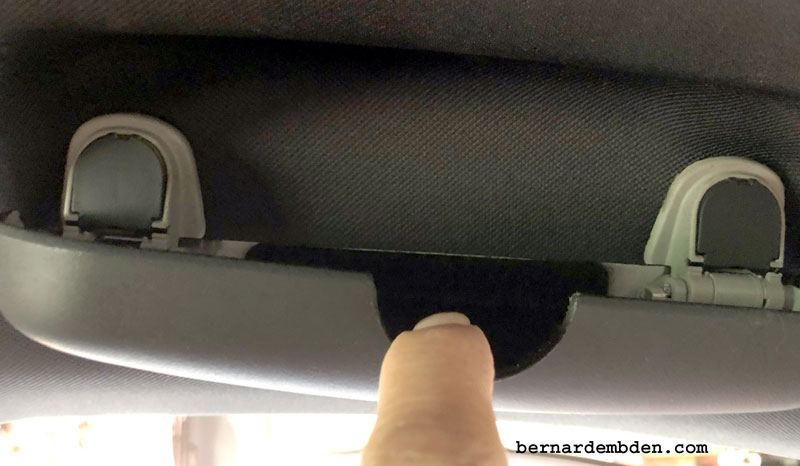
The bad news was everything else. The part of the Volvo's hinge attachment surface that is designed to fit into the recess of the headliner (red arrow first photograph below) was significantly larger than the Porsche's grab handle's attachment insert (standoff).
There were now two clear options going forward.
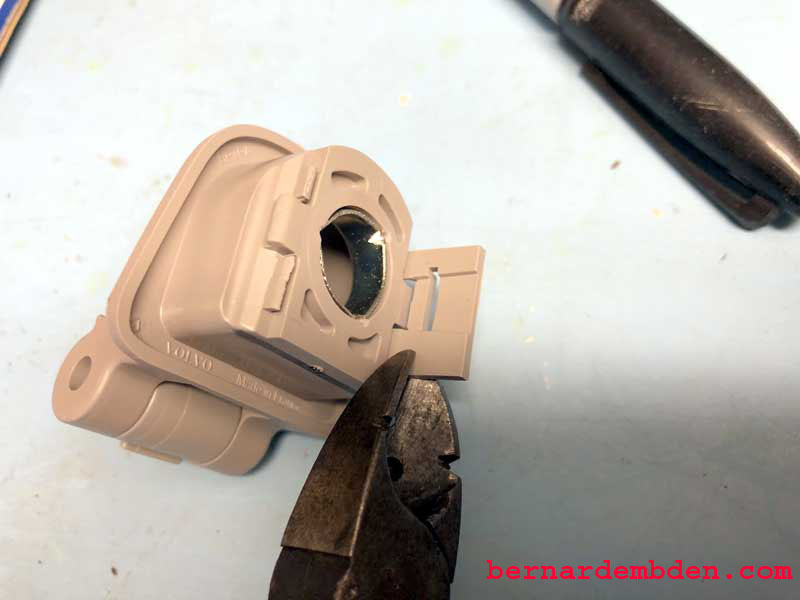
1) Remove the "tits" from the Volvoĺs case attachment hinges (photograph below, note hinge removed from case) use a washer to manage the large opening, and bolt the hinge and case up against the headliner using the existing screws. (Preliminary mockup revealed that the case sits farther outward from the headliner recess than the grab handle) If you are OK with that, call it a day and drive safe.
2) Option number two. If you enjoy pain, have a touch of OCD and have 3 or 4 days available, then devise a method to mount the case into the existing recesses so that it looked as if it was factory installed. Paint it black with some texture to match the headliner and make it look good.
For me there was really no choice. It was always going to be option number two.
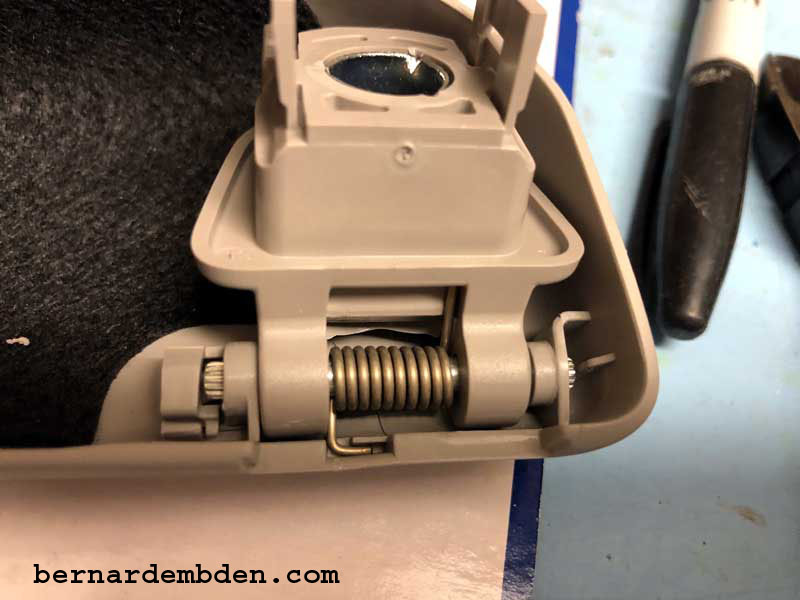
(Photographs below) Remove both hinge assemblies from the sunglass case by withdrawing the metal pins. Note position of hinge damper and hinge spring orientations.
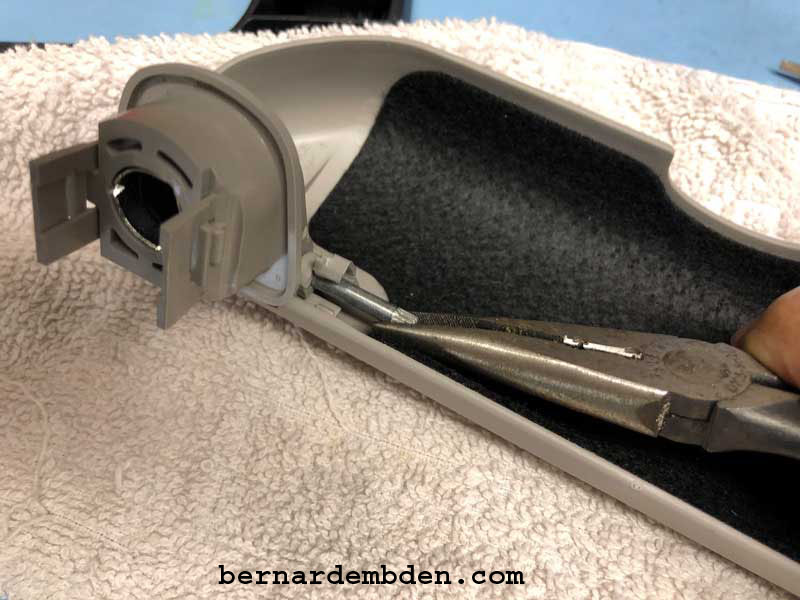
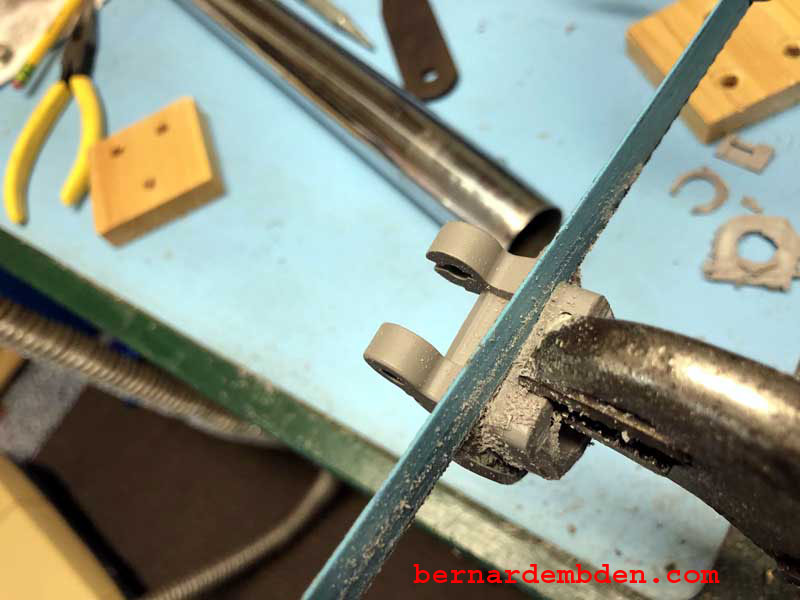
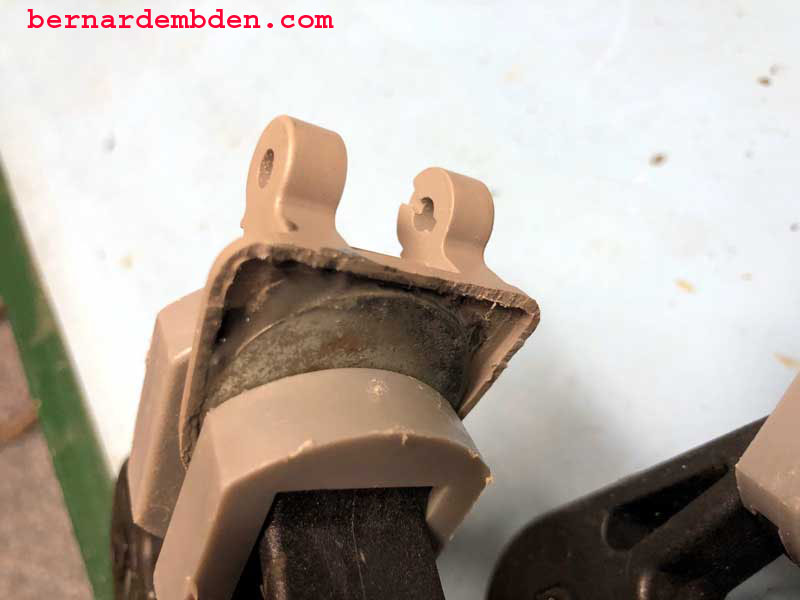
The existing recess in the headliner is too small to accept the Volvo's sunglass case hinge assembly. They will have to be removed. Secure the hinge in a vice grip (secure vice grip in workbench vice) and saw the excess off. (photograph below)
Don't be scared or confused, remember this is option number two.
The cut hinge assemblies should look like the photographs below.
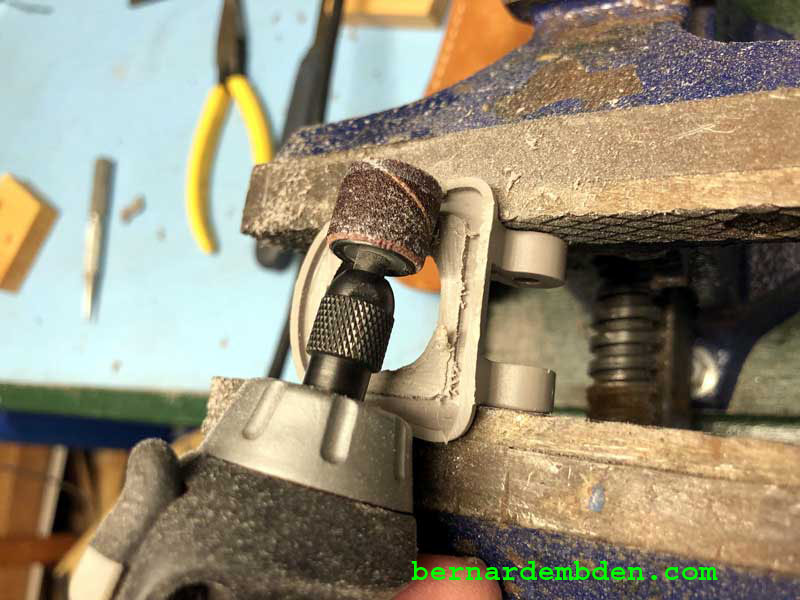
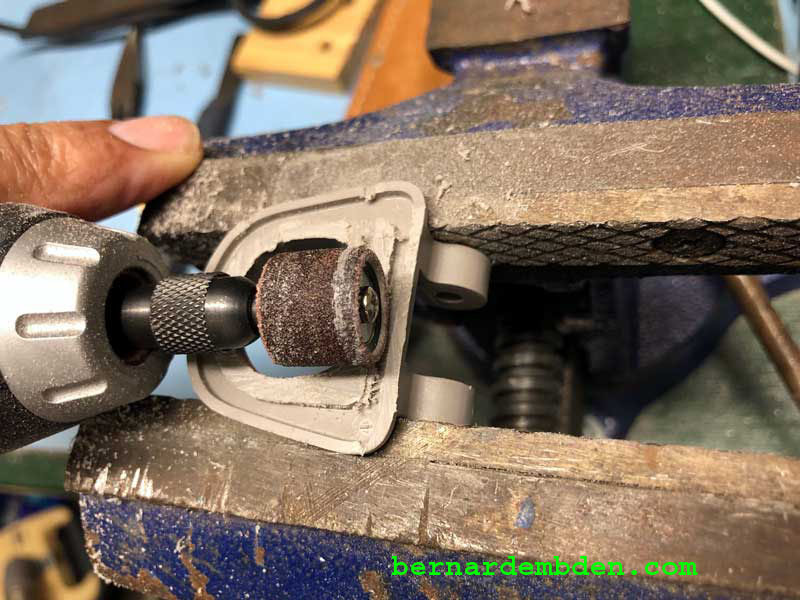
Use the proper attachment on a Dremel to remove the cut off lip that remains. The objective is to get the cutoff lip flush with the surrounding plastic thus creating a recess. (see photographs below)
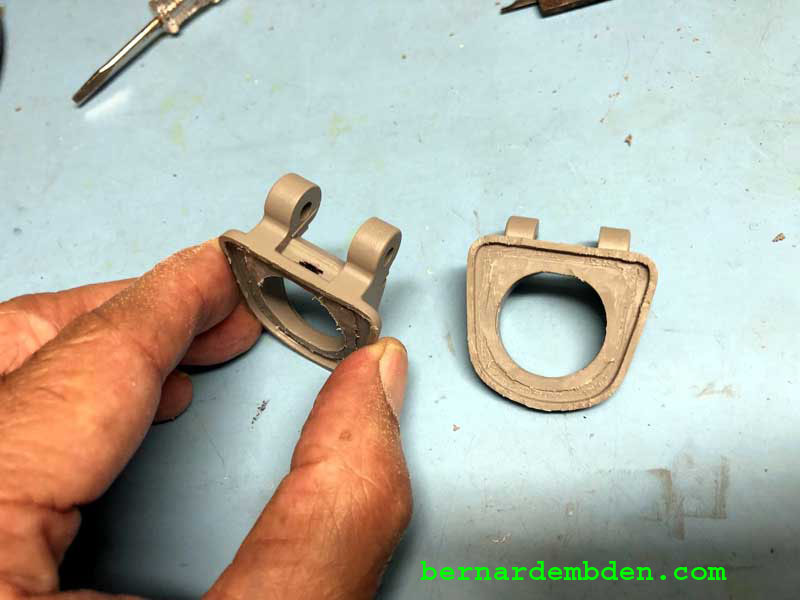
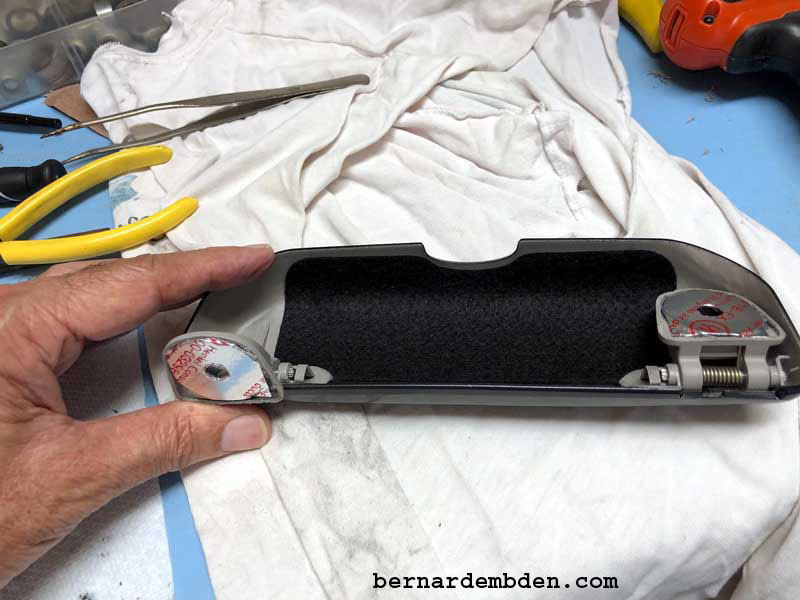
These are the hinge assemblies that will rest on the headliner. However, The hinge openings are way too large for the existing screw heads. Best practice here would be to locate the same plastic material as the existing hinges and epoxy them to fill in the openings. A hole in the appropriate location would then facilitate the mounting screws.
I hate delaying any project to locate hard to find materials. A look through my garage revealed fender washers that were exactly the size that I needed. They fit nicely into the recess of the modified hinges. (photograph below)
Problem? They are metal washers, not plastic. Bonding dissimilar materials is akin to voodoo or witchcraft. No one does it well and most methods fail miserably.
Undeterred, the metal washer to plastic bonding project was now officially a go.
The good news is that the sunglass holder would not be subject to the same forces as the grab handle. All you had to do was open the damm thing, not suspend your entire weight on it.
I did a little research. There are epoxies made specifically to bond metal to plastic. I have no doubt that some might actually work, however I came back to what I was familiar with and I had in my garage. The tried and true JB Weld.
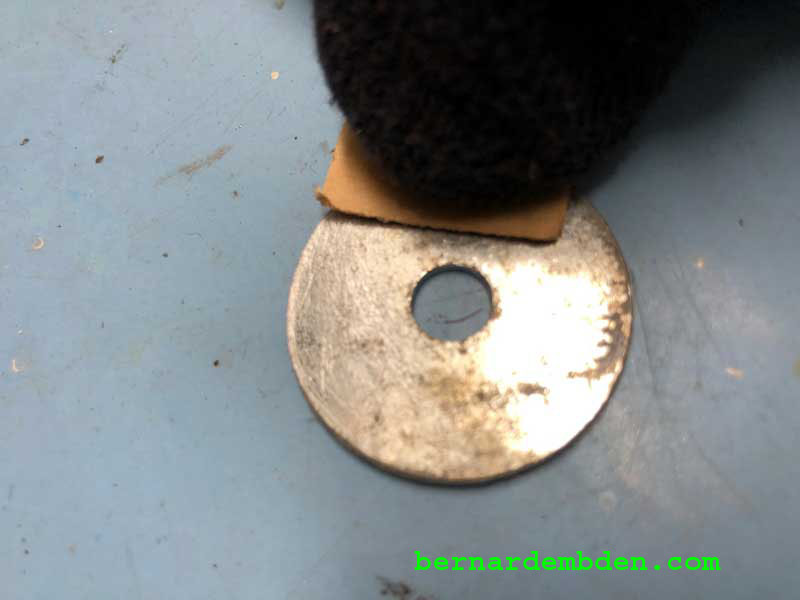
Bonding dissimilar materials are somewhat similar to painting your car. Preparation determines the results. The metal washers have to be scuffed up enough for the bonding agent to grab it. Take your time on this. In addition use gloves while sanding the washer and handling the hinge. Be forewarned, the natural oils from your hand is waiting to sabotage the bond. (Photograph below)
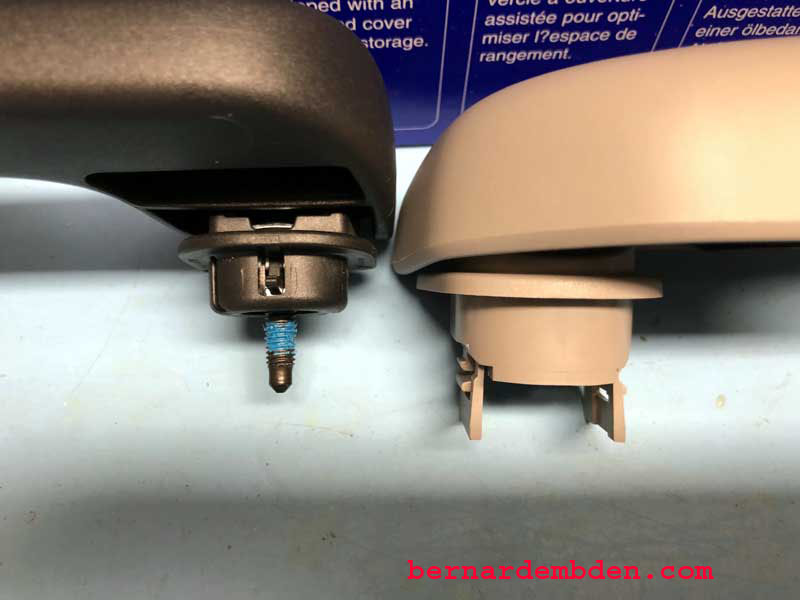
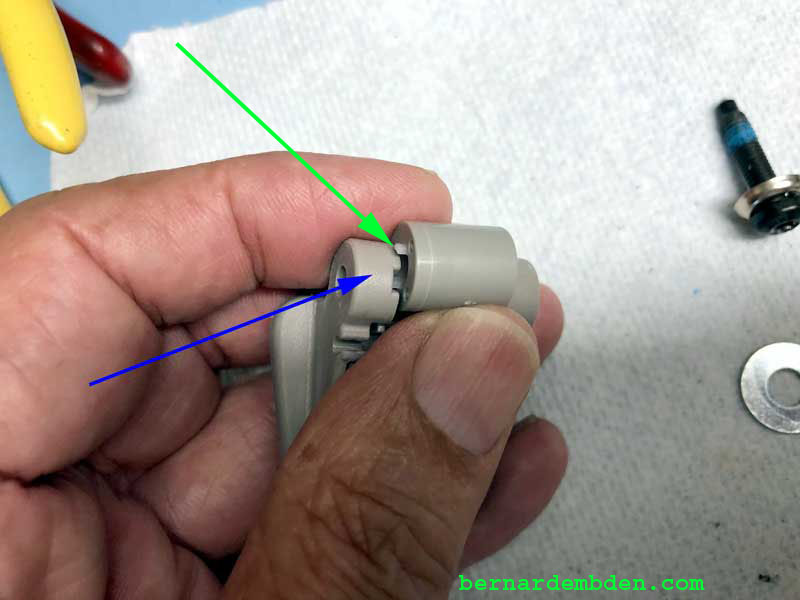
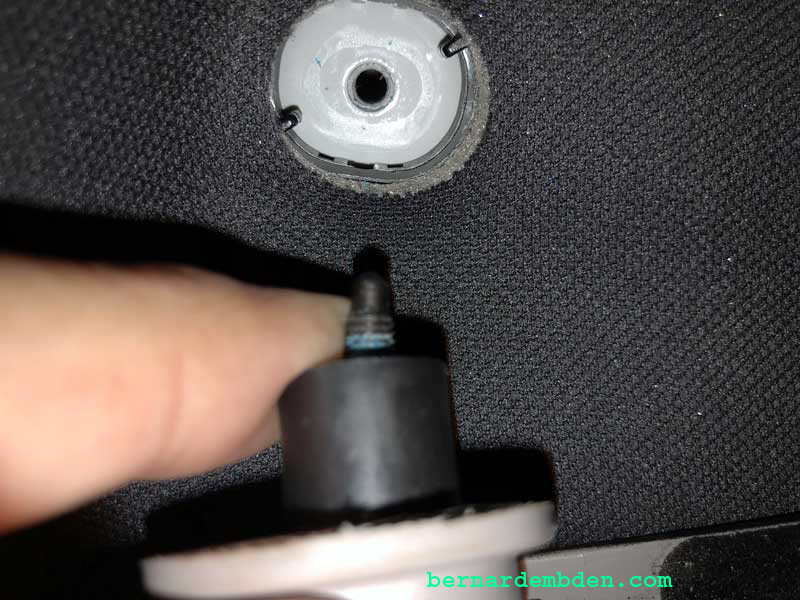
The installation will require "stand offs" thatĺs the same depth as the part of the grab handle that fits in the headliner's recesses. (original standoff red arrow, modified standoff blue arrow, photographs, below).
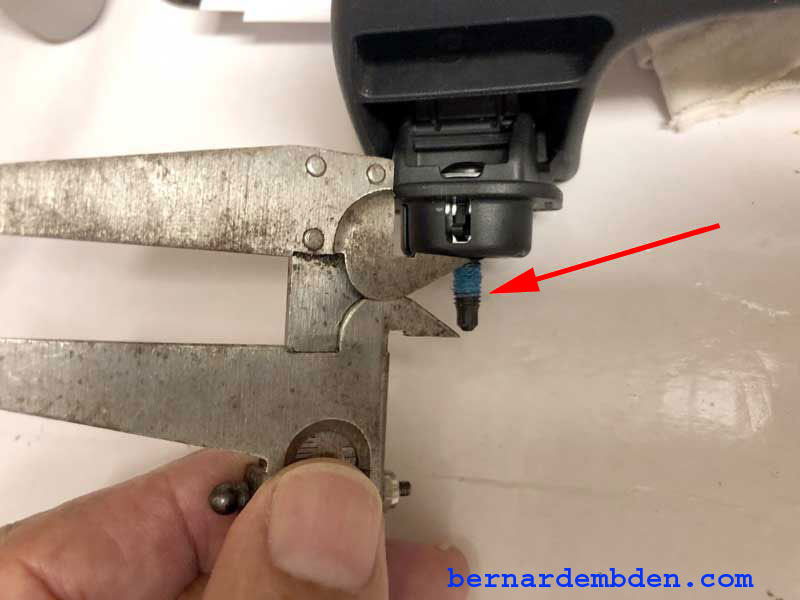
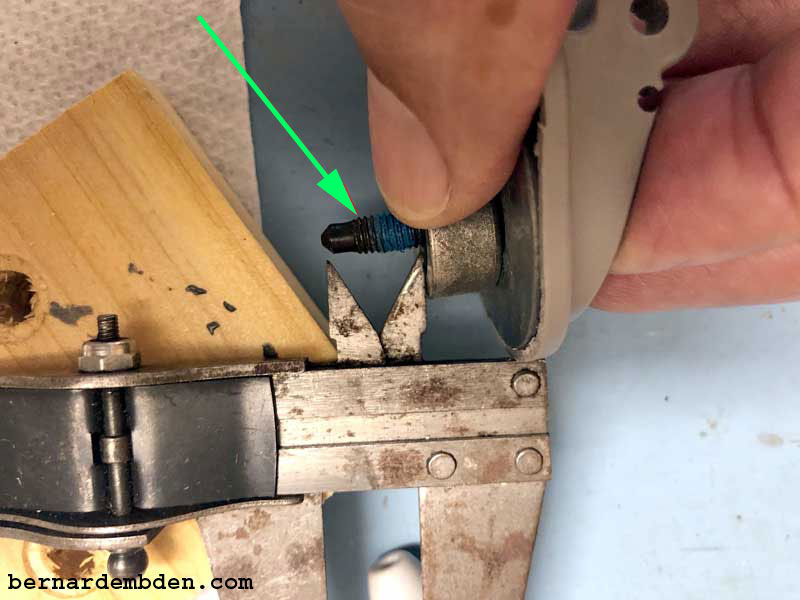
The exposed depth of the mounting screw (red arrow photograph below) should also be the same approximate exposed depth of the screw on the original grab handle. (green arrows second photograph below).
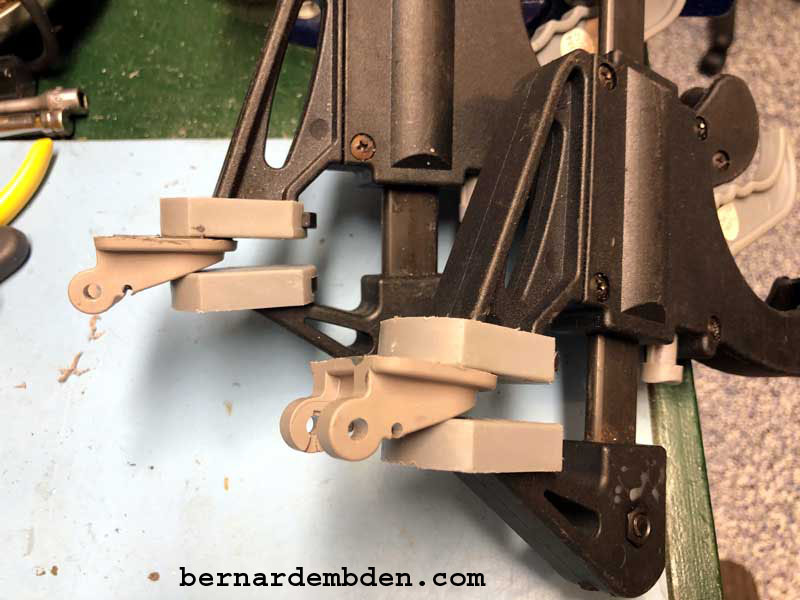
Test fit of both hinges.
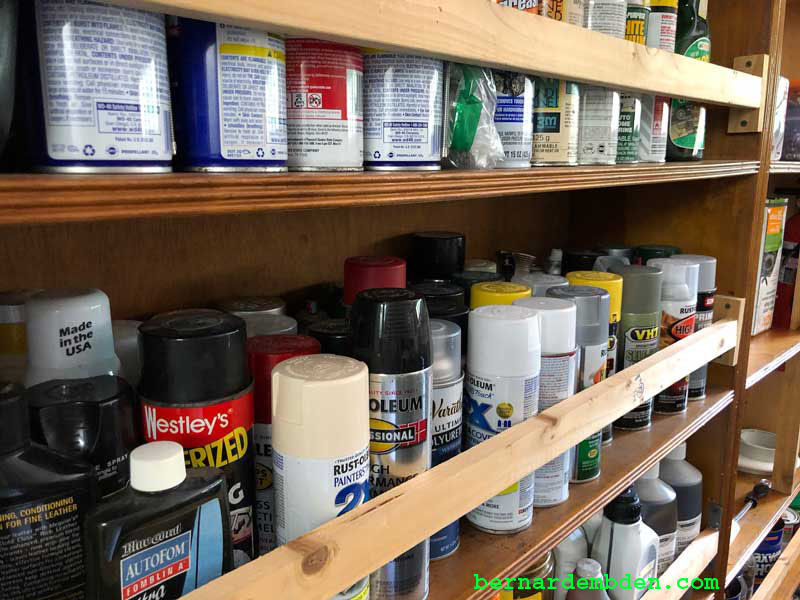
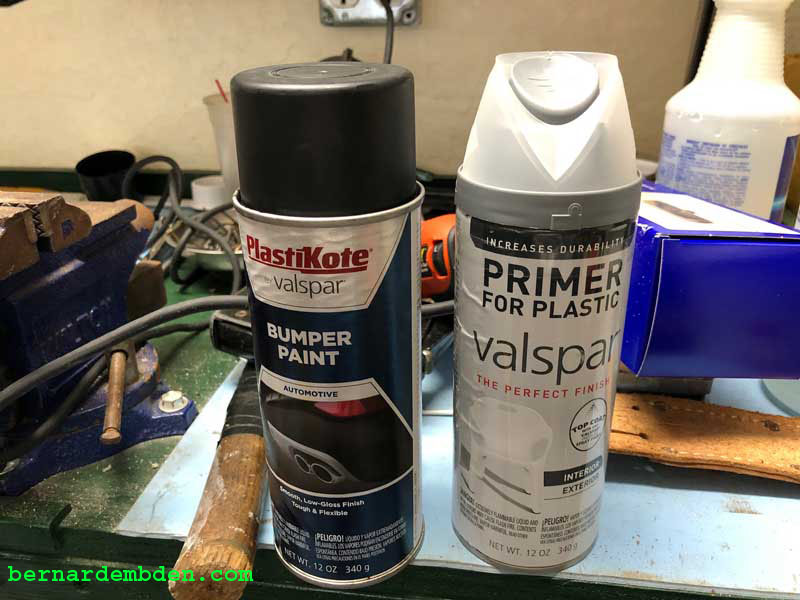
The light grey of the sunglass case does not compliment the dark headliner. The plan was always to paint the case black. A quick look at my spray can inventory and a black bumper paint was chosen because, based on the cap color, I believed it would match the headliner. Note that plastic requires a specific primer.
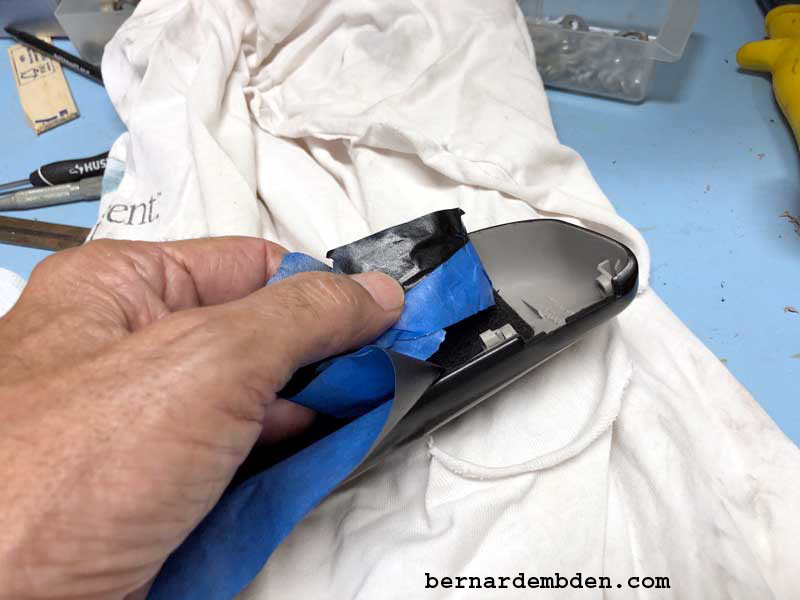
Painting is preparation. Handle case with gloves. I used 600 sandpaper to lightly scuff the plastic. Mask off the inside of the case. Apply two light coats of primer, then two coats of bumper black. Let dry fully. Wet sand lightly with 1000 sandpaper and then a coat of clear. Let dry.
Remove masking tape and attach hinge assemblies.
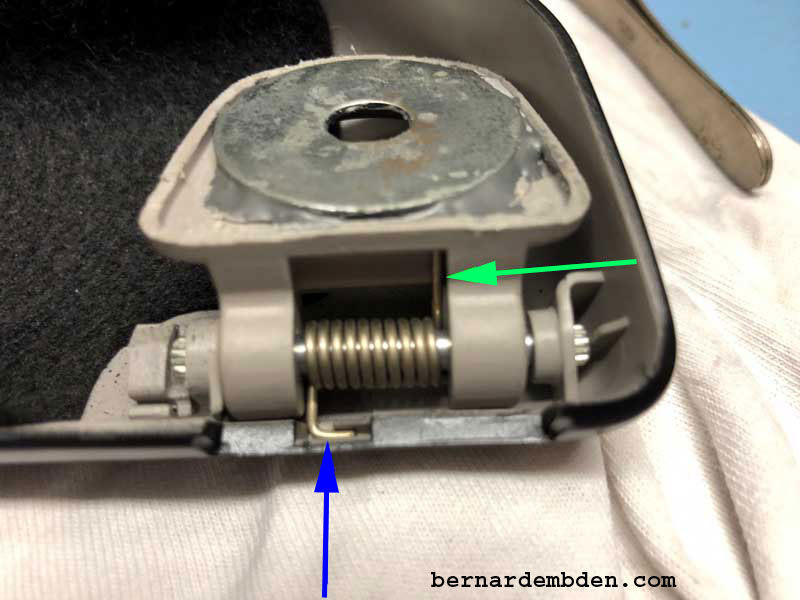
Note position of hinge damper in the following photograph. The hinge extension (green arrow) MUST line up and be inserted in the corresponding notch in the hinge arm. (blue arrow)
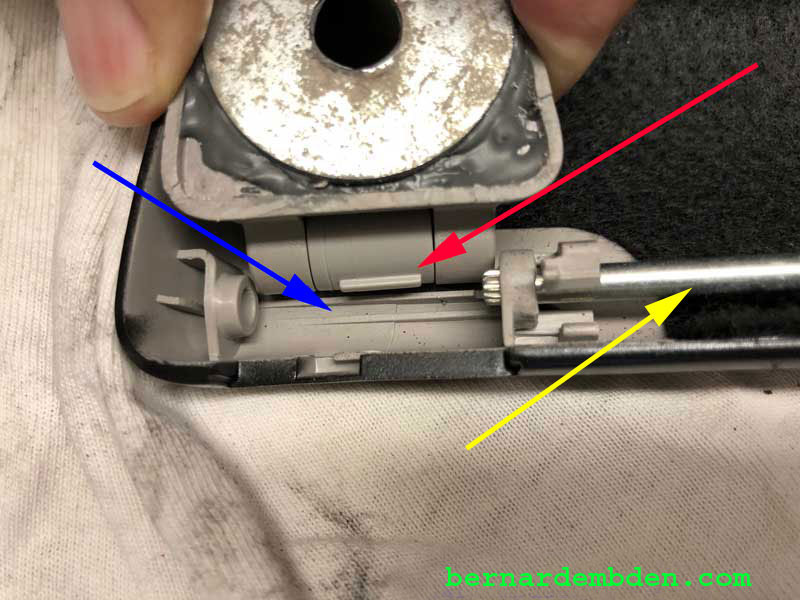
(Photograph below) The hinge extension on the bottom of the hinge damper (red arrow) must be installed between the ridges (blue arrow) in the bottom of the case before the locating pin (yellow arrow) is installed.
Install hinge spring as per the photograph below. Note position of spring end positions (green and blue arrows).
Push in snap lock that secures locating pins. (red arrow photograph below).
Test fit of the sunglass case to the headliner revealed four significant problems.
1) Because this project duplicates the insert depth of the original grab handle, (standoff) the metal washers now rests firmly against the headliner material.Metal rusts. This rust would inevitably transfer to the headliner material. This modification was always designed to be completely reversible. The metal washers surface area are considerably larger that the original grab handle, any rust transfer from the washers to the headliner would be visible if the original grab handler were re-installed.
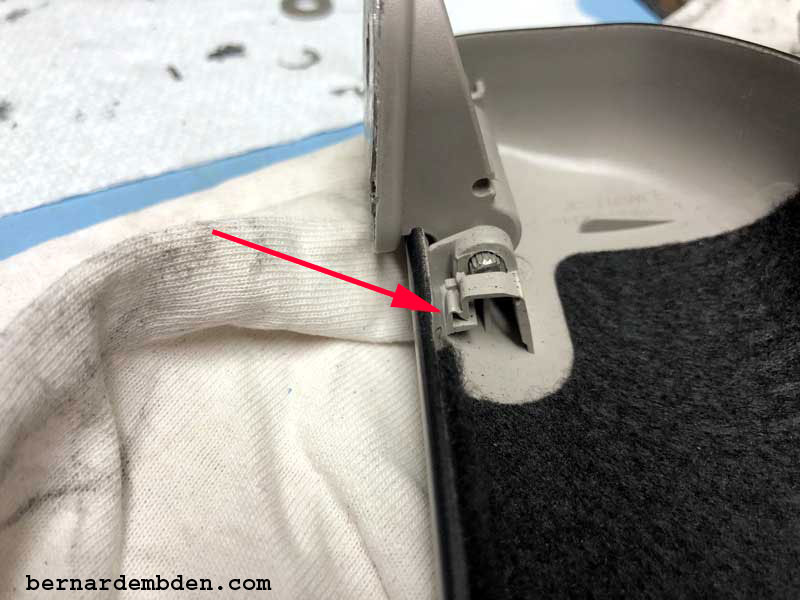
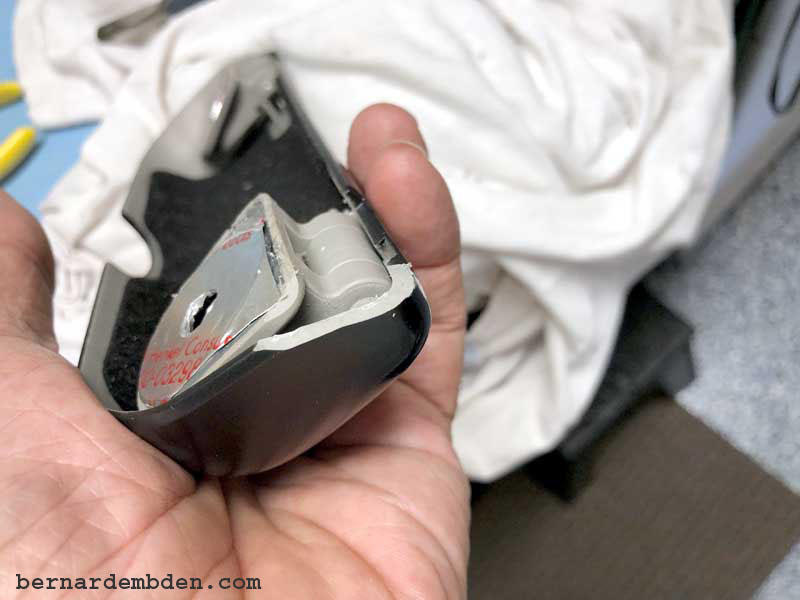
2) The extra width of the sunglass case resulted in the side of the case rubbing slightly against the headliner's recess as it opens and closes. (red arrow photograph below)
2) The notch necessary for opening the sunglass case was not accessible. It needed to be cut out lower so that my finger could open it. (blue arrow photograph below)
4) The case color is horrible. The "Bumper black" that I chose from my inventory is way too glossy. It does not look integrated to the headliner material. I initially thought that by clearing the paint I had made the finish glossier. Test painting a substitute plastic material proved that was not the case. The bumper paint was just not the right choice. (see second photograph below)
Solutions for the first problem. Paint the washers or cover them.
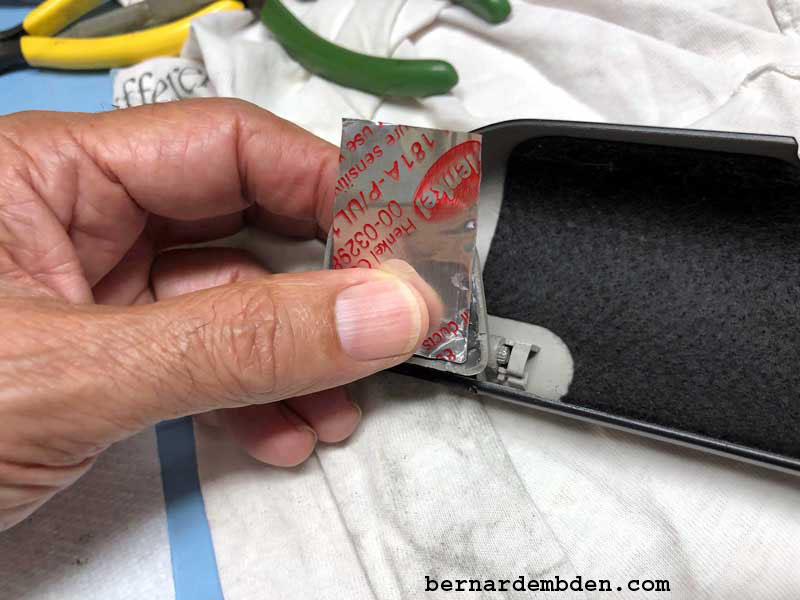
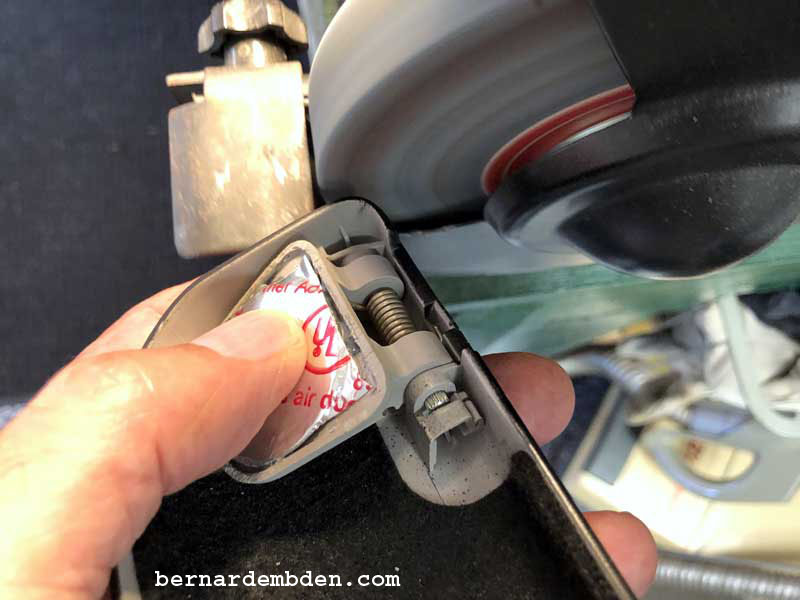
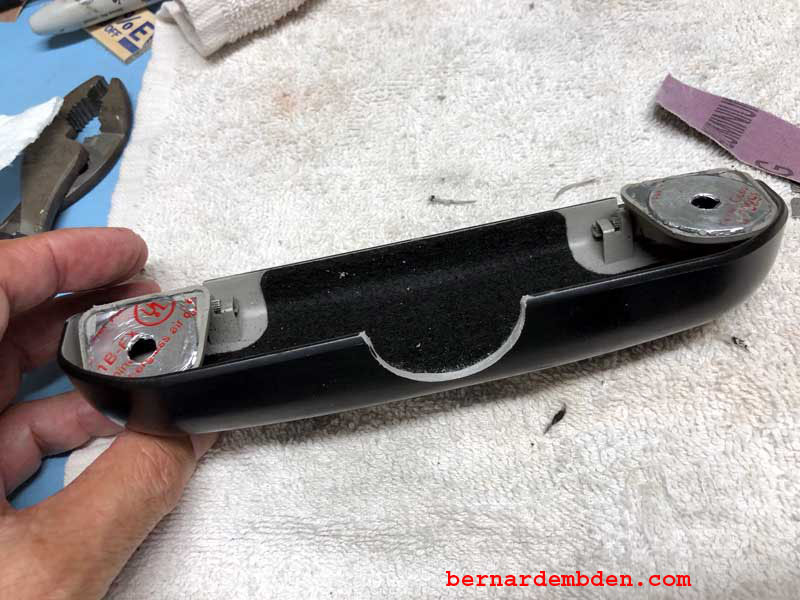
I decided to cover them. I needed a non-rust material that would cover the metal washers and was thin enough to not affect the insert depth of the stand-offs.Aluminum tape
The same stuff used by air-condition technicians to seal up air ducts. It met all the criteria. It had a self-stick backing, it would not rust and it was thin. (photographs below)
The second problem would require some trimming of the case on both sides where it contacts the headliner as it opens and closes.
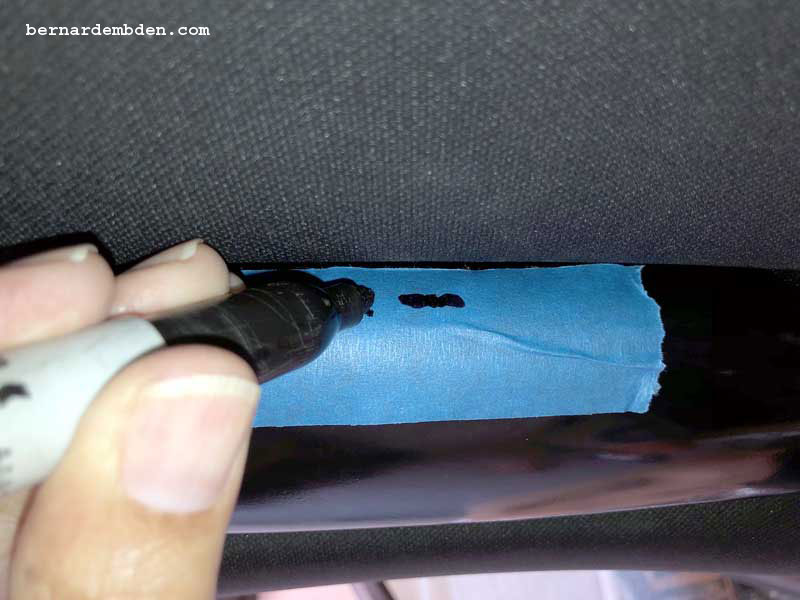
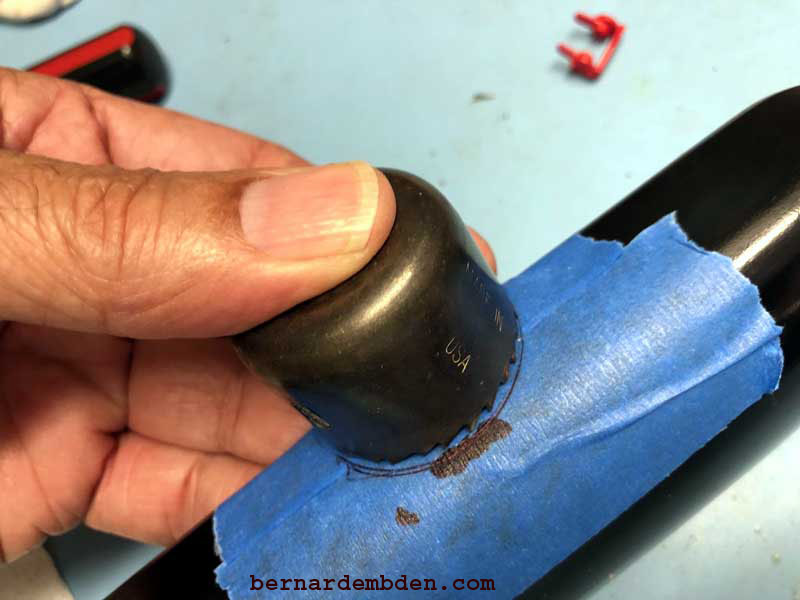
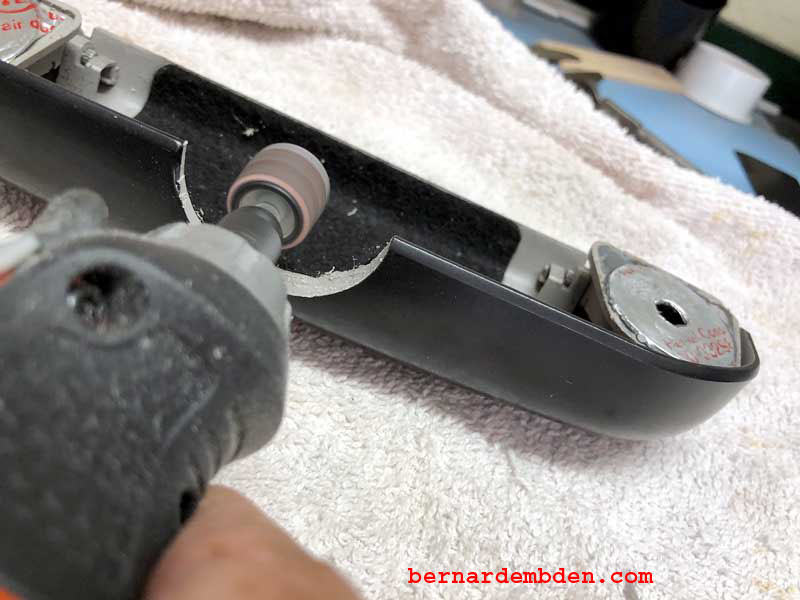
Mark both locations that are rubbing as the case closes. Using a grinder (photographs below) I removed the offending material from the case. Test fit to make sure problem is resolved.
The third problem would require more surgery on the sunglass case. With the case installed, I marked the depth necessary for the notch to be extended to easily open the case (photograph below).
After tracing the area to be removed I used the appropriate size hole saw and my drill press to remove the excess material. (see photographs below).
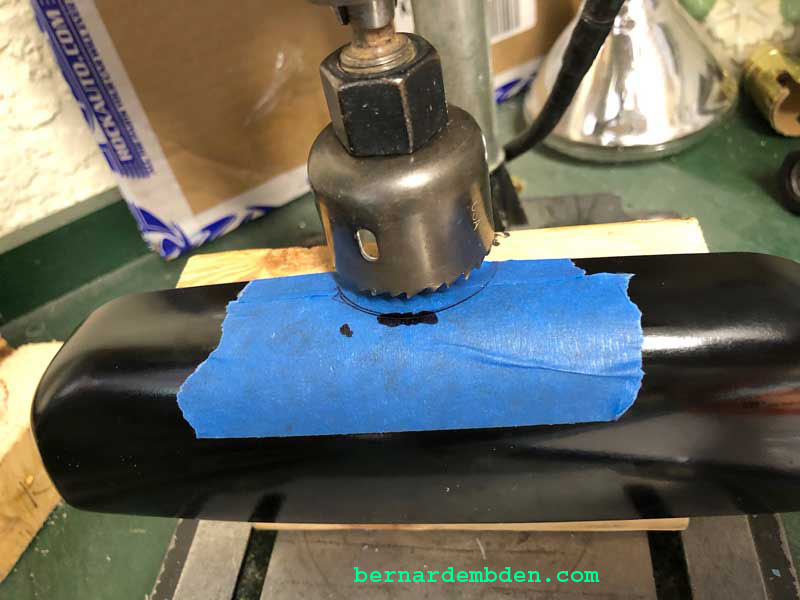

I used my Dremel to clean up the opening.
The fourth problem was the case color.
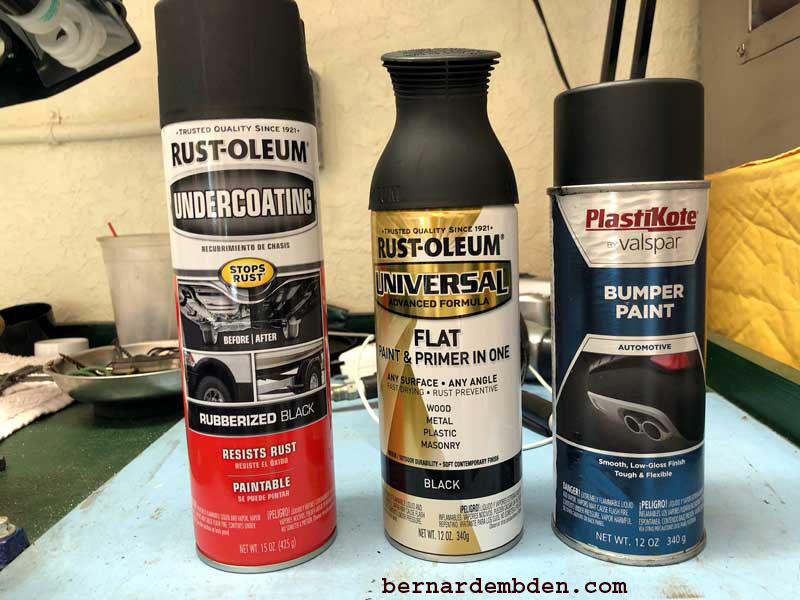
I decided to go old school in choosing a paint color. I purchased a number of shades of black paint (including paint designed to undercoat) and sprayed samples on pieces of metal stock. After drying I compared the two best samples to the original color and also to the removed grab handle. (Photographs below).

It was obvious that the flat black and undercoat paint matched the grab handle the closest. I then compared those two samples to the grab handle.

I then compared the flat black and undercoat paint samples to the headliner.
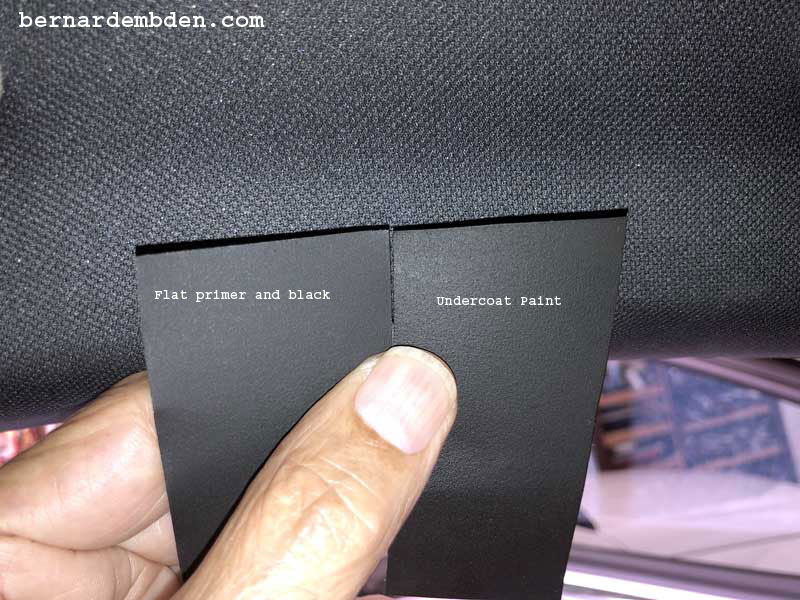
Against all odds the Rust-oleom undercoating (IMHO) matched the grab handle and headliner the closest. The reason was not only the color, but the texture was somewhat similar to the headliner.
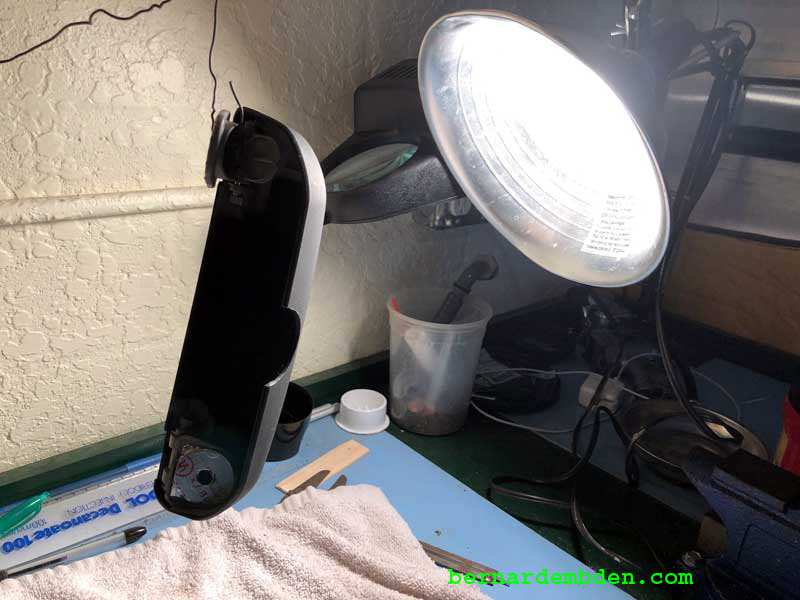
After a light sanding, plastic primer on the exposed edges the case was ready for two coats of undercoat paint. Note that this undercoating "paint" takes a long time to completely dry. My process was to let it air dry, then 48 hours close to my "Heat lamp" (photograph below).
If done properly the result should look like the following photographs.
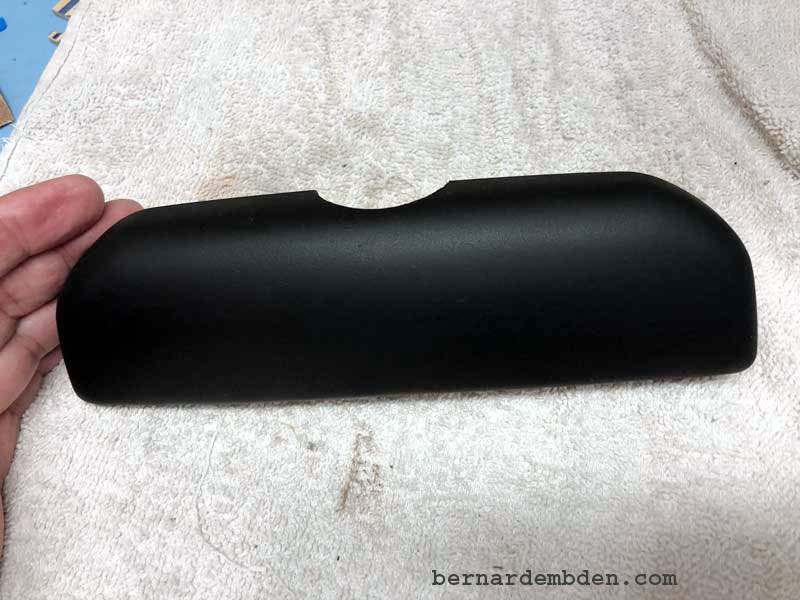
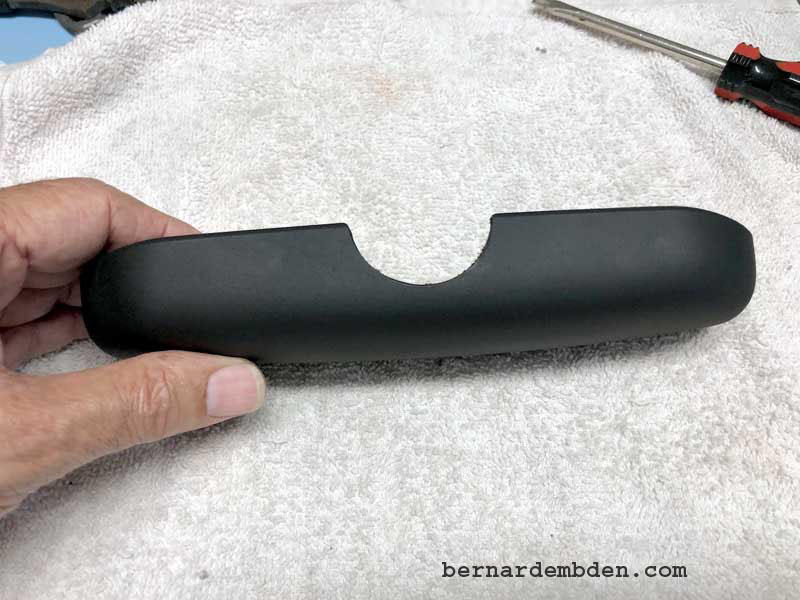
(Photograph below) Presenting the newly painted case against the cars headliner reveals a color and texture that blends in extraordinarily well with the headliner material.
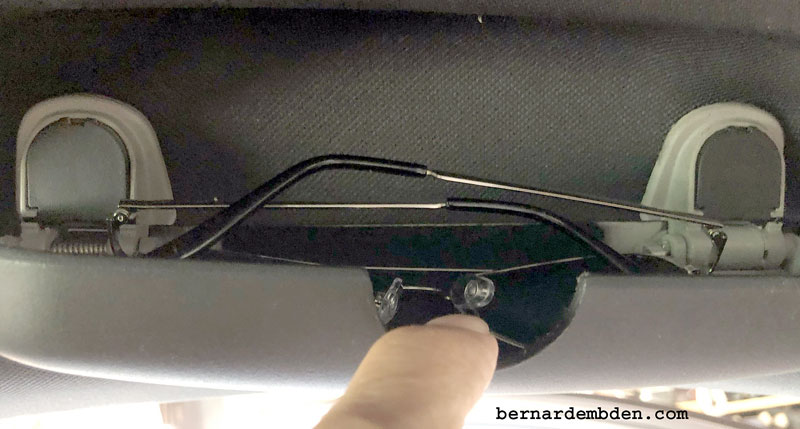
With the rust, rubbing issues, opening notch and paint now sorted, offer up hinge and standoff to mounting recess in the headliner. Note that I have changed the standoff from metal to plastic, retaining the same depth.
Using a T35 Torx screwdriver hand tighten both screws. Attach screw covers. (and sunglass?) photographs below
Project complete. This project was more of a PIA than I would have believed. That said:
I now have a place to store my sunglasses.