
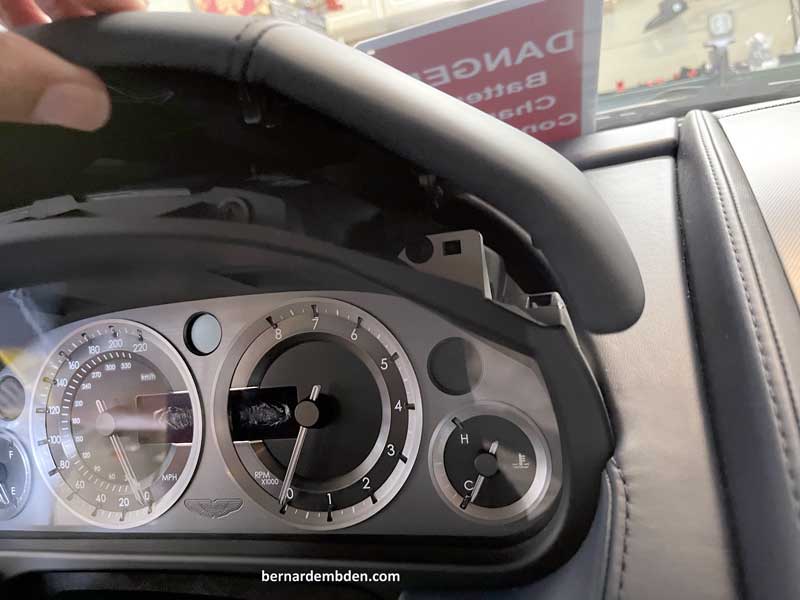
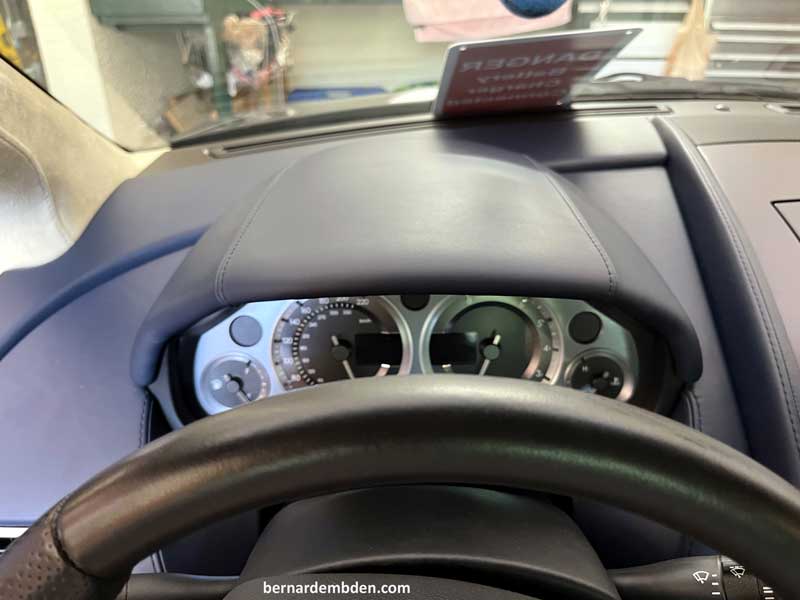
I could no longer read the dashboard display.
As part of Aston Martin's manufacturing process, a polarizing film was installed on the dashboard display surface, ostensibly to enhance reading the vehicle's display in the sunlight.
This has proven to be a terrible idea.
Over time, and heat, the polarizing film became hard, brittle and opaque. Not content with obscuring all visibility of the display, the polarizing films adhesive bonds with and infiltrates the top surface of the plastic display panel.
Essentially, this film is now part of the top level of the vehicle's plastic display, and virtually impossible to remove.
This is not an isolated problem. I believe that all Aston Martins built from approximately 2003 to 2017 used the same dashboard and the same polarizing film.
Those vehicles that are over 10 years old are now seeing these issues. My car, a 2007 Vantage started exhibiting problems when reading the display a couple of years ago. At first I attributed the problem to failing eyesight, then realized that the display was literally being obscured before my eyes.
Purchasing a new display was not cost effective. The only solution was to fix the problem.
I was certain of one thing. The fix would not include replacing the polarizing film.
This project starts by removing the top cover of the dashboard. Pressure upward from the front of the panel releases the four clips. (photograph below).
You might find a strap glued to the top cover (binnacle) and secured by a center screw. Remove screw (strap can be discarded) along with the other 4 screws across the top of the display housing. (photograph below).
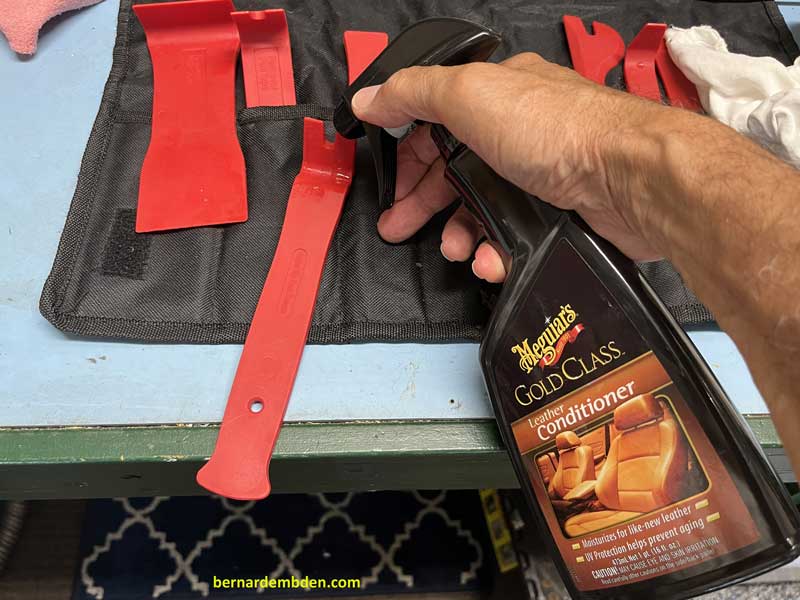
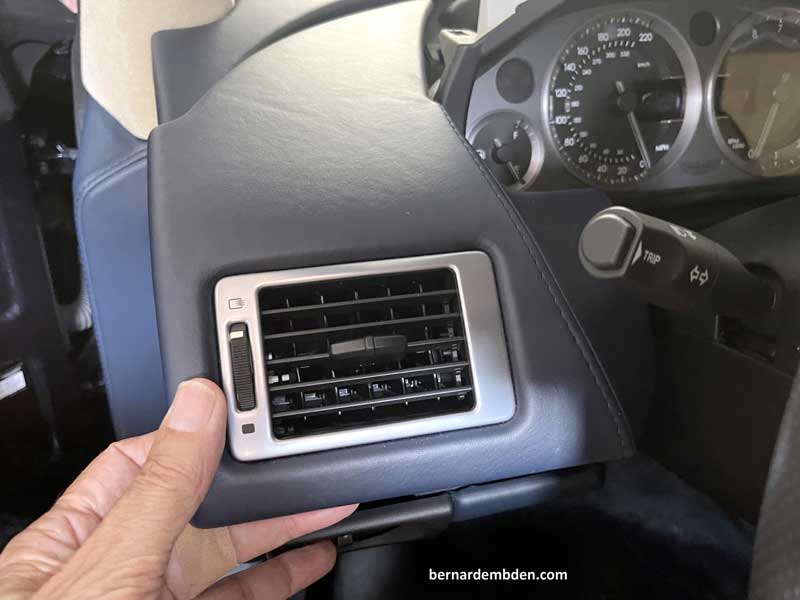
With all the available screws removed, the left and right dash cover panels have to be removed to access the remaining hidden screws. These dash panels can be a problem as there is no way to apply leverage. Usually I do not recommend wedging anything between the leather panels, as this can lead to damaging the leather. If you have to, then coat the trim tool liberally with a quality leather conditioner prior to use. (photographs below)

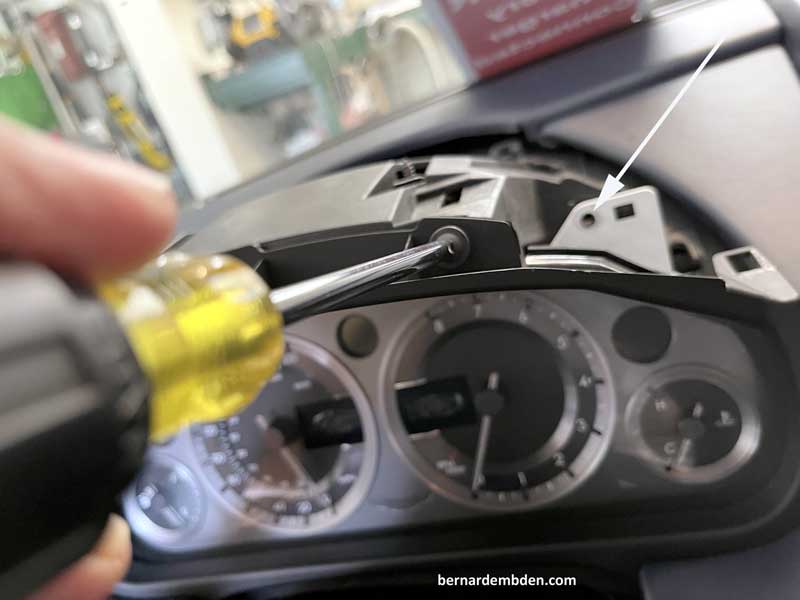
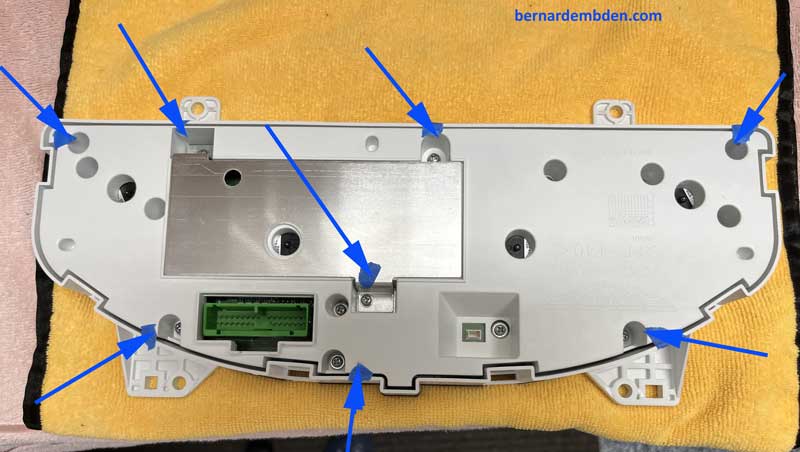
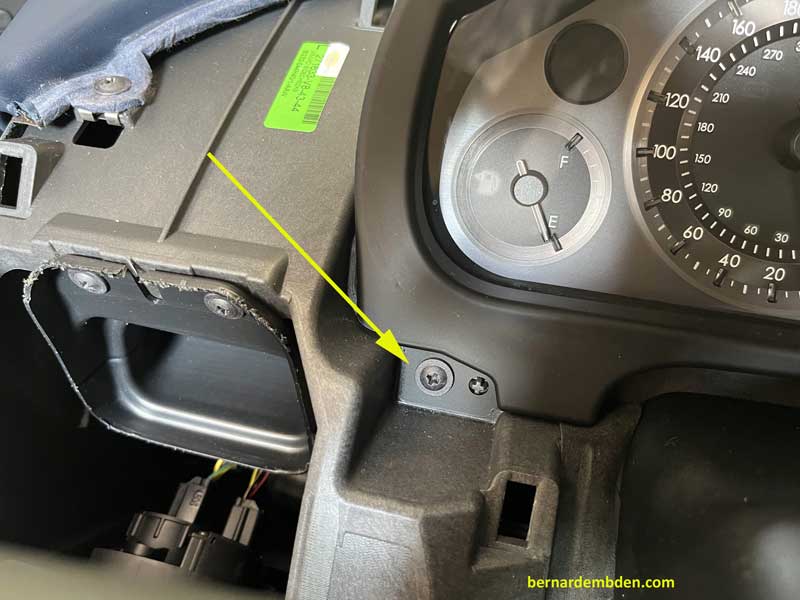
With both dash panels removed, the bottom screws securing the dash surround are now accessible. (yellow arrows photographs below).
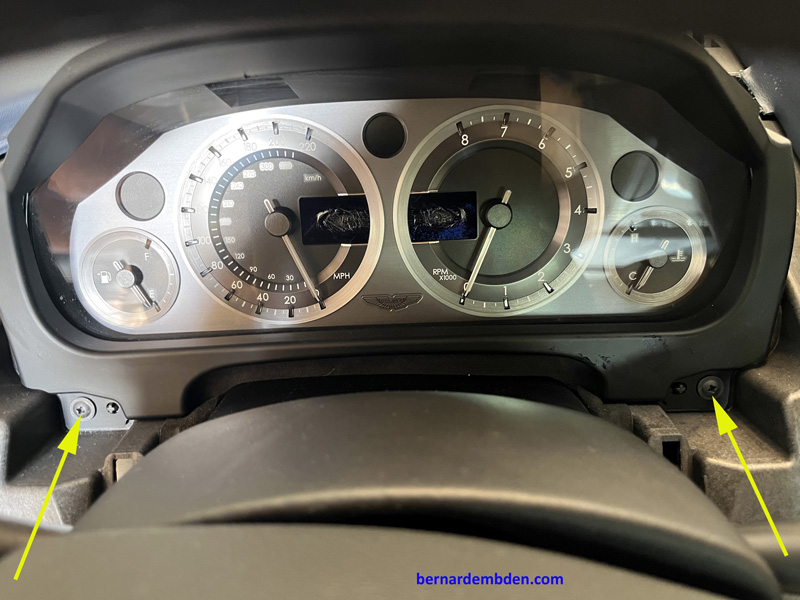
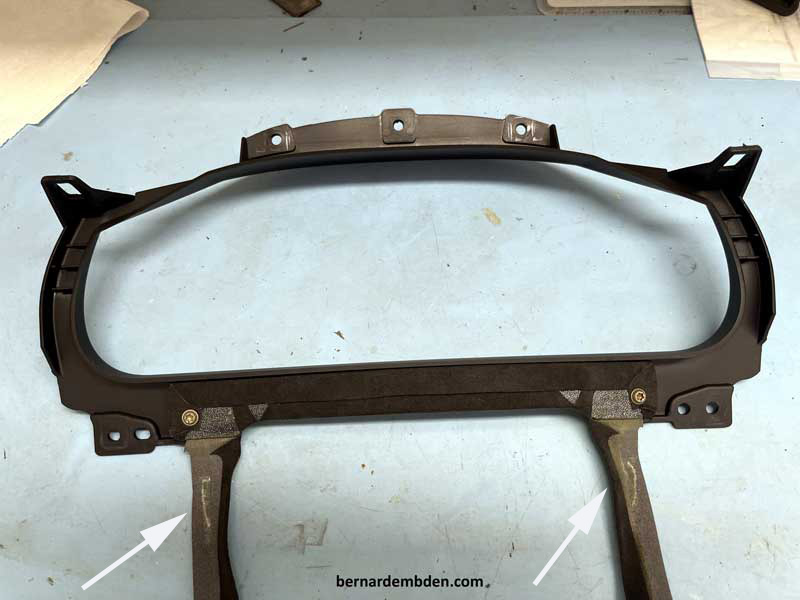
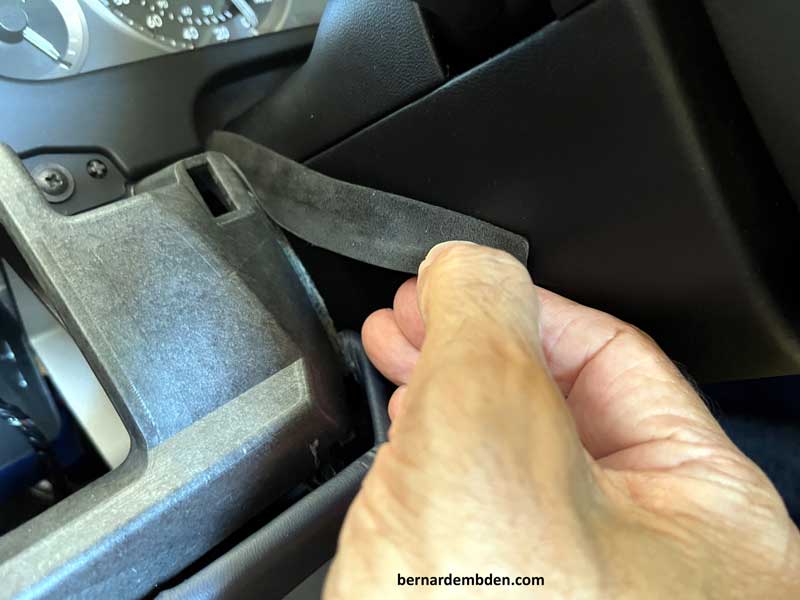
The two bottom screws releases the dash surround. Note location and placement of the two felt/leather strips used to seal the opening between the steering column and dash panels. (white arrows photographs below)
Removal of the dash surround reveals the last two screws securing the dashboard to the vehicle. (green arrows photograph below).

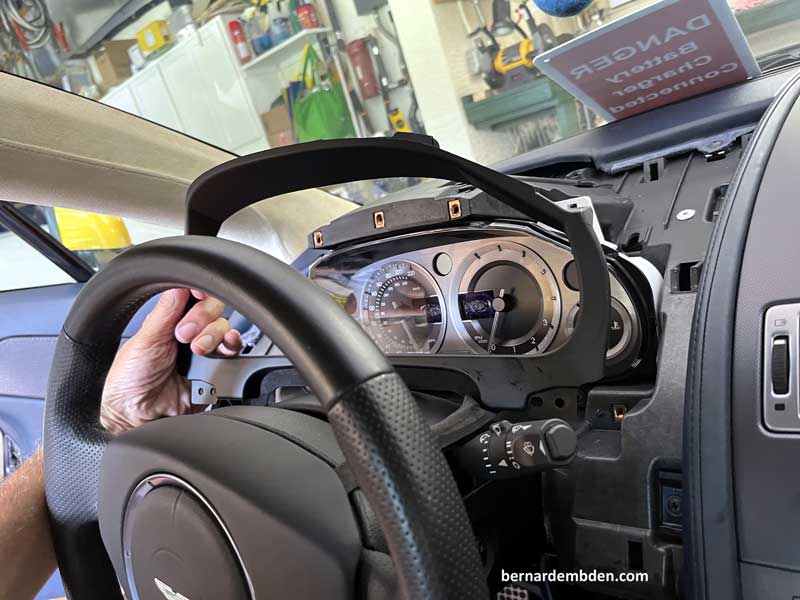
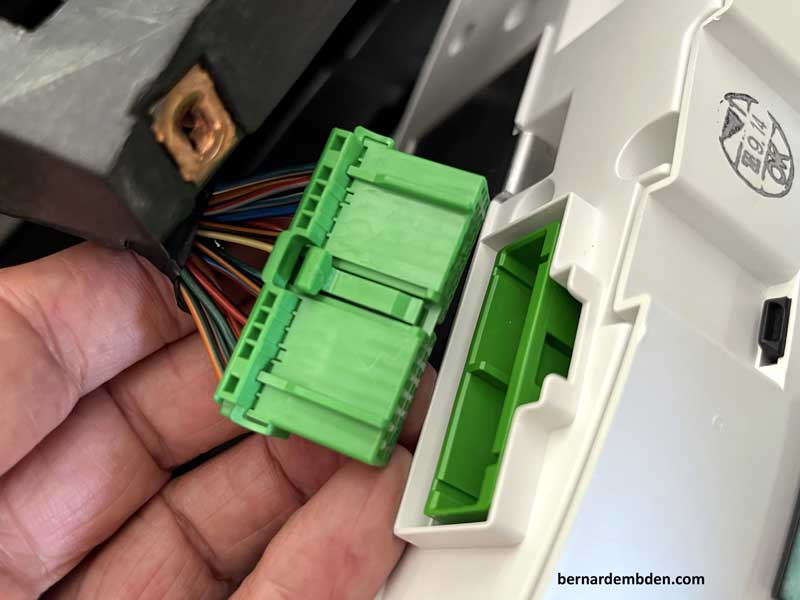
Tilt the dash forward and remove the electrical plug from the top of the dash board. (photographs below)
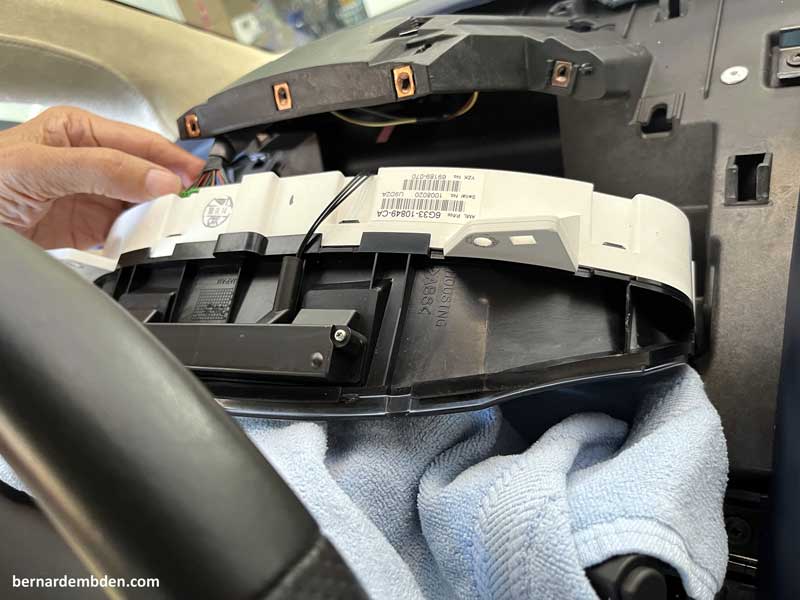
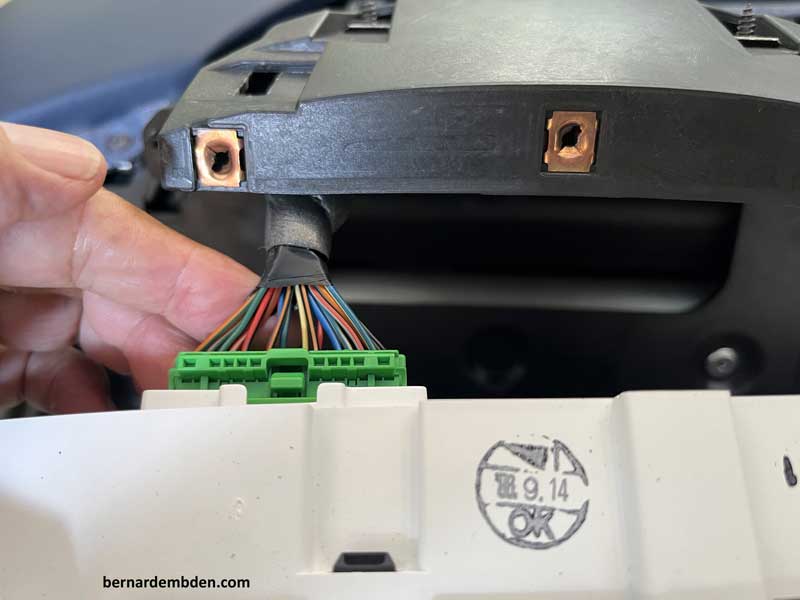
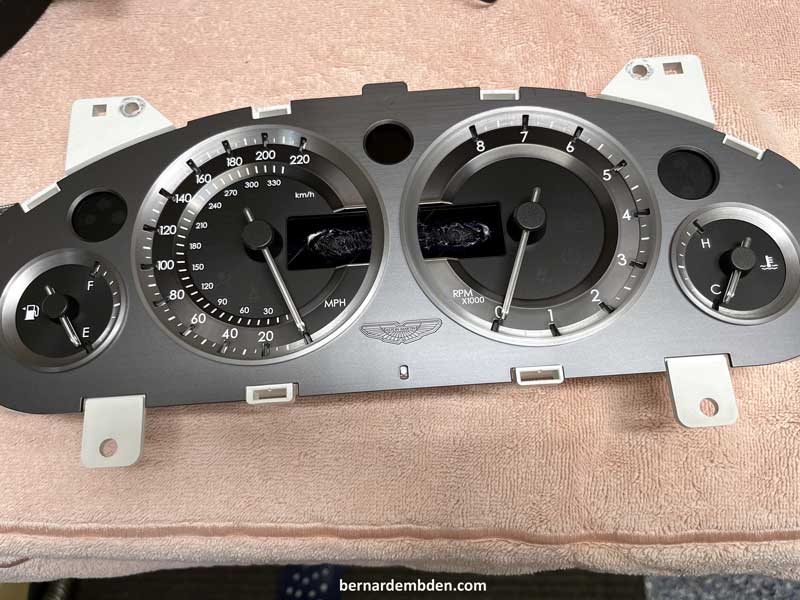
Dashboard is finally out.
Remove the small plug rom the top of the dashboard. (photograph below)

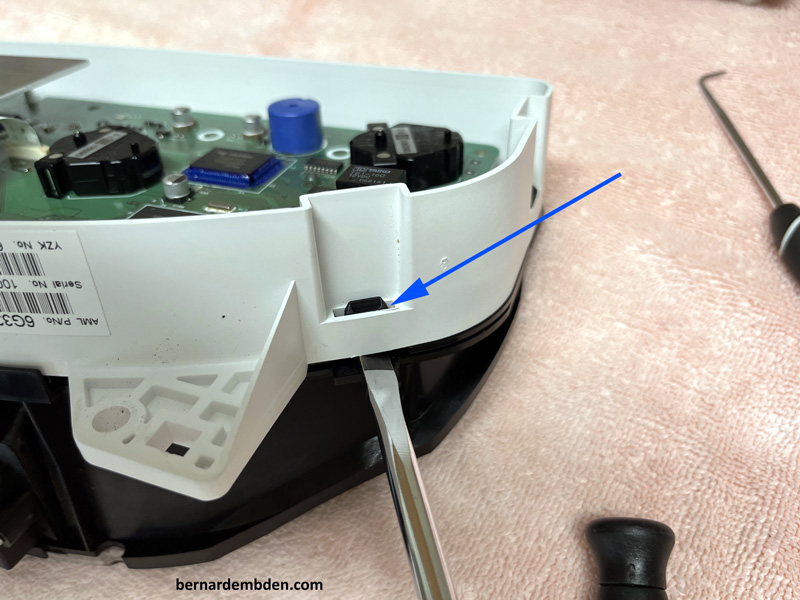
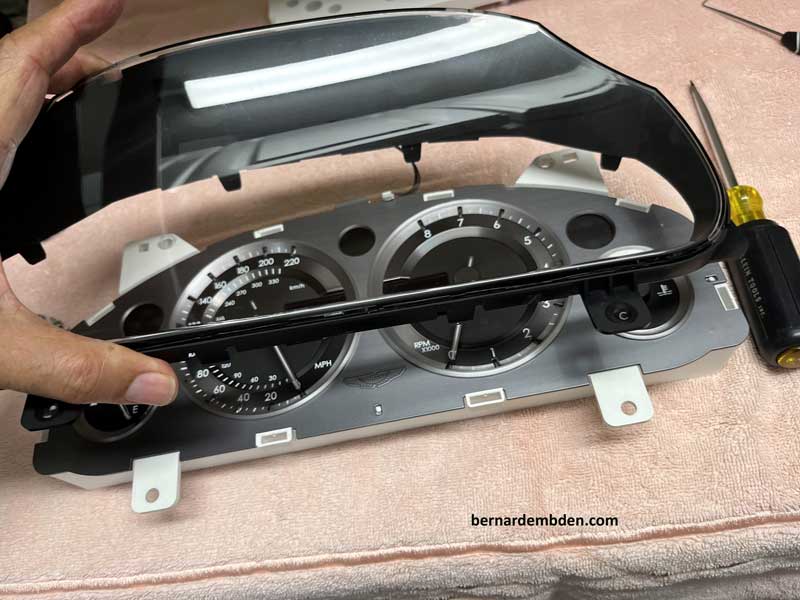
Use a screwdriver (or substitute) to lever apart the plastic facing while simultaneously releasing the tab lock. (blue arrow photograph below).
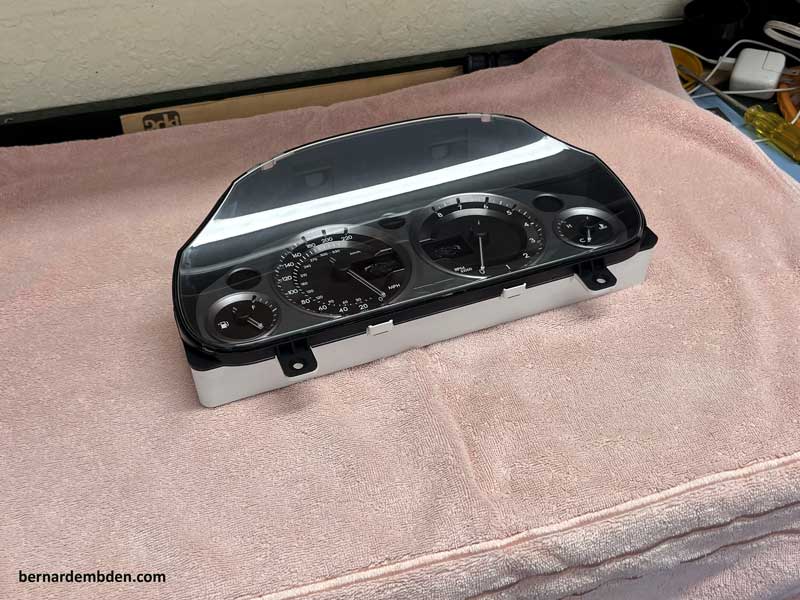
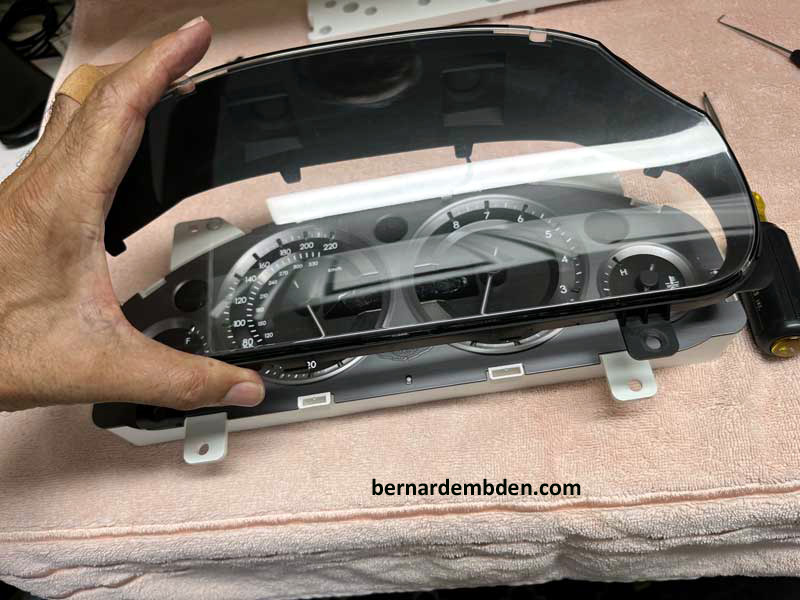
Remove front cover plastic shield from the dashboard unit.
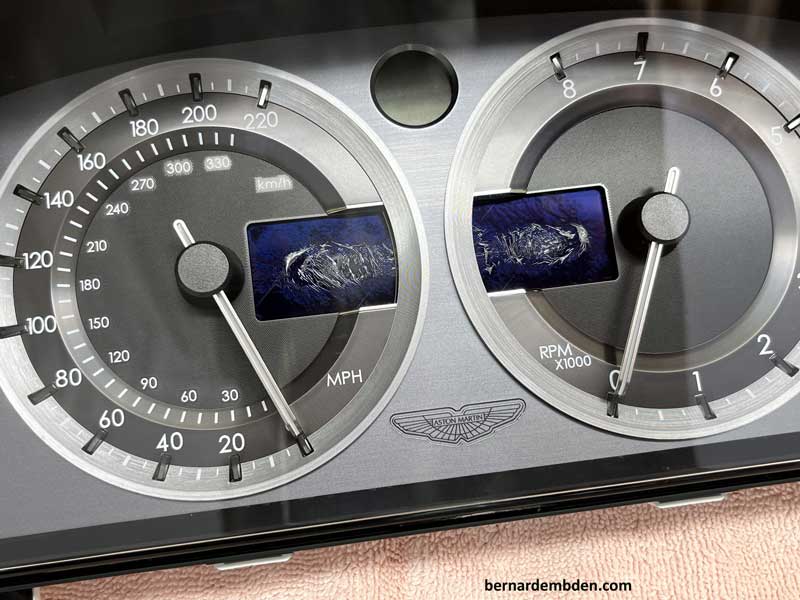
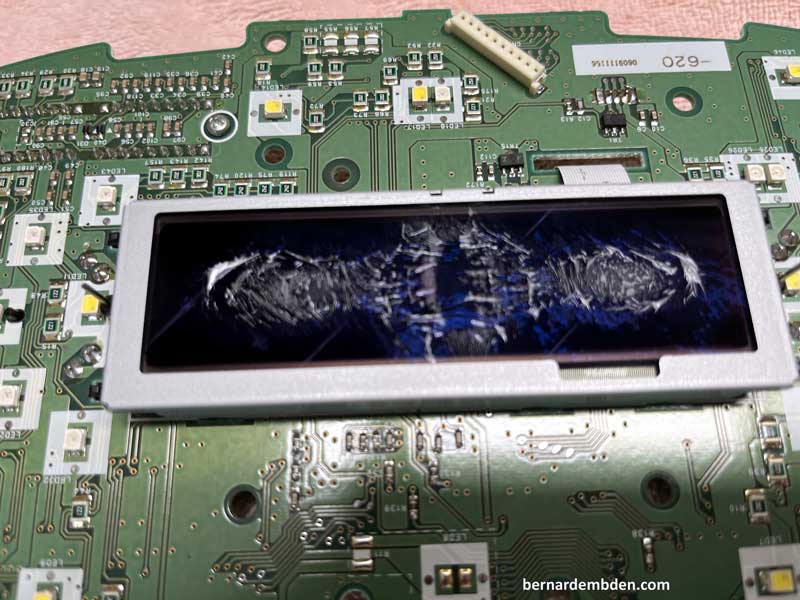
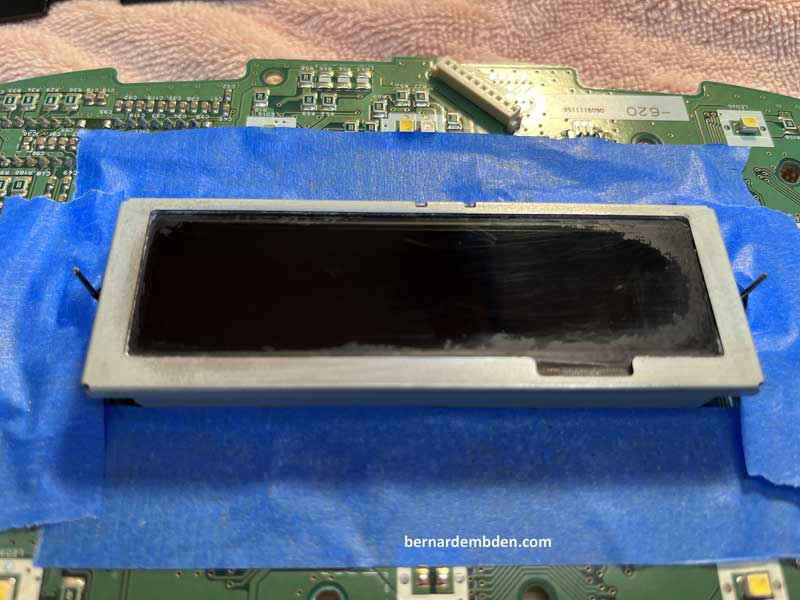
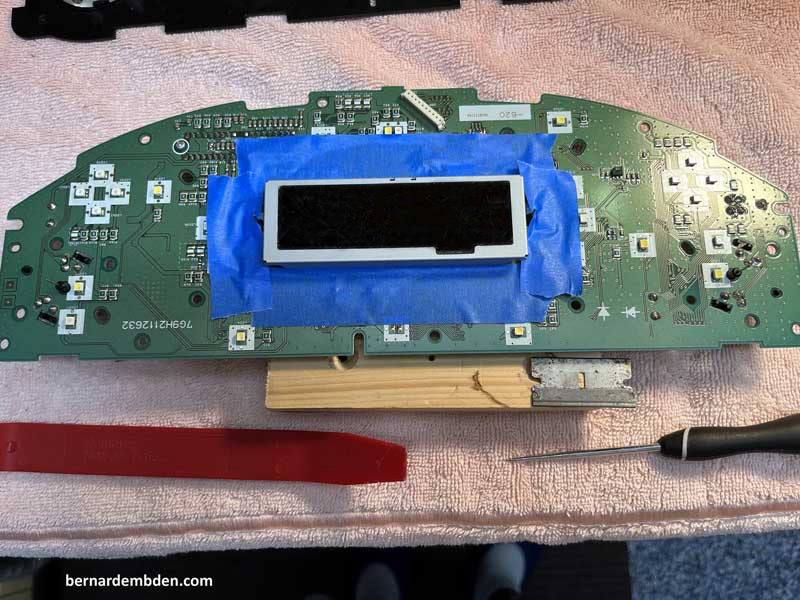
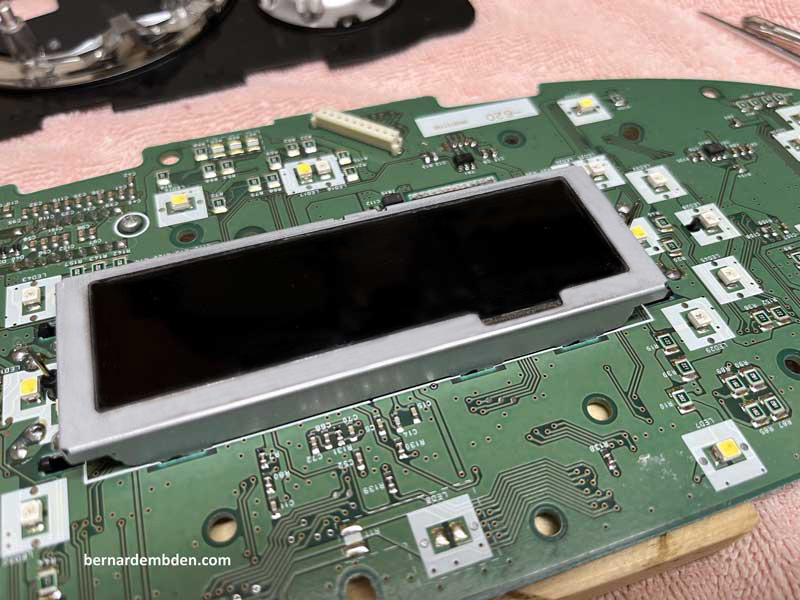
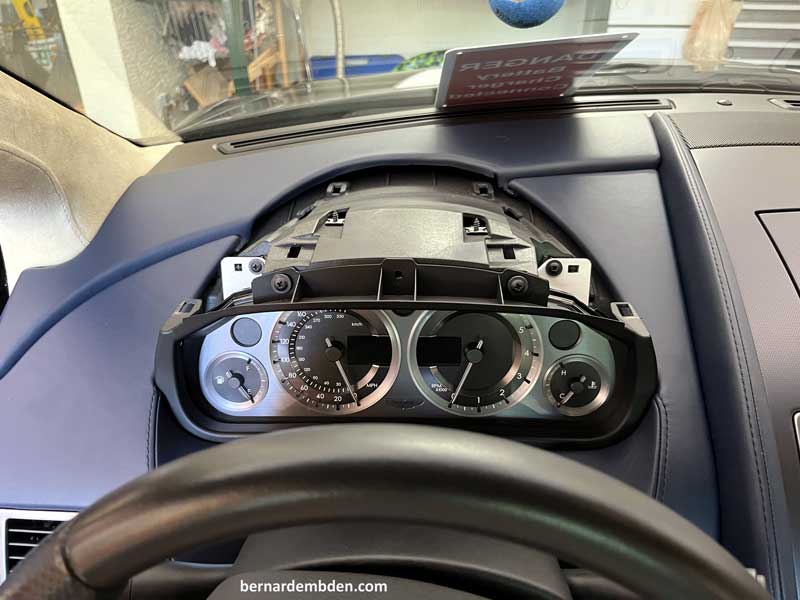
The state of the damaged screen display is now clearly visible.
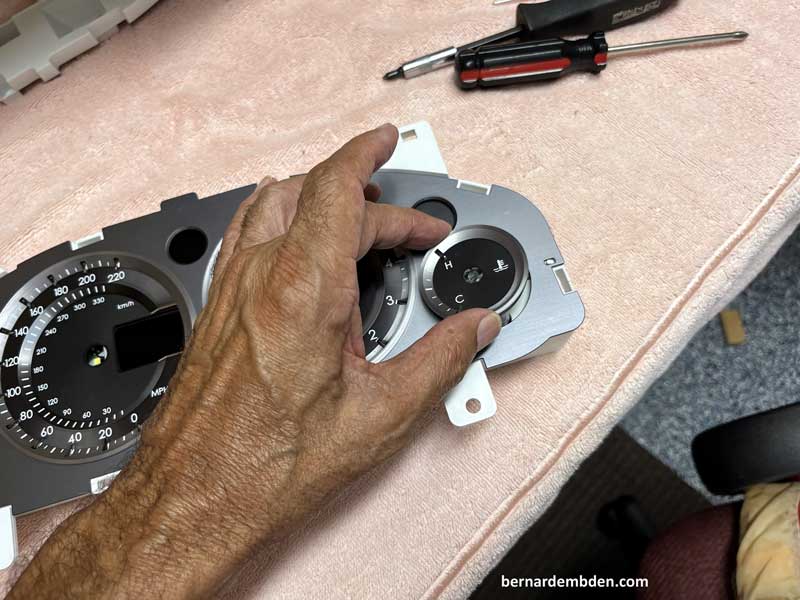
Before taking the back of the dashboard apart, the needles for the various gauges have to be removed. There is no need to memorize or photograph the needle positions as they will be returned to their default positions.
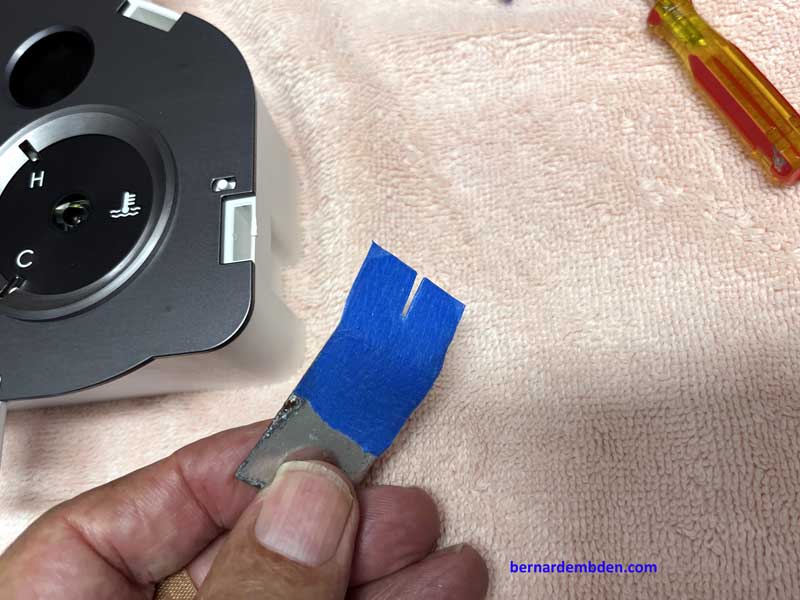
You could just get a pair of needle nose pliers and drag them off. This is a bad idea. One slip of the pliers and you have permanently scratched the needle center pivot. A better idea is to fabricate a simplistic removal tool.
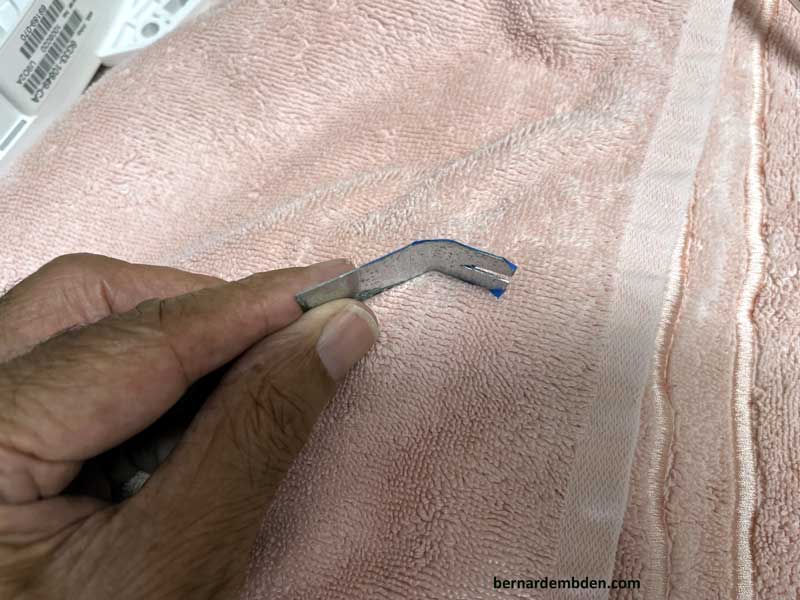
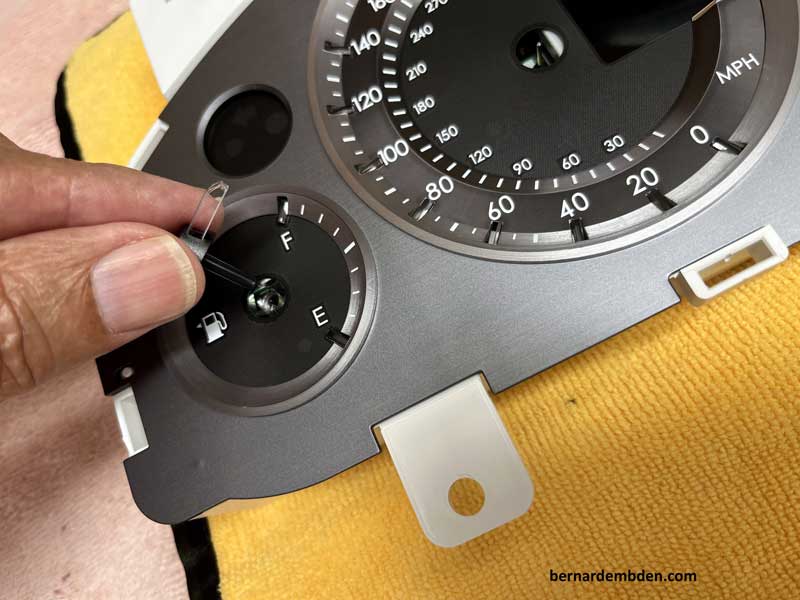
I started by cutting a slot in a section of sheet metal. The slot needs to be wide enough to go around the needle shaft. A bend was made into the sheet metal to provide a fulcrum. Finally the back of the tool was covered with blue tape to protect the face of the gauges. (photographs below).
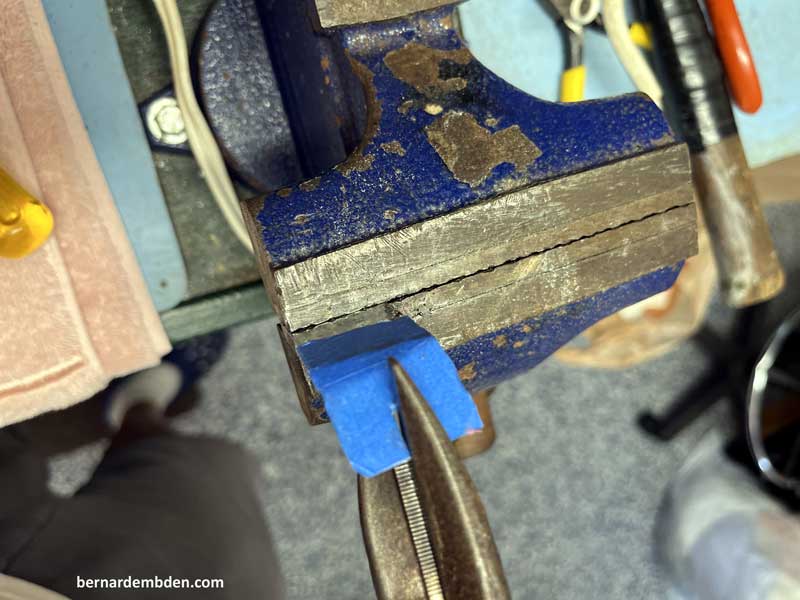
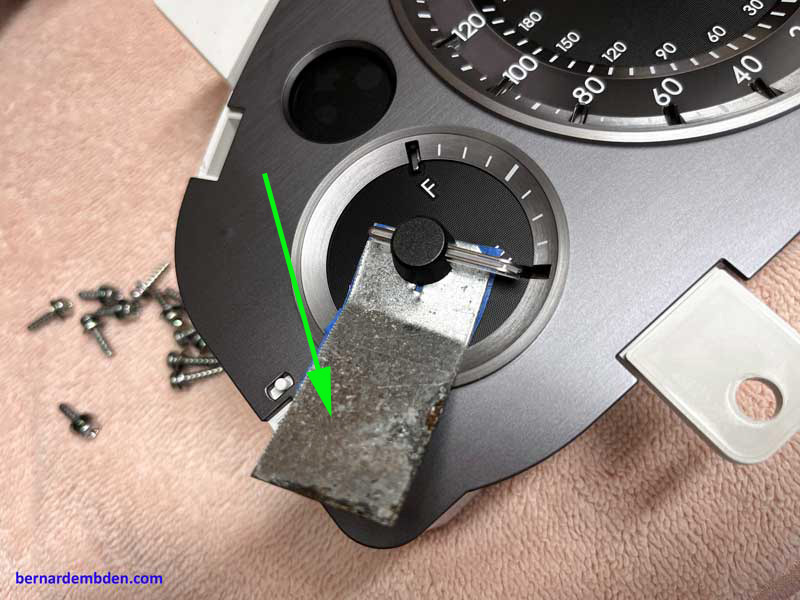
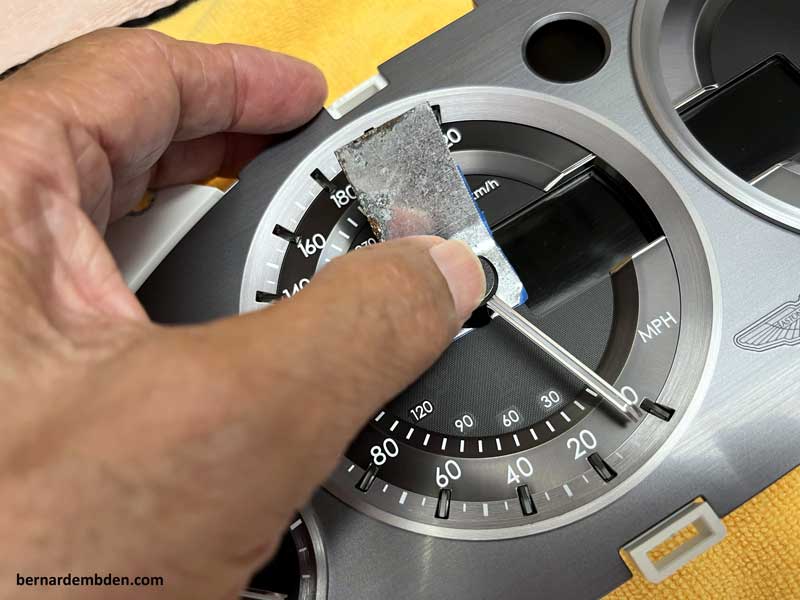
To remove the fuel gauge needle; place the removal tool under the needle and around the needle shaft. Apply pressure downward via the fulcrum (green arrow photograph below) while simultaneously pulling up on the needle center with your fingers. Repeat for the rest of the gauge needles.
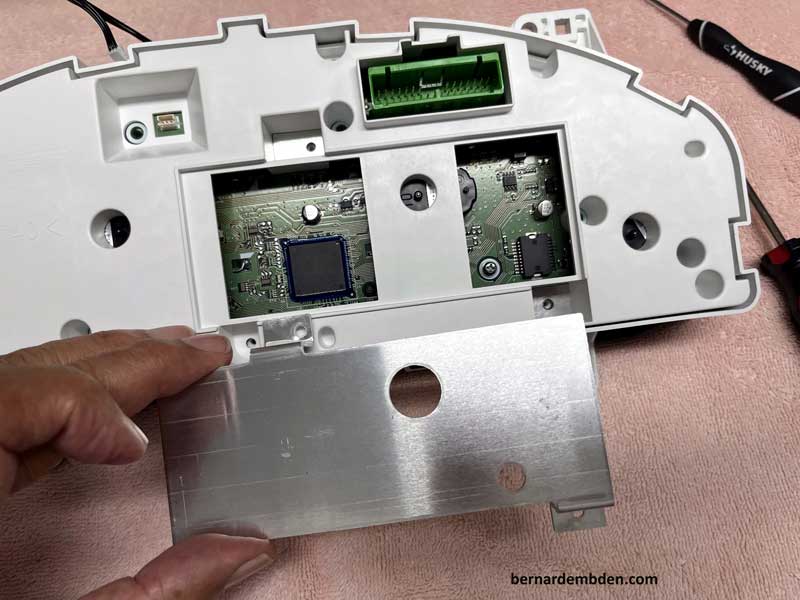
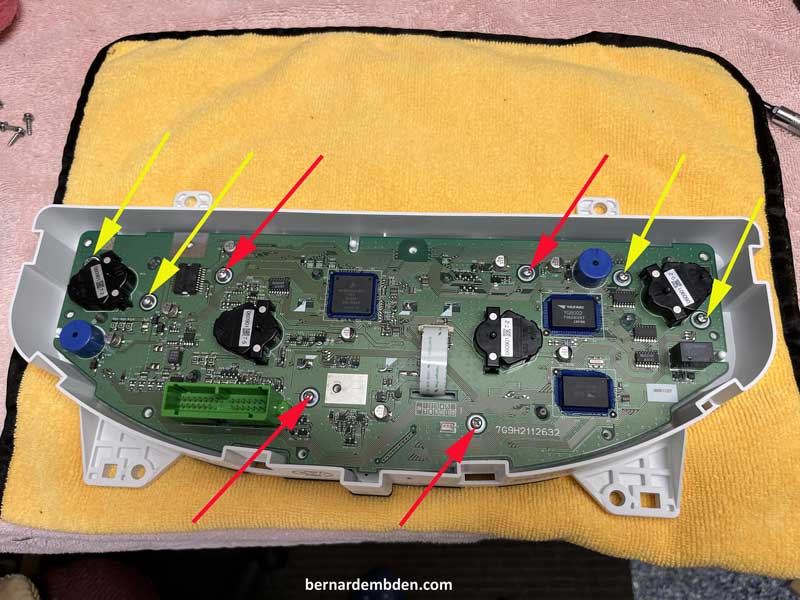
With all gauge needles removed, place the dashboard face down on a towel to protect the gauge faces and remove the two screws holding the metal cover along with six screws securing the back plastic cover (photographs below).
Photograph below. Remove the six additional screws that hold the gauge faces to the logic board. Two each for the fuel and temperature gauges (yellow arrows) and two each for the speedometer and tachometer gauges. (red arrows).
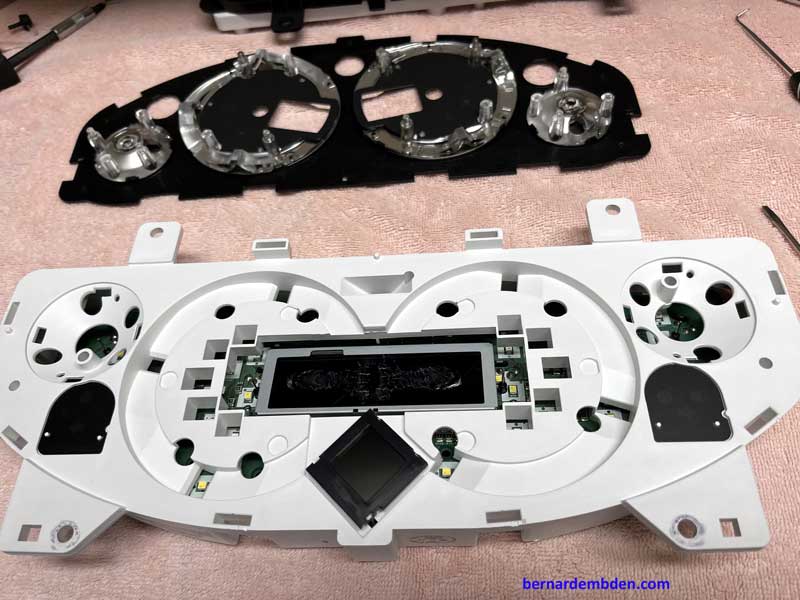
Turn the display over and remove the gauge faces.
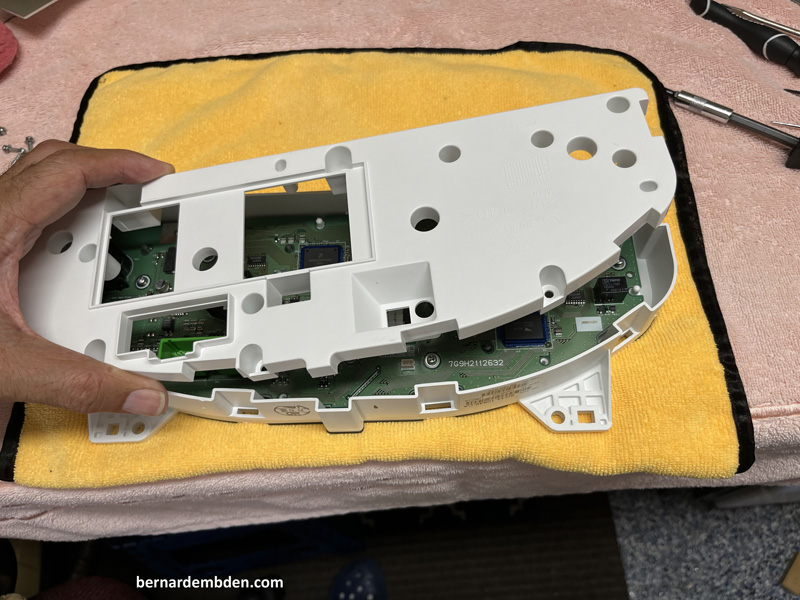
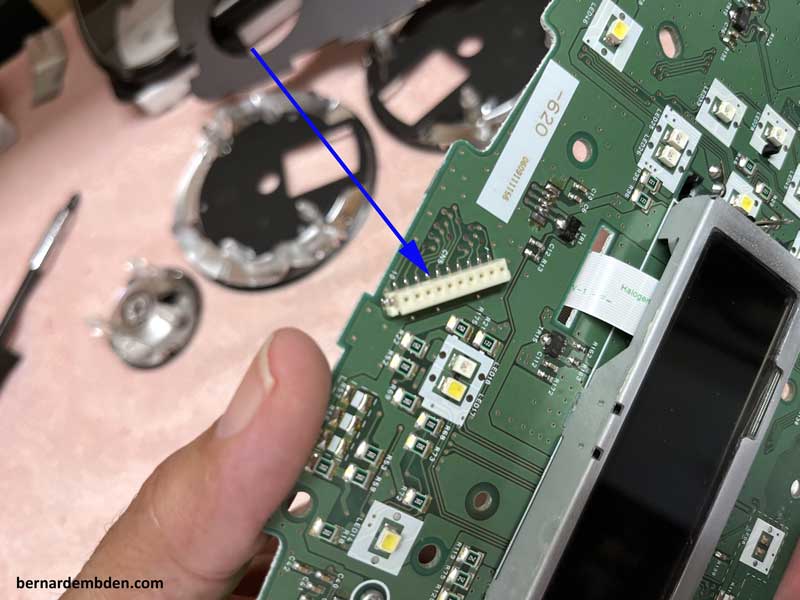
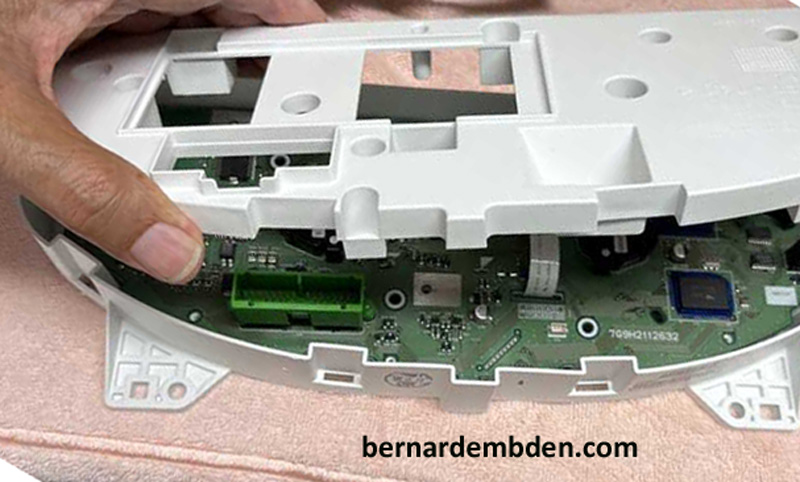
Remove the logic board. There is a pin connection at the top of the logic board that requires moderate pressure to disengage. (Blue arrows photographs below).

1) Remove the plastic display from the logic board. Wet sand the display to remove the contamination and reinstall it on to the logic board.
2) Work with the display while it is installed on the logic board. Understanding that this option removes the wet sanding option.
Option one was the sensible option. Removing the screen from the logic board was not that difficult, as a ribbon cable provides the data to the screen.
I was going with option two.
The objective was not to inflict anything other than surface scratches to the display in removing the baked on film. I started by heating the display with a hair dryer. Be careful here. The surface is not glass, its plastic and plastic will melt. I used the low setting and constantly moved the heat source across the display surface. (Do not use a heat gun).
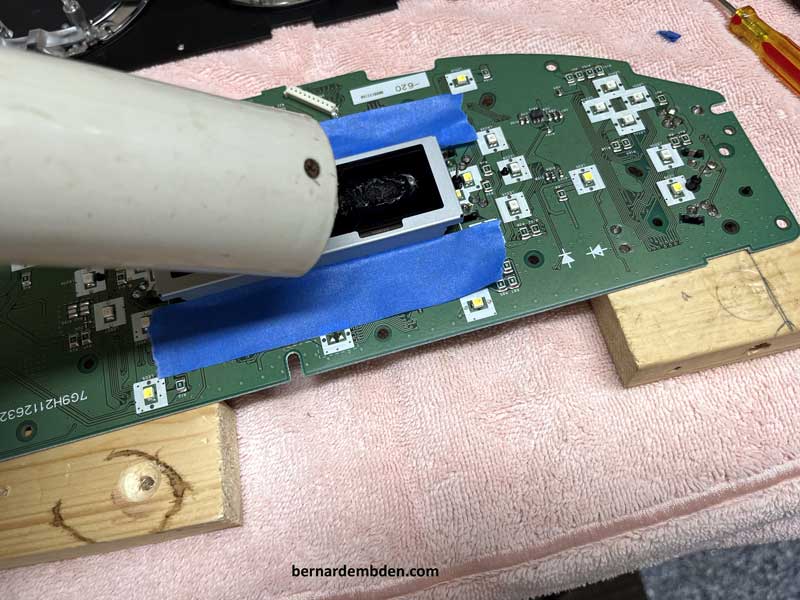
Using hair dryer and my finger nails I started to scratch off the top layer of the polarizing film one millimeter at a time.
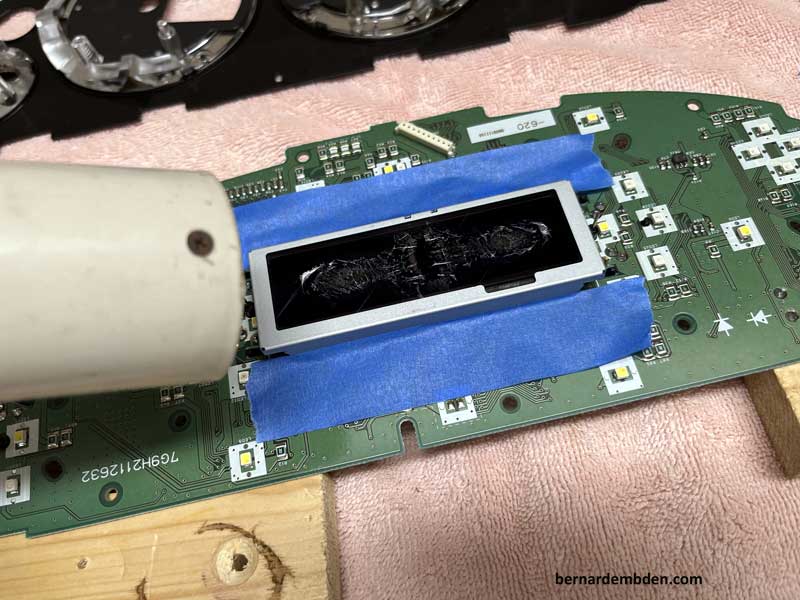
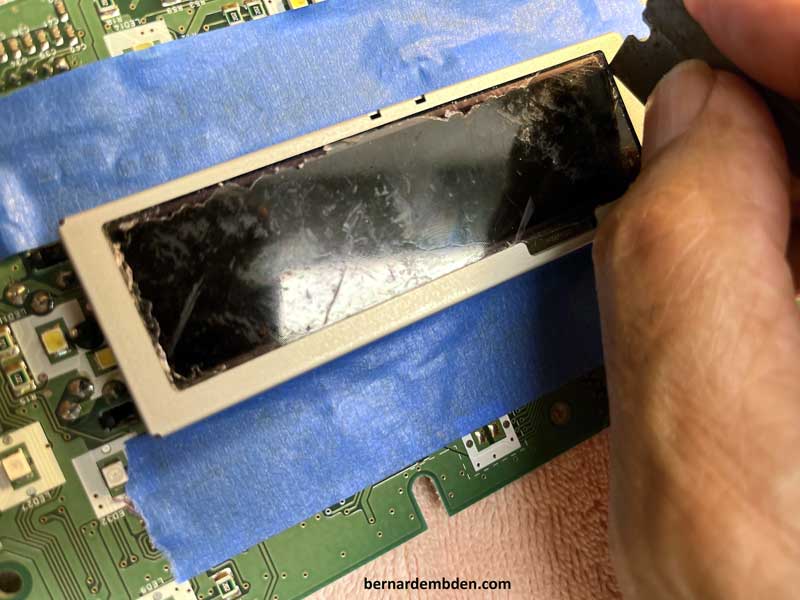
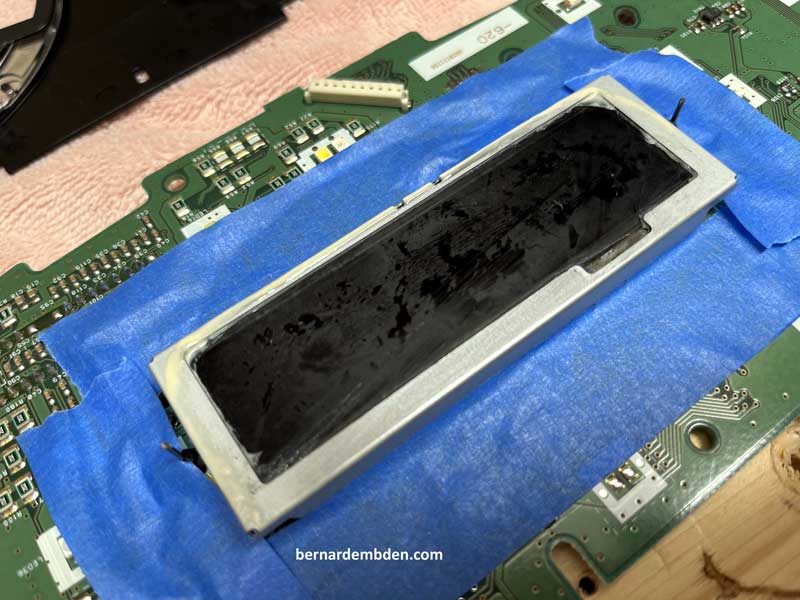
Do not rush this process. Resist the temptation to use a razor or screwdriver or chisel. It’s inevitable that some light scratching will occur, however the objective is to minimize the damage to the display surface. Many hours later most of the film had been removed (along with my fingernails) with the exception of the film around the edges. Using a razor blade I cut through the film at the edge of the metal surround. (photograph below)
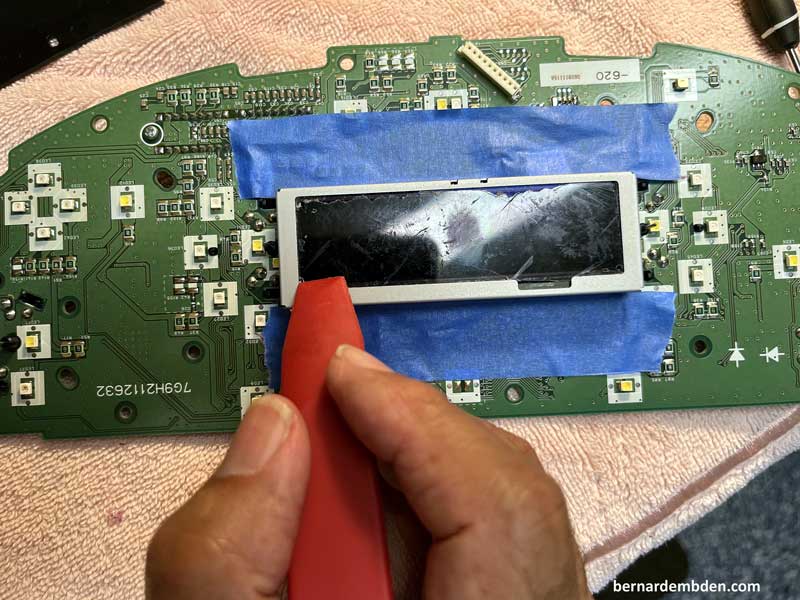
With minimal fingernail depth remaining I resorted to a plastic trim removal tool to remove the last visage of the film at the edges.
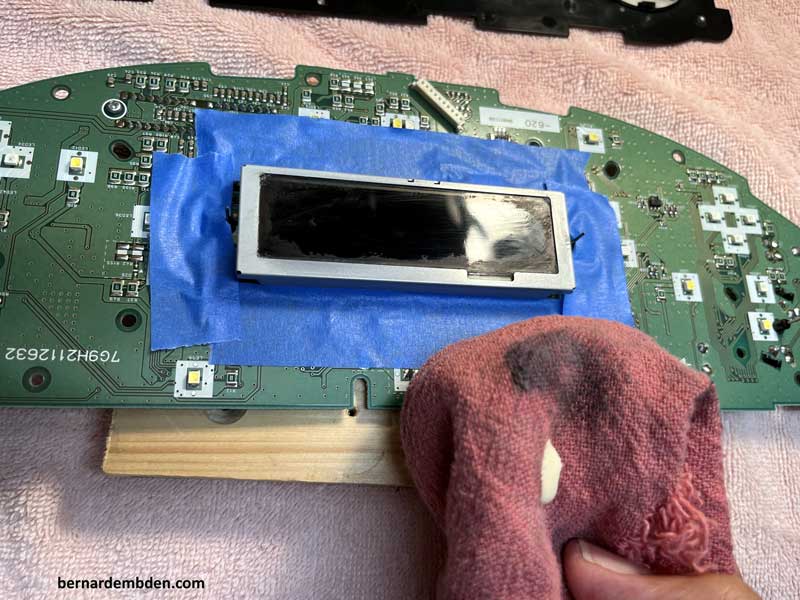
I then brought out my secret weapon. 3M Headlight Renewal.
This is a stand-alone paste that removes fine scratches from plastic headlight lens. This product can be applied by hand and doesn’t need water added to the process. Essentially this product is the reason that I was careful about deep scratching the display surface.

First pass. Add a quarter size drop of the 3M paste and rub gently but firmly using a circular motion.
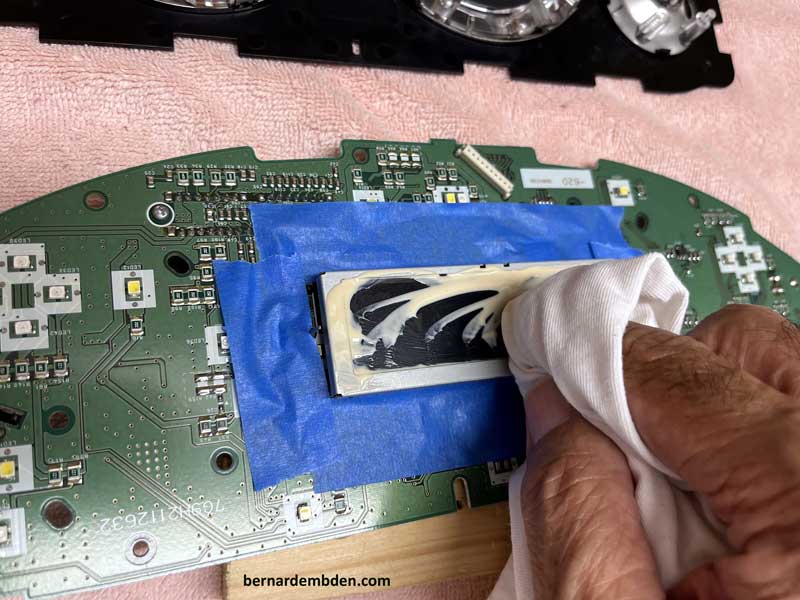
I did not see much improvement to the display surface but the rubbing cloth indicated something was happening. (photographs below)
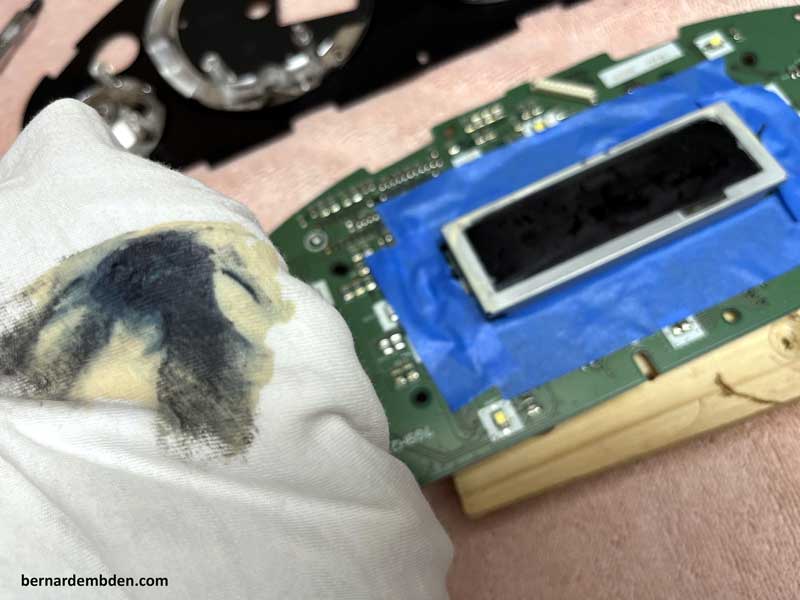
Somewhat encouraged I kept at it.
And kept at it
Changed rubbing material to Terry cloth And kept at it.
Wrapped Terry cloth material around a plastic trim tool to get into the corners. (And kept at it).
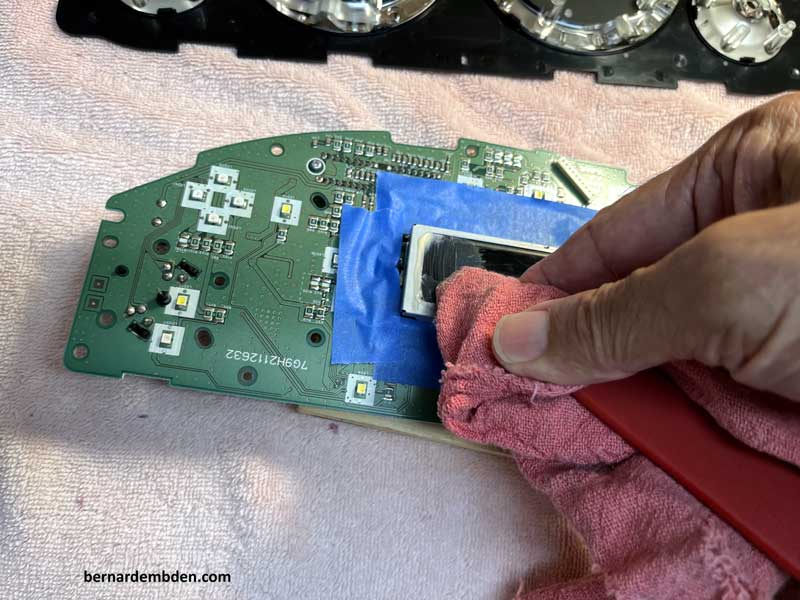
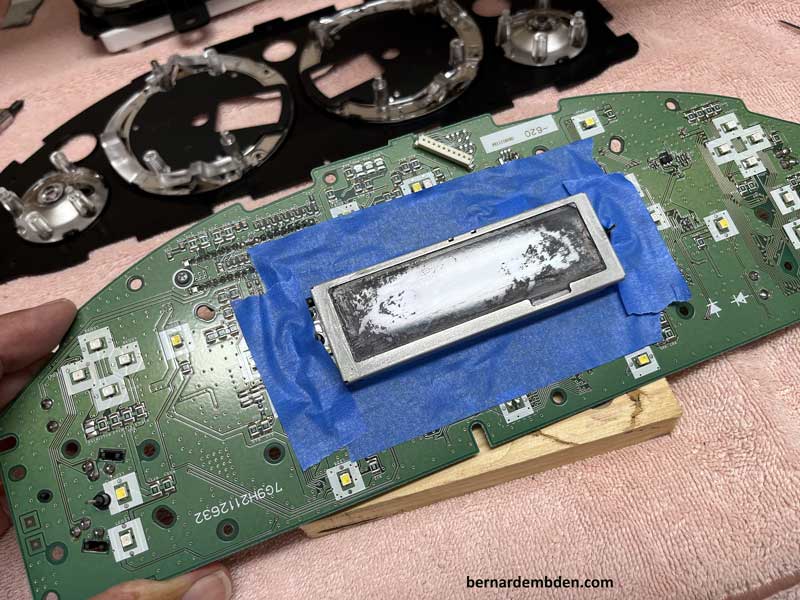
Examine screen under a light source. It’s almost there. (I just kept at it)
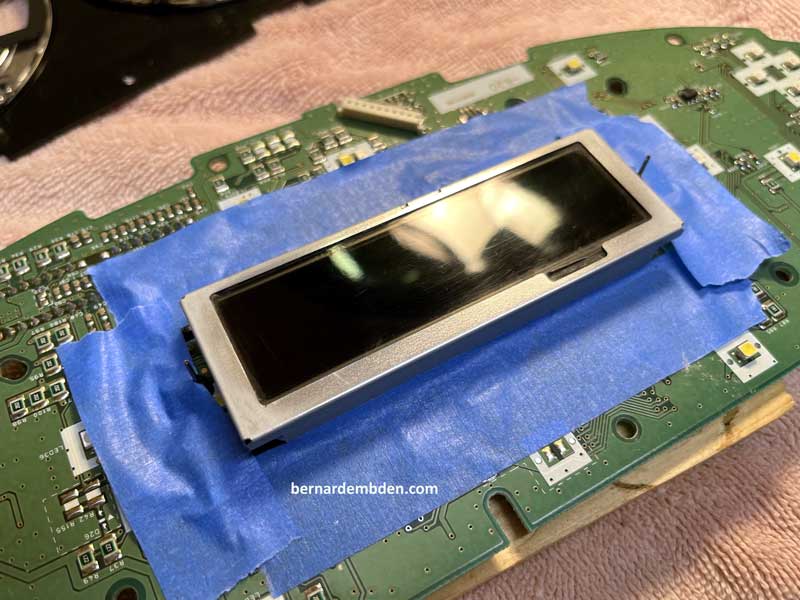
If you are patient and keep at it the completed display surface should look like the following photographs.
Reassembly of the dashboard starts by installing the logic board to the front facing plate. Be aware of the pin connection mentioned prior. Install the gauge dial faces inside the front plate and attached them to the logic board with eight screws.
Offer up dashboard back and install with eight screws. (blue arrows photographs below)
Turn dashboard over and install the gauge needles. There are two variables to be aware of.
Needle position and needle depth.
You can try to install the fuel gauge needle exactly at the empty position. You might get it right after several tries. However, the needle position is easily controlled by installing the needle before the needle stop. Once installed move the needle up against the needle stop, then force the needle to slip against the needle shaft as its rotated back to the exact desired position on the gauge dial.
Example, the fuel gauge needle is installed not on empty, but at the quarter full position. With the needle seated to the correct depth, the needle stop holds the needle at approximately the quarter full position. Now force the needle down to the empty indicator. The needle body will slip against the needle shaft allowing you to stop the needle at the exact empty position.
Needle depth is determined by using the needle removal tool. Place the tool around the needle shaft and press firmly. The thickness of the sheet metal tool will provide the proper clearance between the needle base and the gauge face. (photograph below).
With all four needles installed to the correct depth and stop locations, Offer up the dashboard's front plastic cover and install via the locking tabs.
Install dashboard into vehicle, making sure to attach the top plug.
Install two screws at the base of the dashboard. Install Dashboard surround (two screws) Place the two felt/leather strips from the surround back to their original locations. (you did take note of this didn’t you?) Photographs below.
Note the top center screw is not installed. Usually there is a strap glued to the underside of the binnacle cover that connects to this screw. I ultimately decided to install the center screw and leave the strap unconnected. (Red sign on the windshield is to remind me that my battery maintainer is connected)
Project completed. I can actually read the screen.
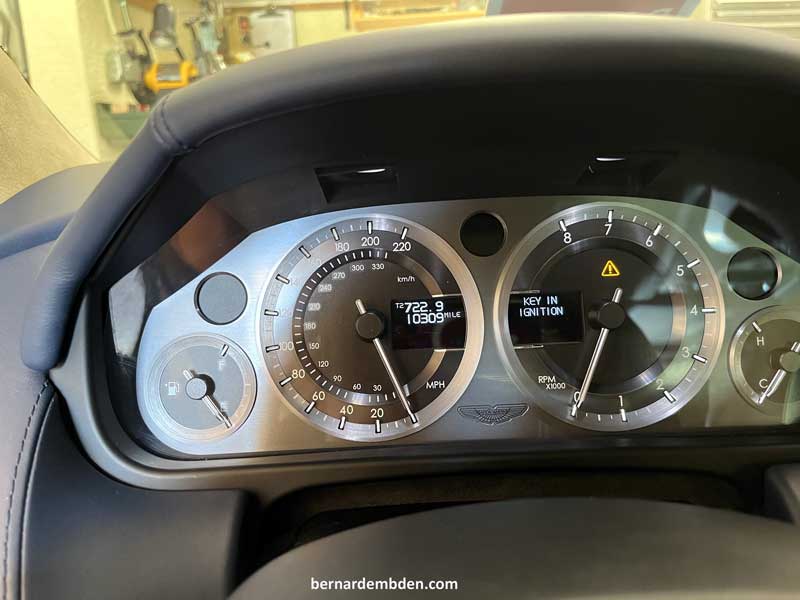
Expect to spend a couple of days on this project. The results are well worth the effort.
