
Oil underneath the oil pan and front cross member of my 1978 Jaguar XJ-S was the first clue that something was amiss. Locating a leaking crankshaft seal is not for the faint hearted. Crawling under the V-12 at four thousand RPM will make grown men weep. The trail of oil from underneath the crankshaft damper was unmistakable. The seal would have to be replaced.
I recommend removing the radiator support, fans and fan shroud. It's critical that you have fairly good access to the front crankshaft area.
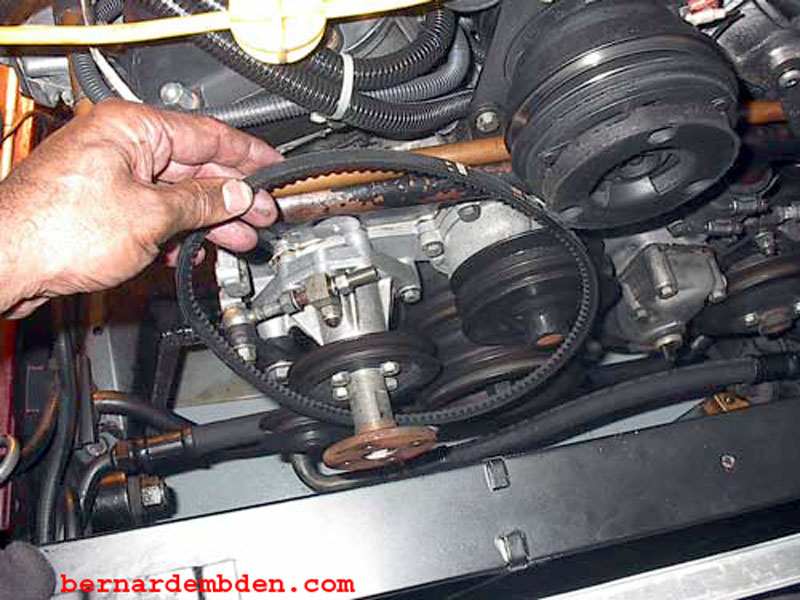
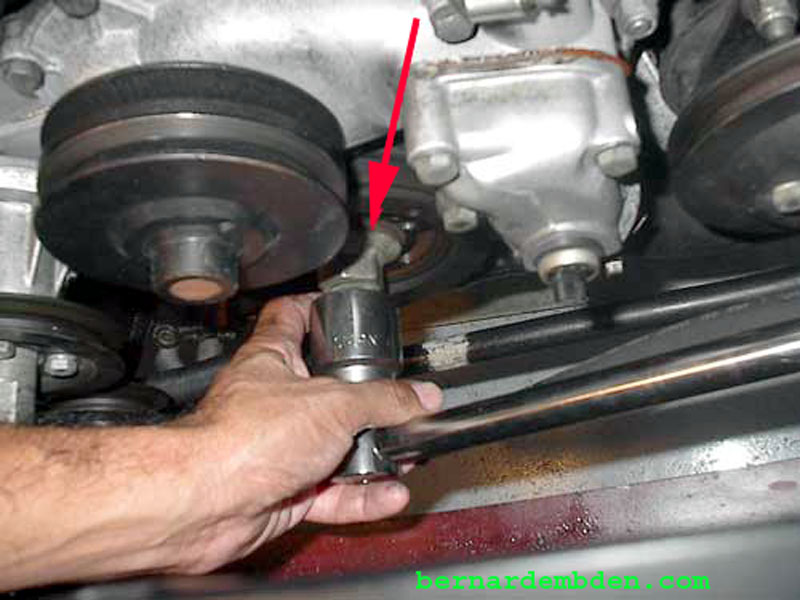
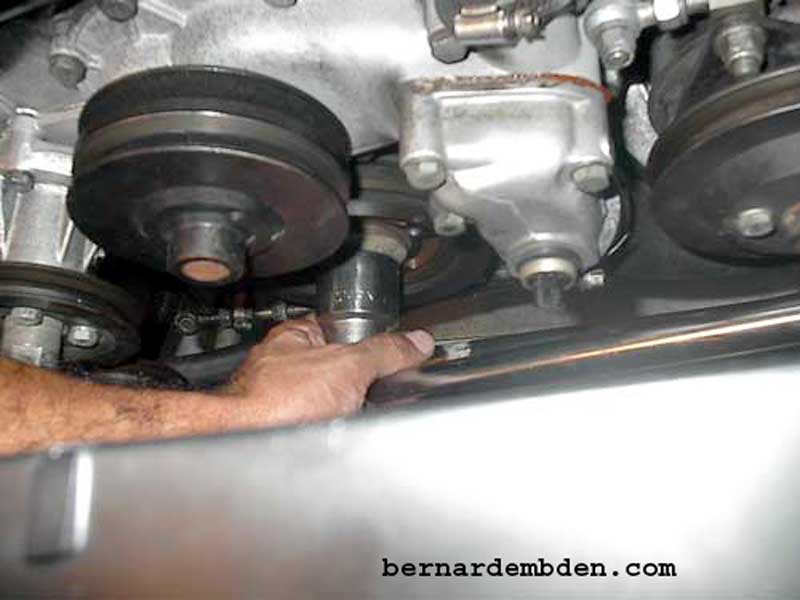
Remove all belts from the engine. (Photograph below)
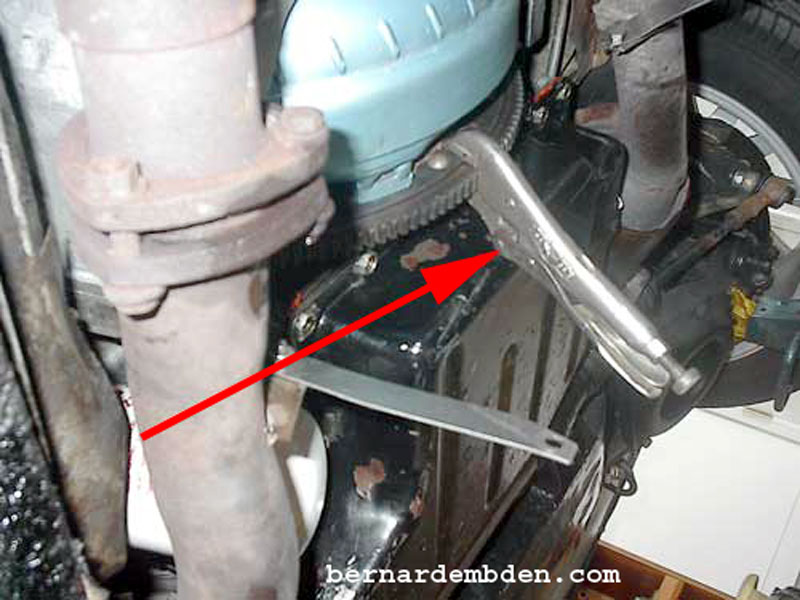
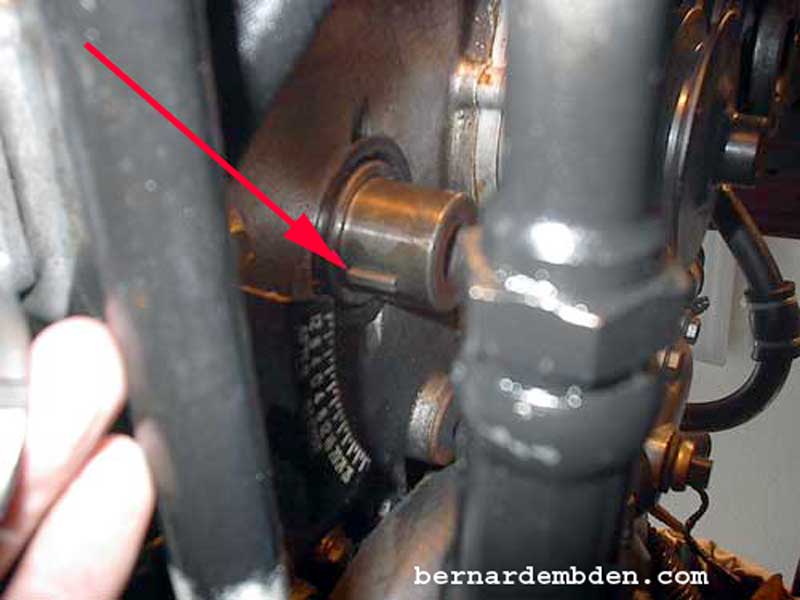
In order to remove the crankshaft bolt, the engine must be prevented from turning. There are a number of ways to accomplish this. Don't use a screwdriver to jam the flex plate ring gear teeth, you might damage them. My recommendation is to remove the torque converter inspection plate and use a vice-grip to clamp down on the flywheel ring gear. (red arrow photograph below) Turning the engine will cause exhaust pipe to stop the rotation of the vise grip. As this point force can be applied to the crankshaft bolt to remove it.
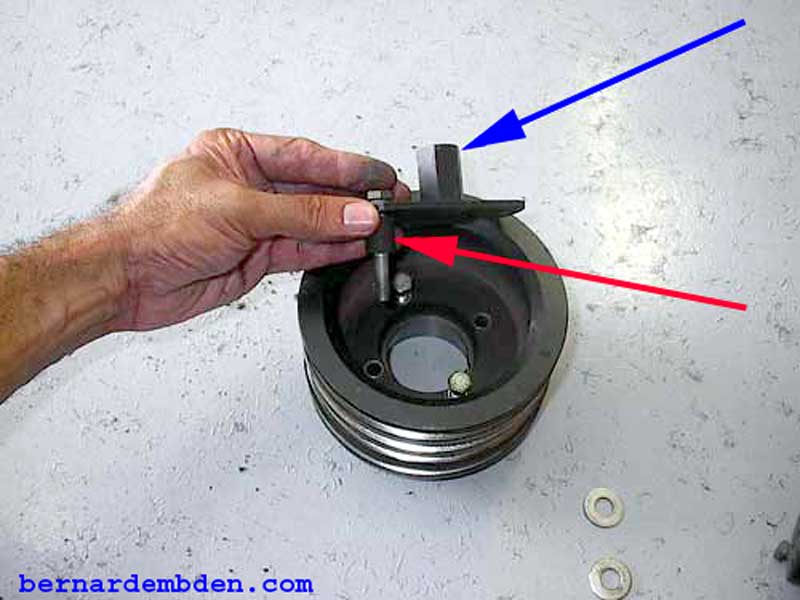
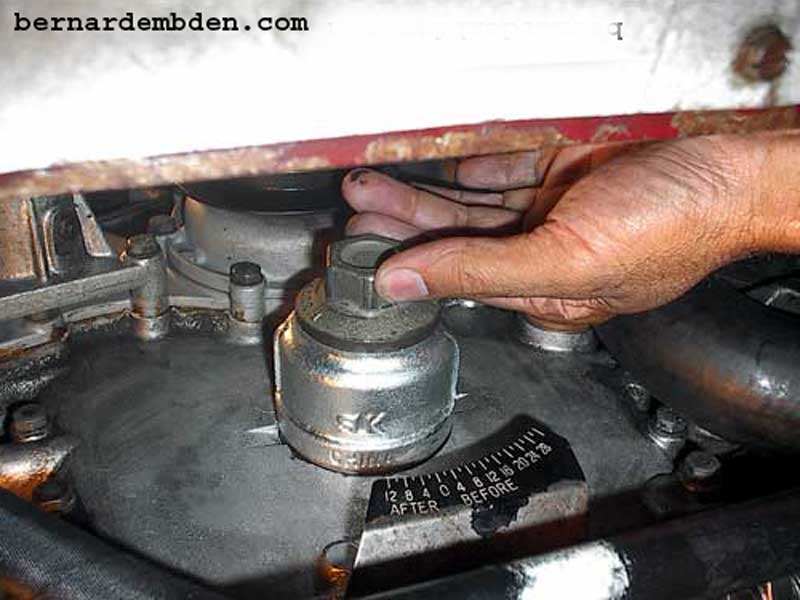
Remove crankshaft pulley. The pulley has a hex nut that bolts to the damper. (blue arrow photograph below). The hex nut installs with two bolts with spacers (red arrow, photograph below). This hex nut assembly must be removed just to gain access to the crankshaft bolt.
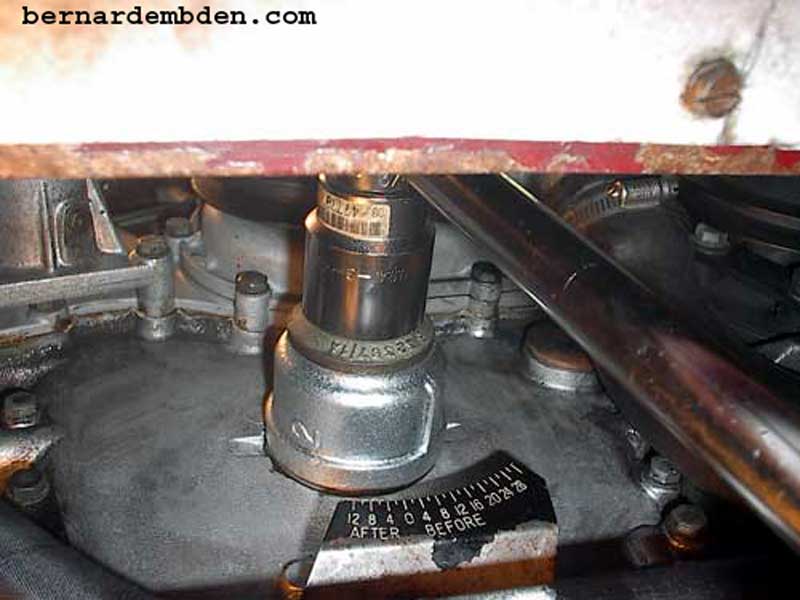
The crankshaft bolt (red arrow photograph below) requires a 34mm socket. I was unable to find this socket in a 3/4" drive. I used a 1 5/16 inch six point 3/4" drive socket instead.
Even with a breaker bar attached, I had to augment leverage with an extension to get the crankshaft bolt loose.
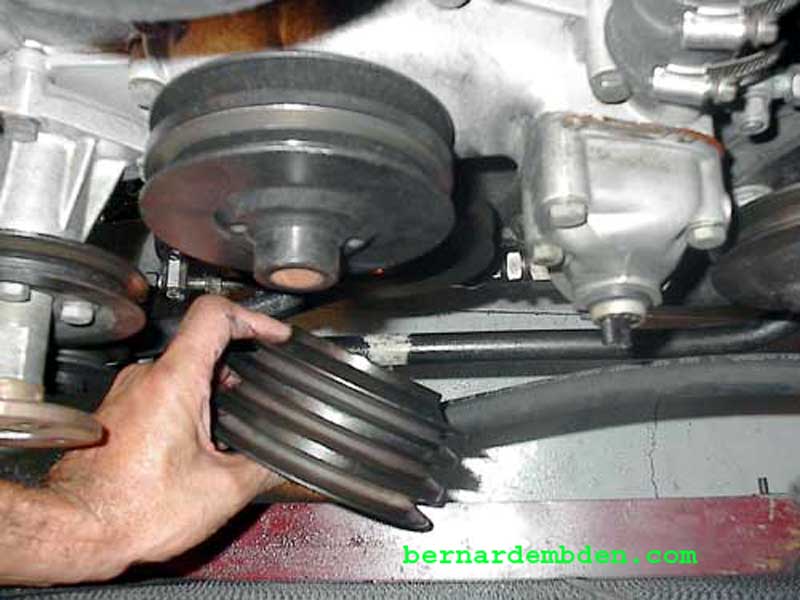
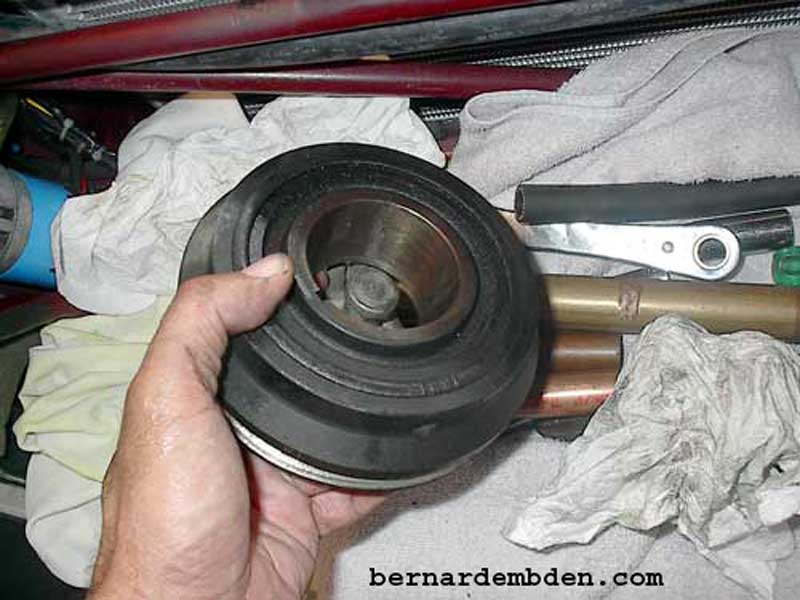
Use the appropriate puller to withdraw the crankshaft damper. (photographs below)

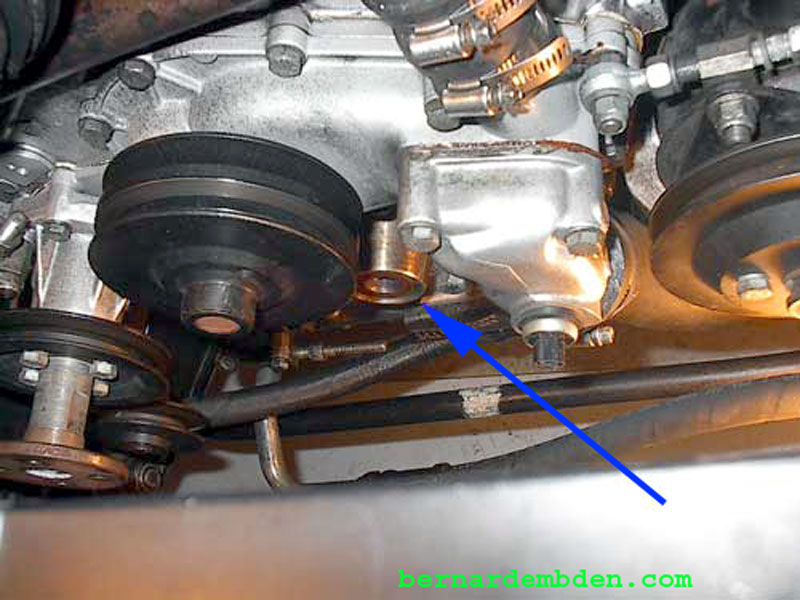
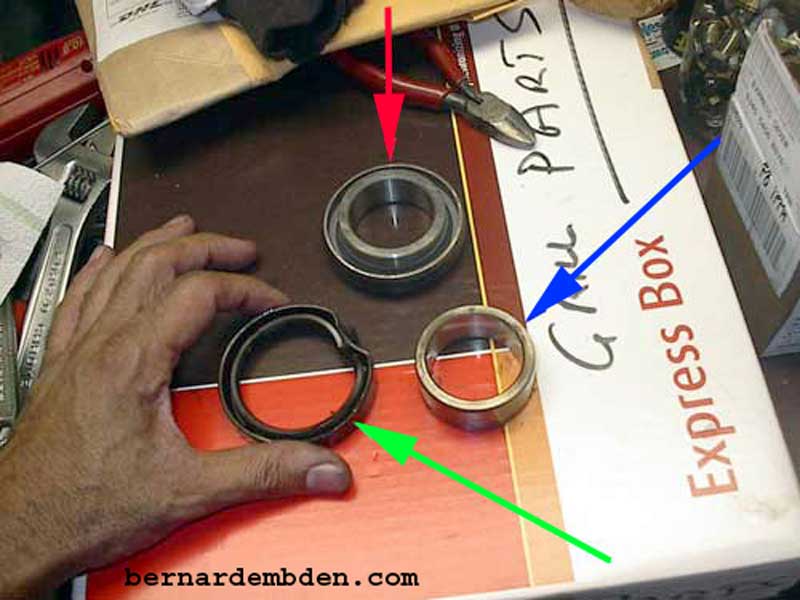
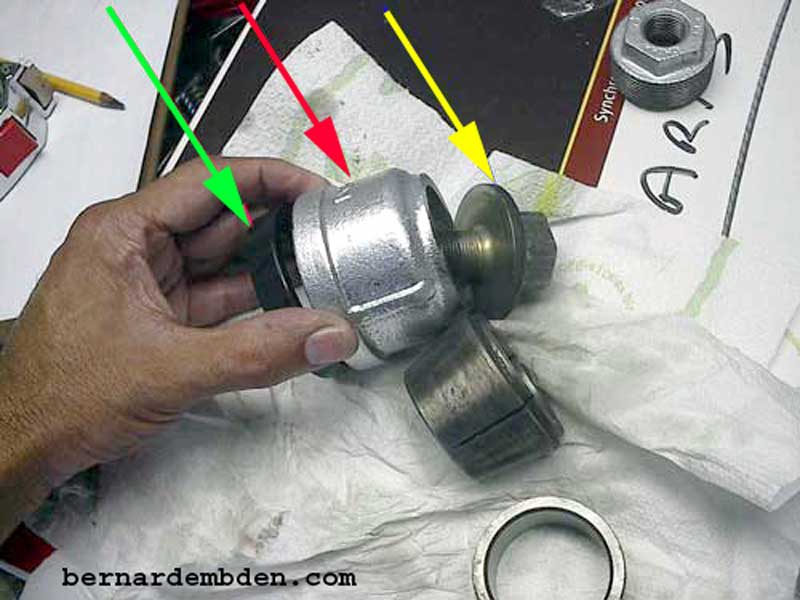
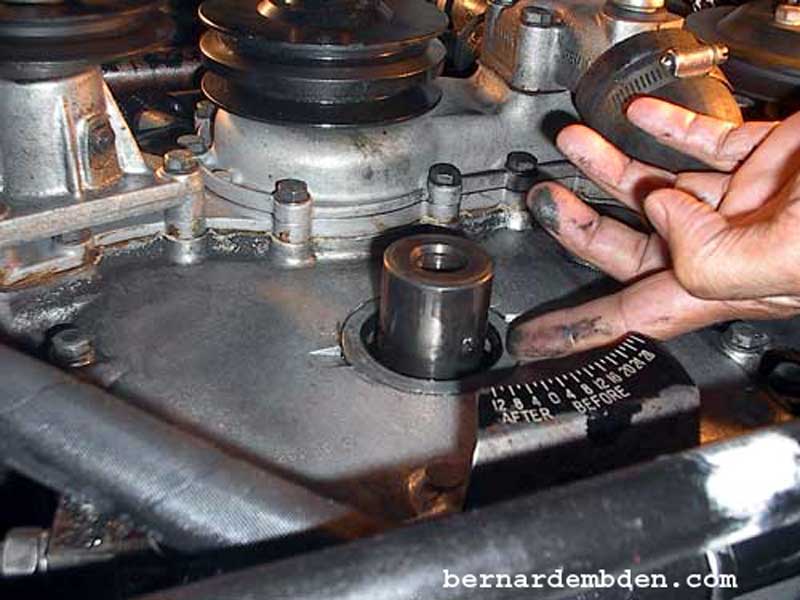
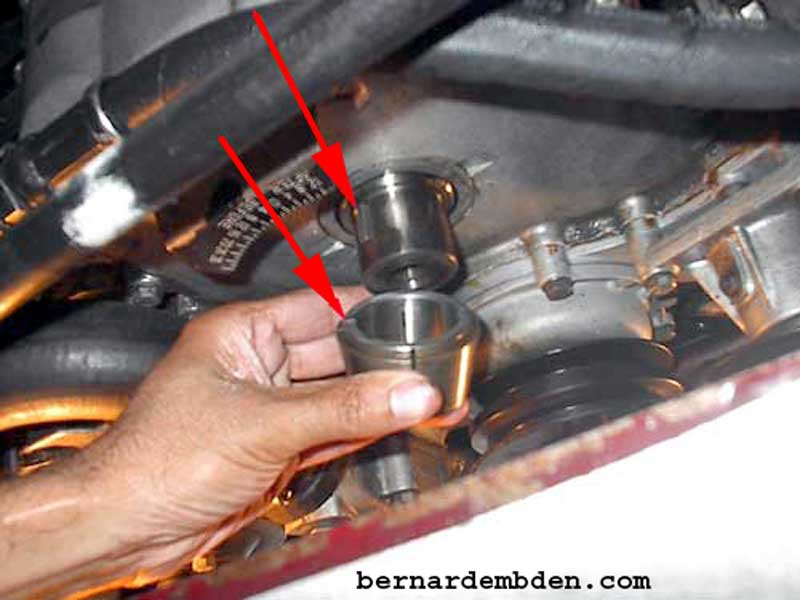
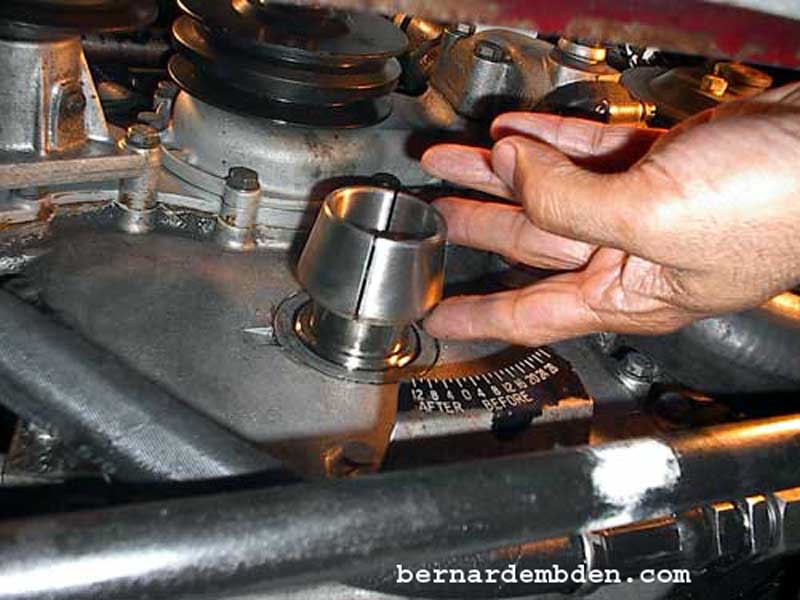
The special damper "cone" is now visible on the front of the crankshaft. (blue arrow photograph below) Remove the crankshaft cone by pulling straight out.
The damper assembly uses two identical keys. One locates the damper to the cone. The other (red arrow below) locates the cone to the crankshaft. Remove the crankshaft cone key. Note the keys are identical and are positioned on opposite sides on the crank / cone assembly. Save these keys. If necessary, tap out gently with a small screwdriver to remove.
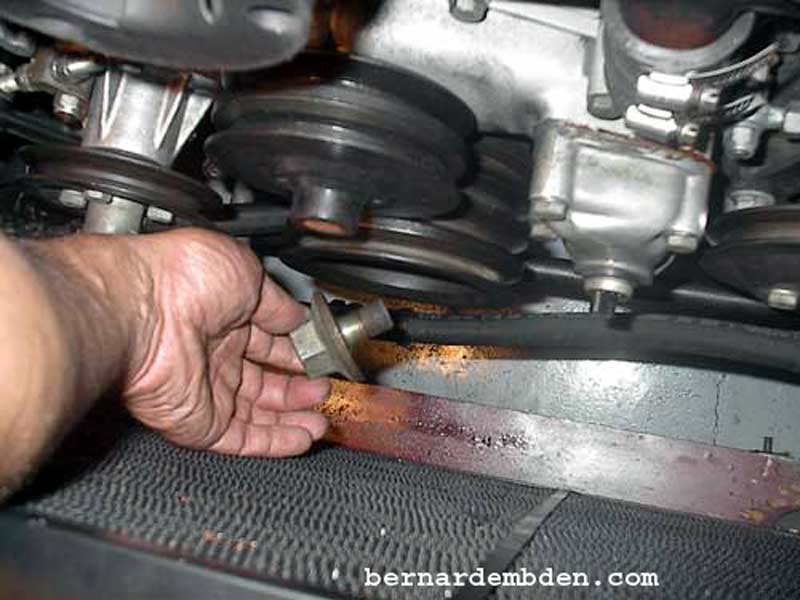
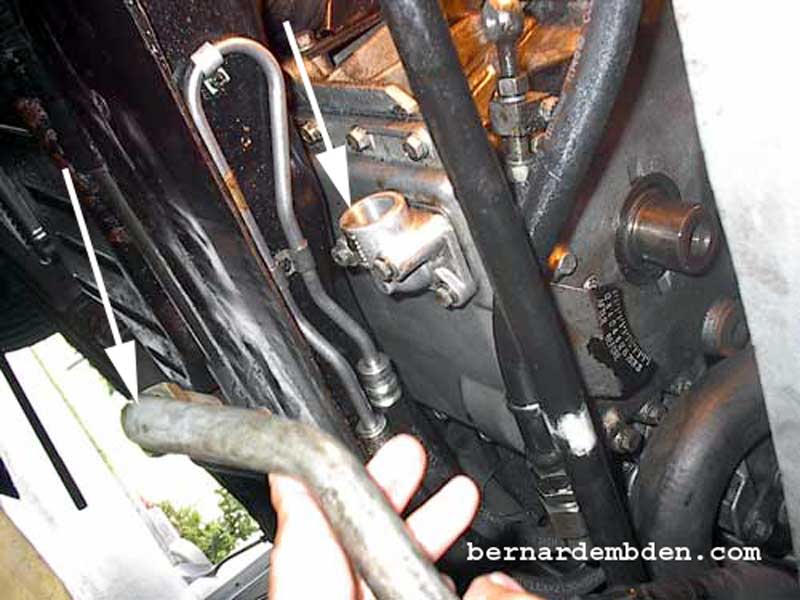
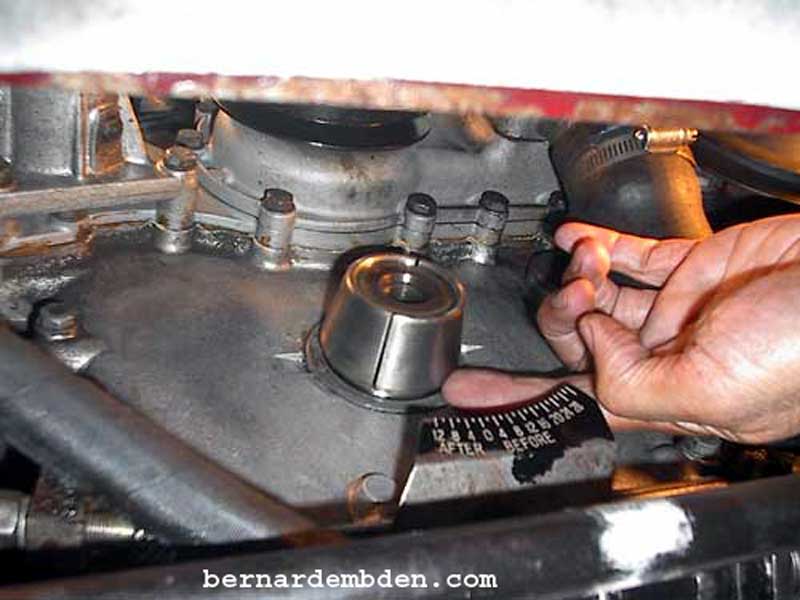
At this point I found it easier to work from underneath the car. Use jack stands or ramps. You will be under there for a while. I also removed the oil cooler return hose for better accessibility. (white arrows photograph below)
Remove "distance spacer" (red arrow photograph below). This sleeve locates the crankshaft cone and provides a replaceable sealing surface for the crankshaft seal.
![]()
The Jaguar V-12 crankshaft damper assembly is either an engineering masterpiece or another example of Jaguar overcomplicating an existing proven design. I suspect there is a bit of truth in both statements. The assembly works by having the crankshaft bolt force the damper against a collapsible cone that transfers the holding friction to the crankshaft nose. (Proper reassembly is critical). In addition the design uses a "distance spacer" to position the cone and provide a replaceable sealing surface for the crankshaft seal.
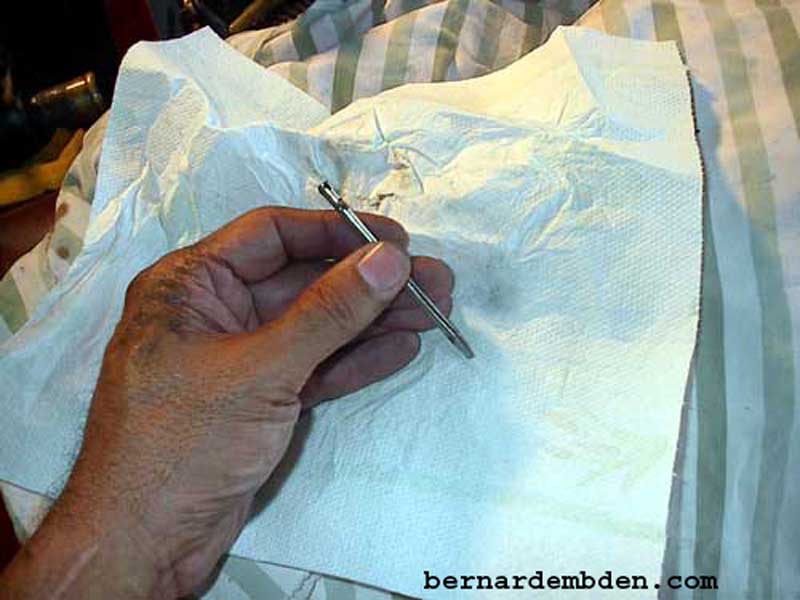
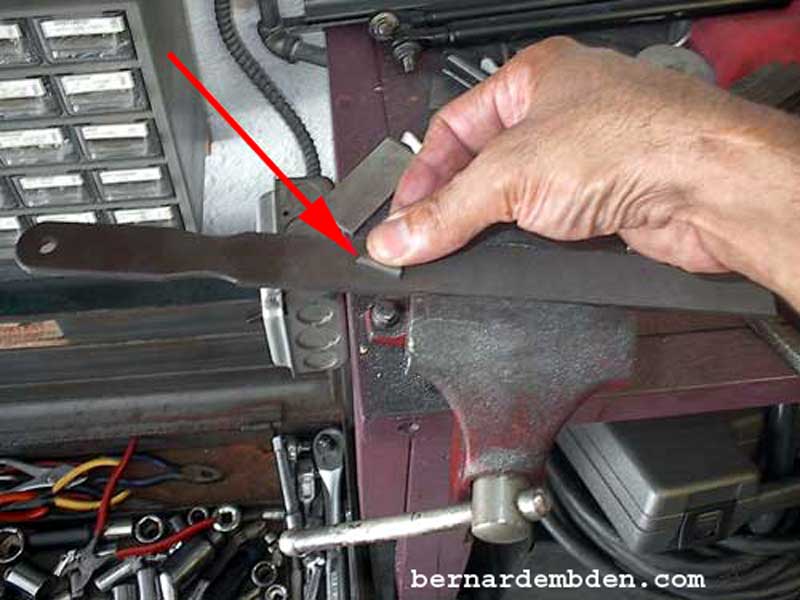
I butchered up an existing screwdriver to use in removing the old oil seal.
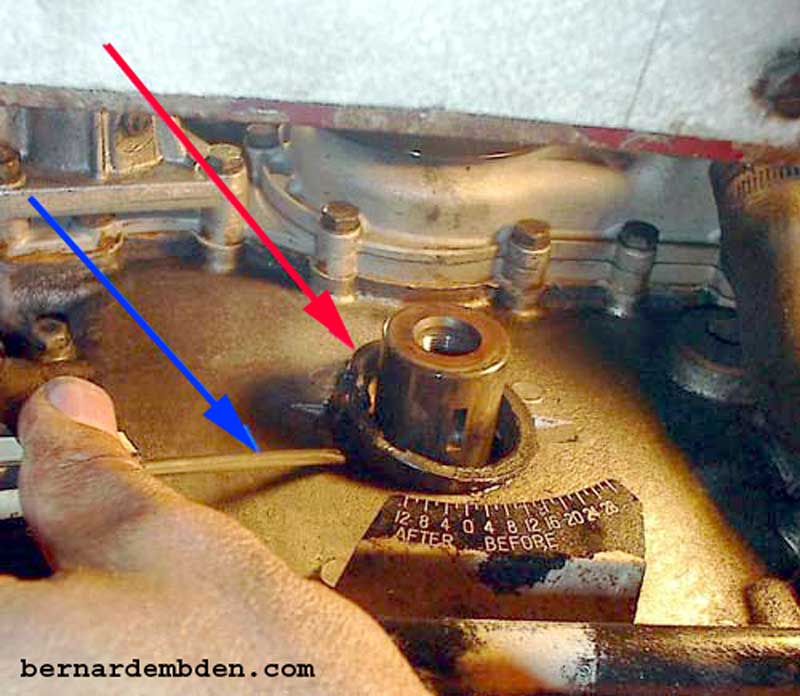
There are two indentations at either side of the cover that facilitates removal of the seal. The easiest method for removal is to simply punch a slot in the seal at the indentation (blue arrow) and pry out the seal (red arrow photograph below).
Note: Carefully clean the seal mounting area. Any nicks incurred during the removal process must be addressed now.
All crank seals for the V-12 are identical. Jaguar initially listed a part number for the seal only for the early cars. That listing has been discontinued, and the only seal currently available from Jaguar includes a new "distance spacer". It is also not cheap. Even from a third party supplier expect to pay approx. $70.00 US for seal and spacer. (Jaguar part number JLM 10613).
For those who hate to spend money, NAPA (auto parts chain in the US) sells just the seal for approx. $10.00 US (part number 21098)
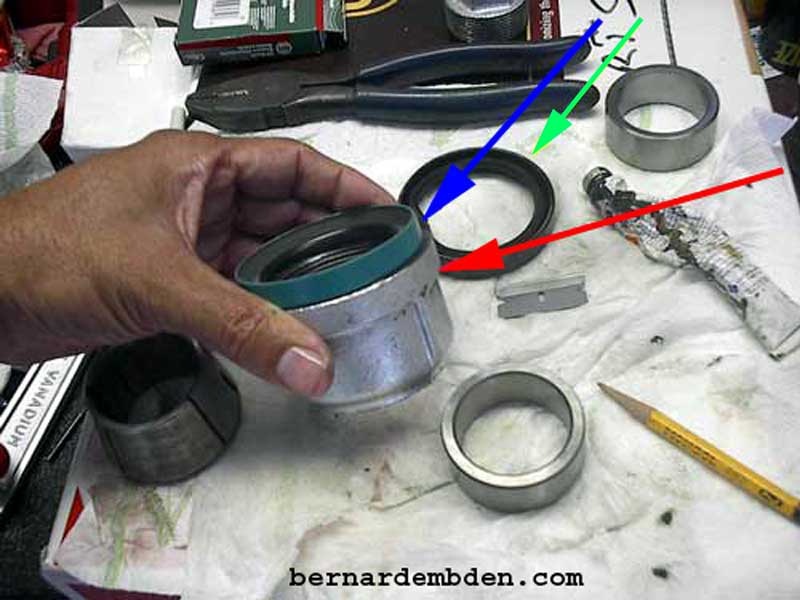
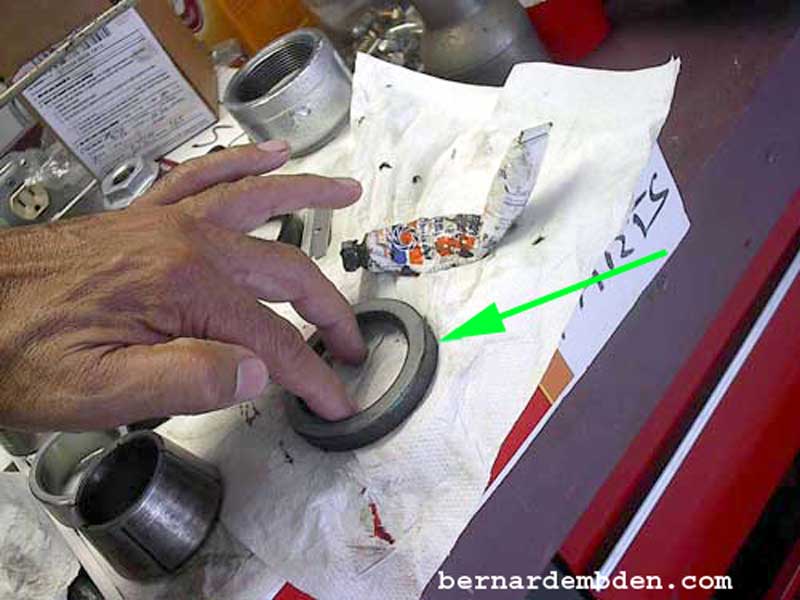
Pictured below is the old seal (green arrow), old distance spacer (blue arrow) along with the Jaguar seal and distance spacer (red arrow) The Jaguar seal has a rubber coating impregnating the outer band. This affords a better seal between the outer seal and the crankshaft cover. Interesting, it does not have the compression spring, which the original seal had and has become the norm for this type of seal.
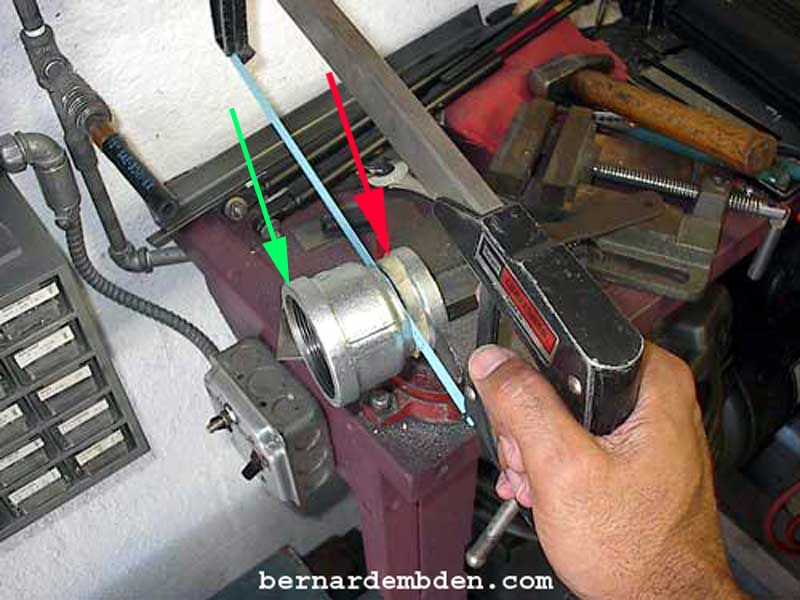
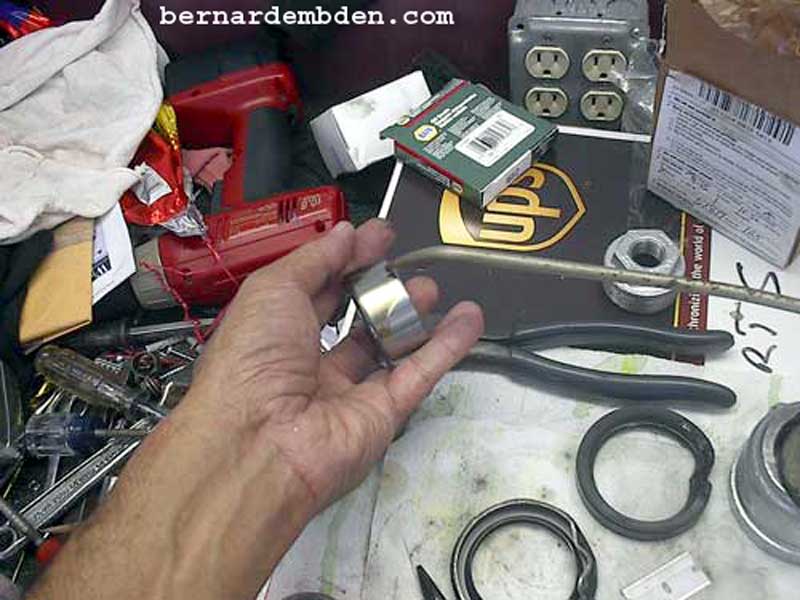
There are two ways to install this seal. Hammer in, or press it in. You can hammer it in, however close quarters and the possibility of damaging the seal precludes that idea. My recommendation is to press the seal in. I fabricated a press that uses the crankshaft bolt as leverage. I purchased a 2 to 1 1/2 inch galvanized pipe reducer from Home Depot. Any plumbing store will have this. The 2-inch side is exactly what I need to address the seal. The 2" side will be used to press the seal in. The height of the reducer is critical. Measure 1 7/8 inch from the 2" side (green arrow photograph below) and cut the pipe at exactly 1 7/8 inches. Cut from the 1 1/4 inch side (red arrow photograph below))
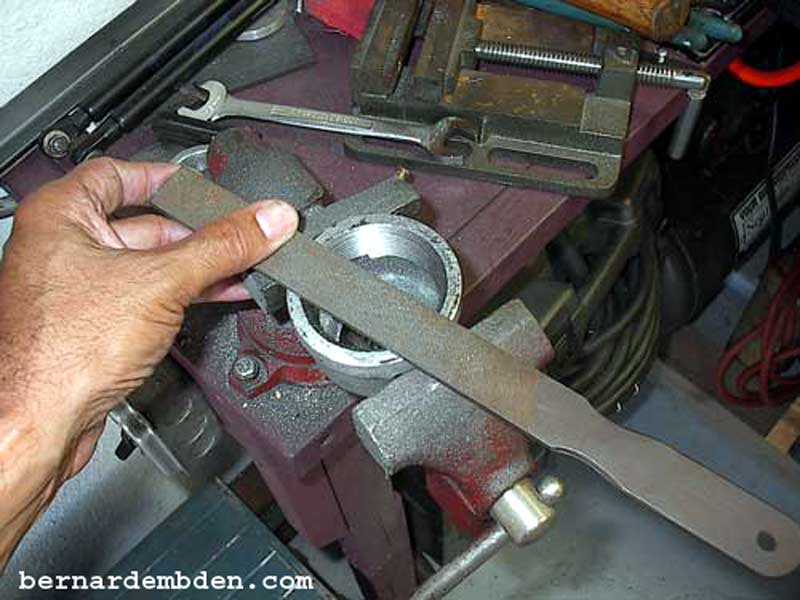
I used a flat file to get the 2-inch surface perfectly flat. This is not absolutely necessary, however you might as well make this the right way.
As seen in the photograph below the 2" side of the pipe (red arrow) union mates exactly with the NAPA oil seal (blue arrow) The green arrow identifies the Jaguar seal.
In the photograph below, the crankshaft bolt (yellow arrow) will be used to force the modified pipe union "Press" (red arrow) against the new seal (green arrow) thus pressing it into the crankshaft cover.
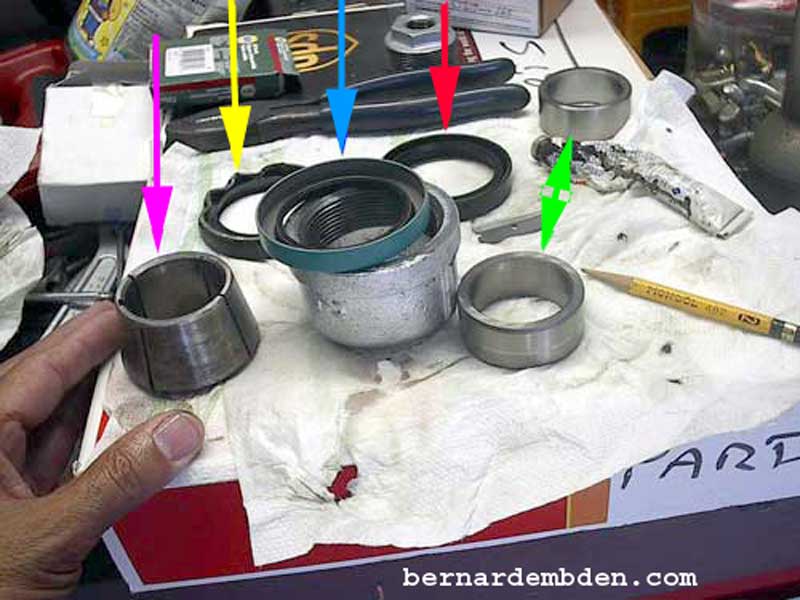
Photographed below are the following:Cone (pink arrow)
Old seal (yellow arrow)
New NAPA seal (blue arrow)
New Jaguar seal (red arrow)
New and old distance spacers (double green arrow)
Inspect the crankshaft and collapsible cone keys. If there are any nicks incurred during removal of the keys, dress the keys up on a flat file.
In addition, make sure the keys fit the appropriate groves in the cone and damper.
Prior to installation, Oil the sealing surface of the crankshaft seal.

The NAPA seal has a standard uncoated metal outer ring with the usual compression spring around the sealing lip. If you are using the NAPA seal I recommend a thin coating of non-hardening Permatex around the outer perimeter on the seal (green arrow photograph below). This will mask any slight imperfections that might occur as the seal is pressed in. If you are installing the Jaguar seal this step is not necessary due to the existing rubber coating on the seal ring.
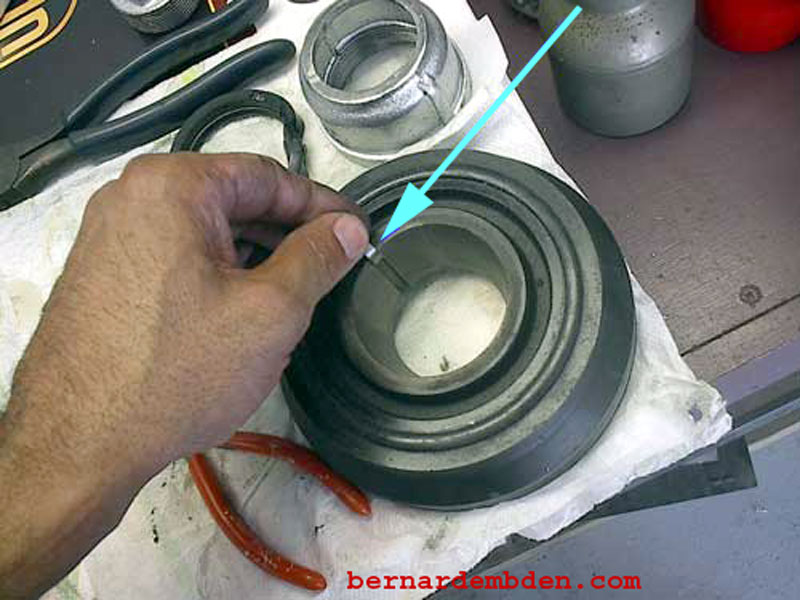
Position the seal (white arrow photograph below) to the crankshaft cover. The seal in unidirectional, it must be installed with the lip towards the engine.
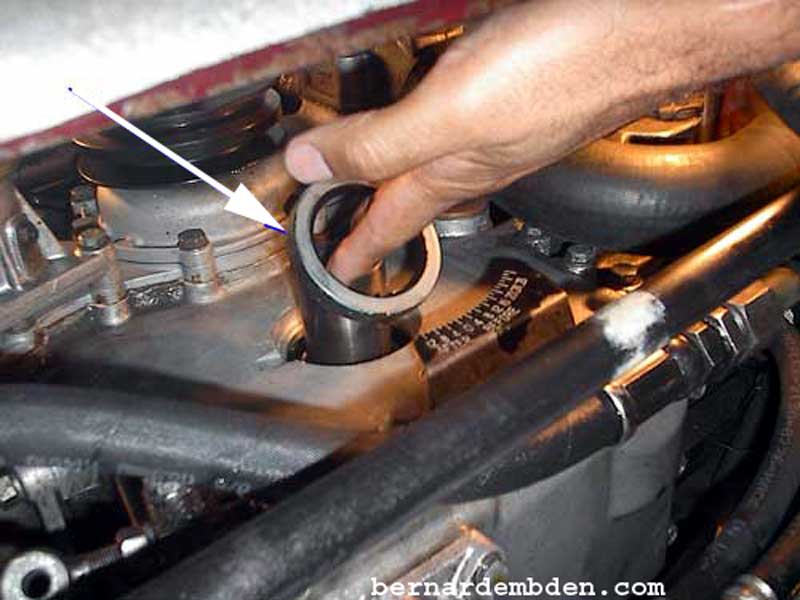
Make sure the seal is centered and slightly inside the mounting flange.
In the photographs below, position the "Press" (green arrow) over the outer ring of the seal (red arrow) and hand tighten the crankshaft bolt snug to the press.
Tighten slowly with a socket until the seal is flush against the crankshaft cover.
Make sure the new spacer is coated liberally with engine oil before installing. If installing the NAPA seal only, clean the distance spacer, oil, reverse and install. By reversing the spacer the oil seal lip is afforded a new surface to seal against.
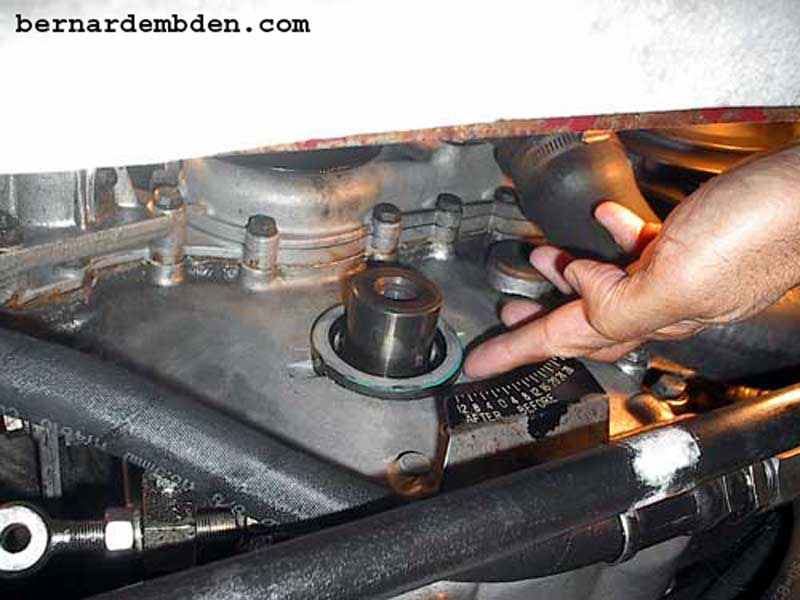
The tolerance of the new spacer to the crank is miniscule. If it is not offered to the crank nose exactly square it will not go on. Do not force it. If necessary use the crankshaft bolt to move the spacer along the crankshaft. When seated, the spacer (blue arrow) should protrude slightly in relationship to the crank seal (red arrow).
![]()
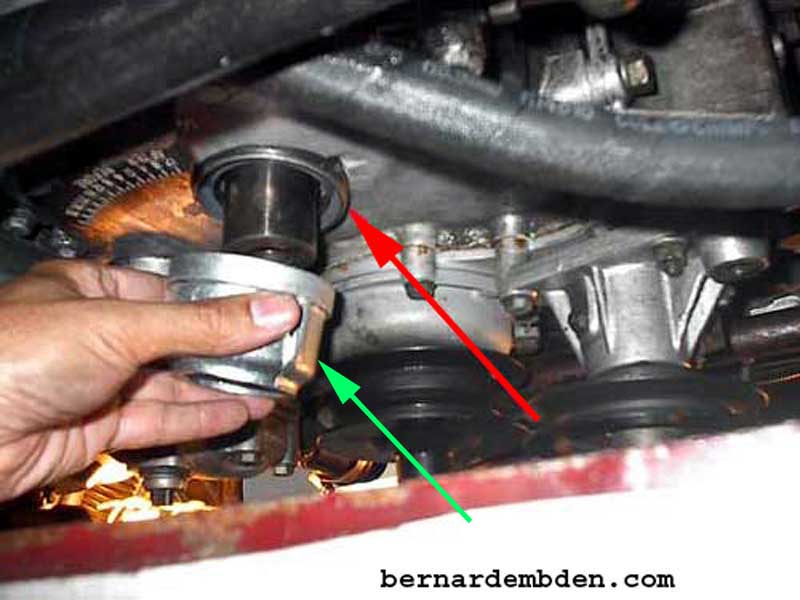
Clean the crankshaft damper, cone and crank. All surfaces that the collapsible cone will come in contact with must be clean and oil free. Install crankshaft key. Offer cone to crankshaft making sure the crankshaft key lines up with the key slot in the cone (red arrows photograph below).
In the photograph below, Cone should bottom out against distance spacer.
Install cone key. Offer damper to cone and install crankshaft nut.
You will need the big boy for this. Get the 3/4 inch socket and breaker bar out. Recommended torque is 150 lbs. If you do not have a torque wrench, use a 3/4-inch breaker bar, with an extension and tighten two grunts. (you are going to check the torque later, right).

Install crank pulley. Install hex nut assembly. Project complete.
This project is within the ability of most owners. Take your time on this. This is one of those projects that you can do a better job that the dealer.
