
Having relocated to a new house in Florida I discovered that my 3 car garage, while marginally adequate for three cars, left virtually no room for a proper work bench and tool/equipment storage. The challenge then was to build a proper workspace, while retaining the ability to park three cars consistently inside the garage.
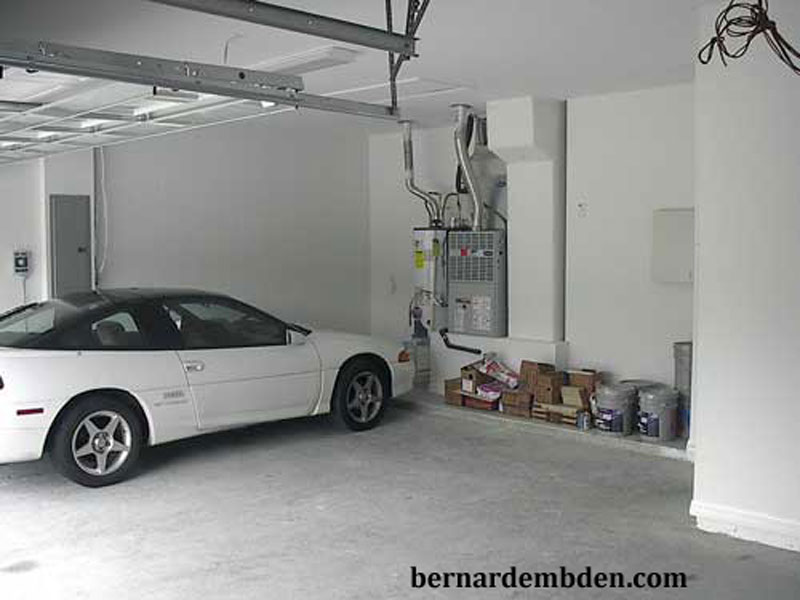
Below is a photograph of one end of the garage, (taken from the 3rd bay) with my daughter's car parked inside. The two car garage area is 19x19 feet. As is customary in some new Florida construction, the garage ends at a 4-inch elevation that houses the A/C along with the heater and water softener units. The third garage area is 17x12 feet.
The first step was to protect the garage floor. Concrete is porous. Old Jaguars leak oil. Need I say more? Don't skimp here. A professional epoxy garage floor treatment is the best solution. Too pricy? Then a good quality acrylic paint designed for concrete is recommended.
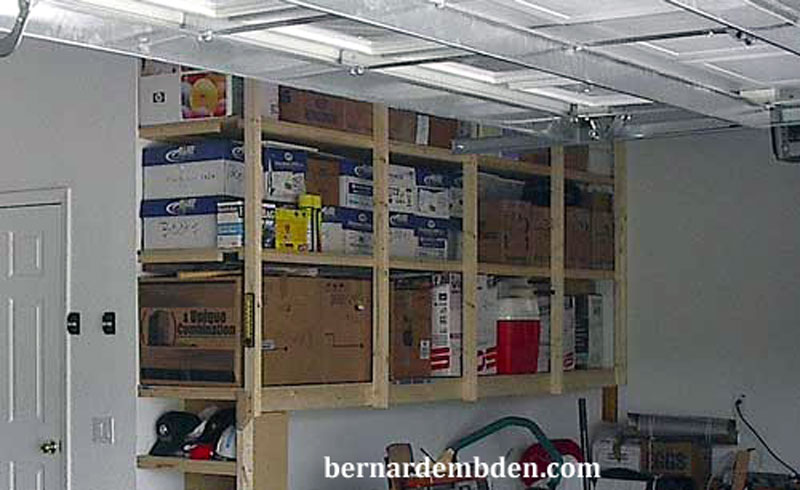
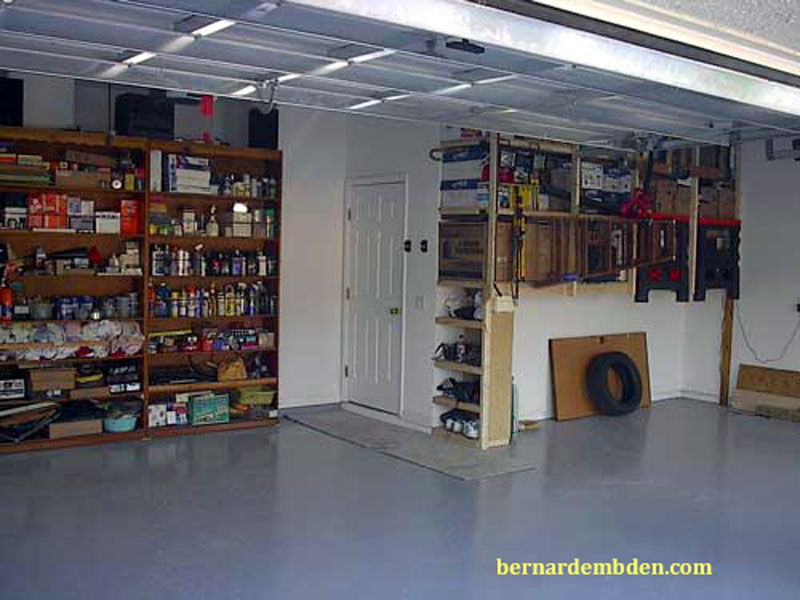
Next was to provide some storage. Without a basement, the wife will have stuff that has to go in the garage. The third garage became the sacrificial lamb. I installed storage shelving 44 inches from the garage floor to the ceiling at the front and side. This allowed one car to be parked with the front underneath the bottom shelf. Be careful with this construction, you don't want the entire shelving to come crashing down on your car. As a precaution, I parked the wife's car in this bay :-)
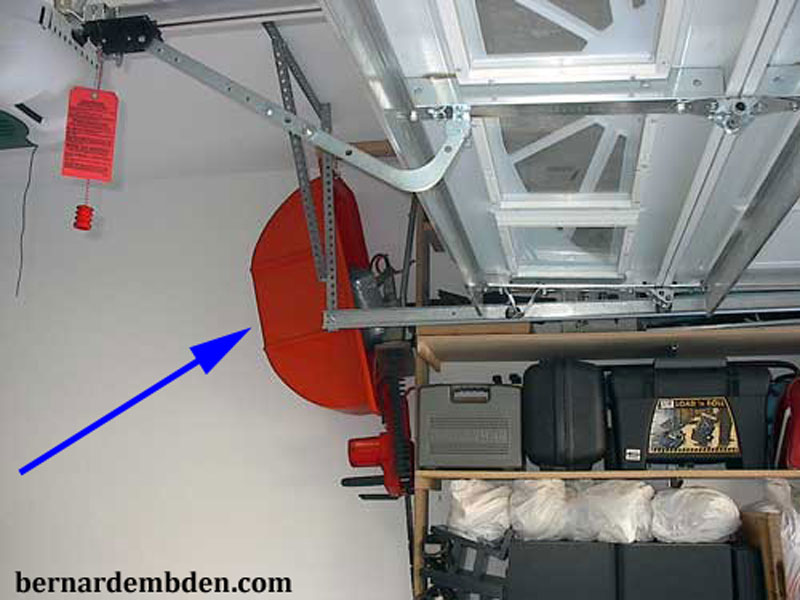
Note the red container for fixing flats (blue arrow) and the welding helmet. No proper garage should be without these.
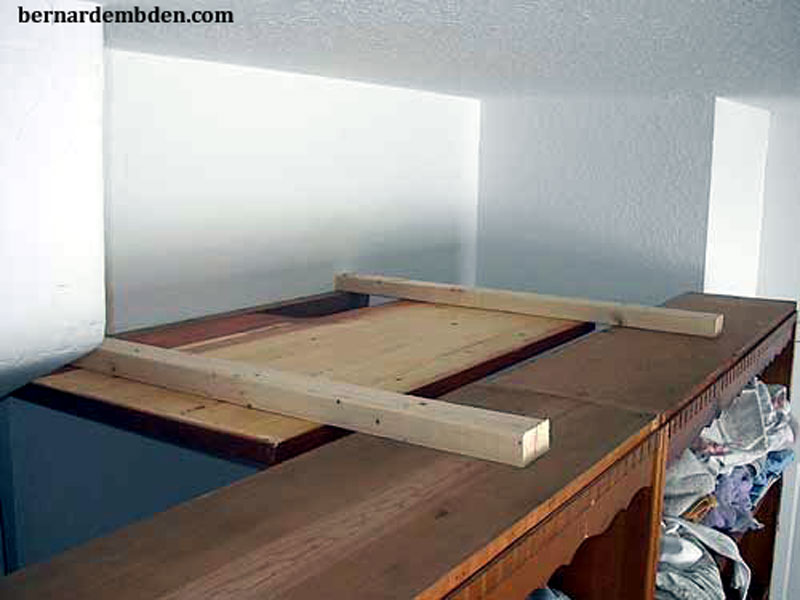
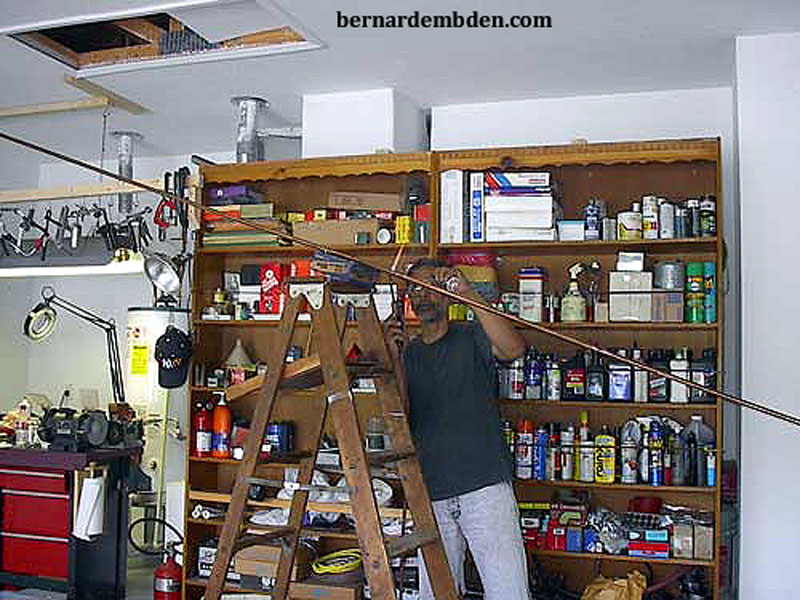
Garage stuff storage was next. I used two old bookcases, each 48x96 inches as my primary storage. I bolted both bookcases together to from a single unit. I could not bolt them to the rear wall (remember that 4 " elevation), so I braced them from the top to the rear wall as photographed below. A sheet of wood was attached to the bracing.
I bolted a number of glass jar caps to the wood attached to the bookcase bracing. Trust me; you can never have too much storage for small stuff.
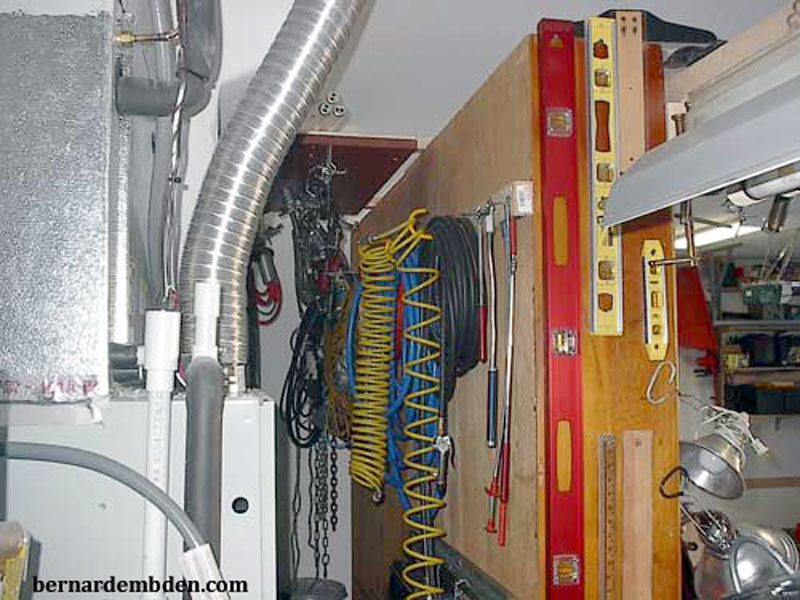
The space behind the "bookcase" was used to store not only the glass jars, but air hoses, electric cords, spring compressors, hub and bearing pullers, paint sprayers, creepers, cases of oil and antifreeze, telescoping mirrors, magnetic and mechanical pickups etc. Bubble levels and "T"-squares are stored on the side.
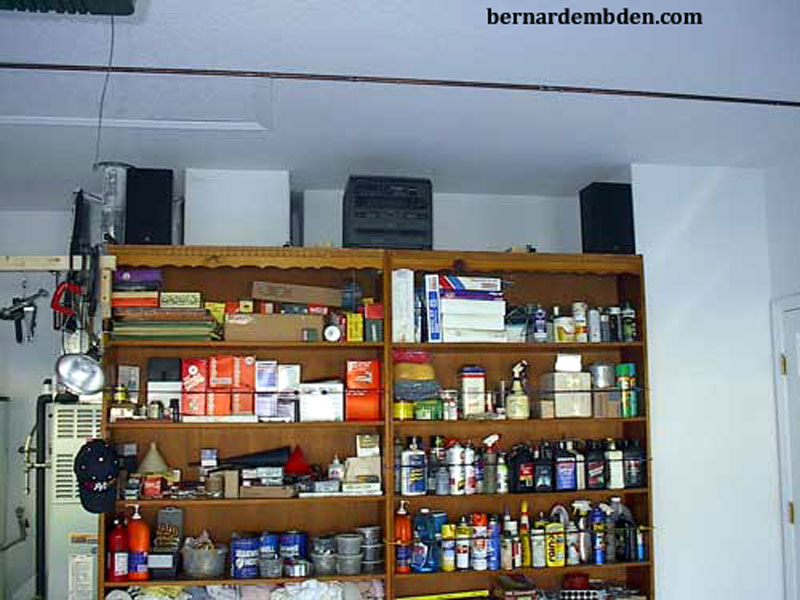
"Bookcase" storage complete. Bungee cords across the shelves prevent cans from inadvertently falling. Radio and speakers are on top. (You have to have some soothing music for those dark days when the Jaguar becomes your worst enemy).
Now on to the workbench. The depth of the garage is 19 feet. In order to have enough room to have a functional workbench with cars inside the garage, the workbench had to be moved inward approx. 12 inches on the afore mentioned ledge. Bench is leveled by using a 4x4 piece of lumber. Workbench should be at least 6 feet wide.
The workbench project has just started and I am sweating like a pig. As they say here, it’s not the heat, it's the humidity. (It's the heat trust me).
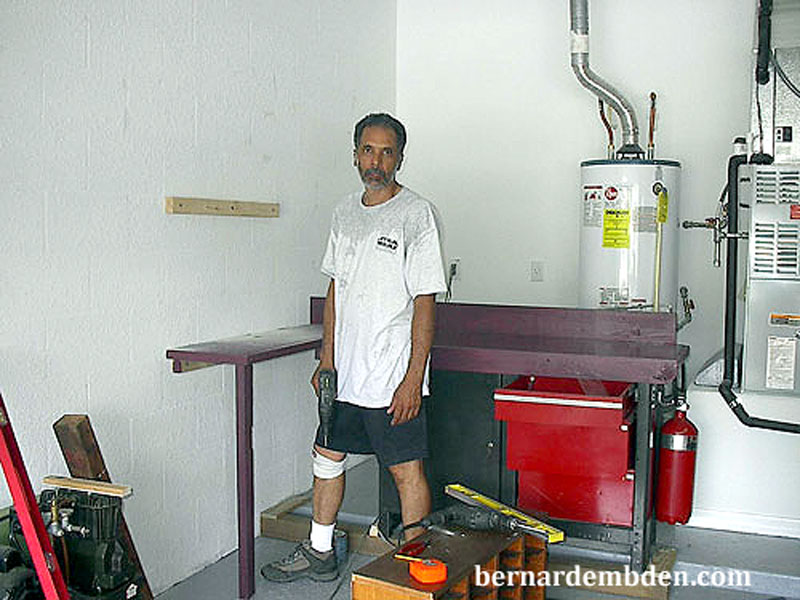
Another coat of paint is applied to the workbench. The color is "wine" left over from the house. You know I would not buy this color. You also know I would paint the bench pink if the paint was free.
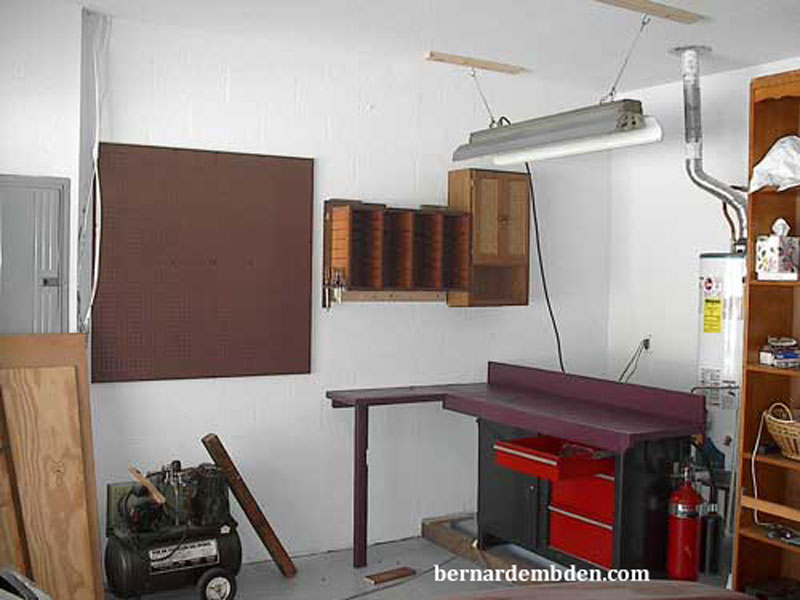
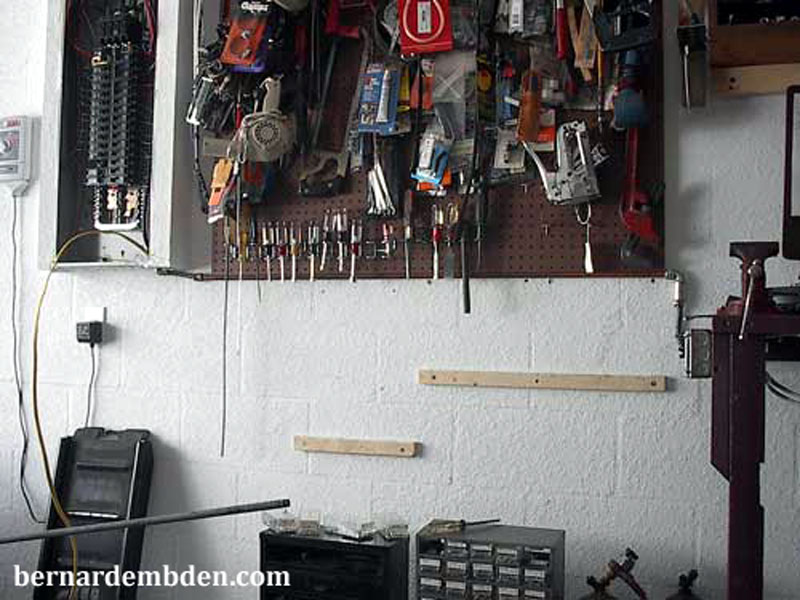
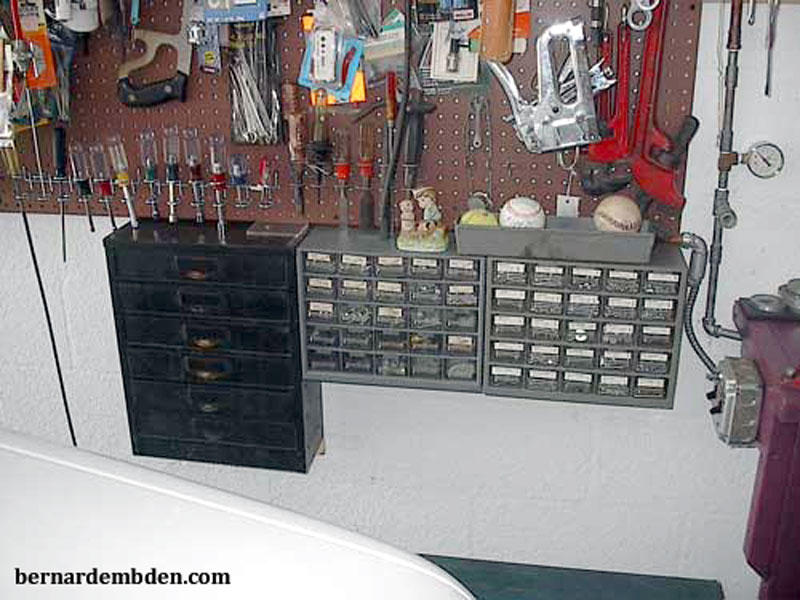
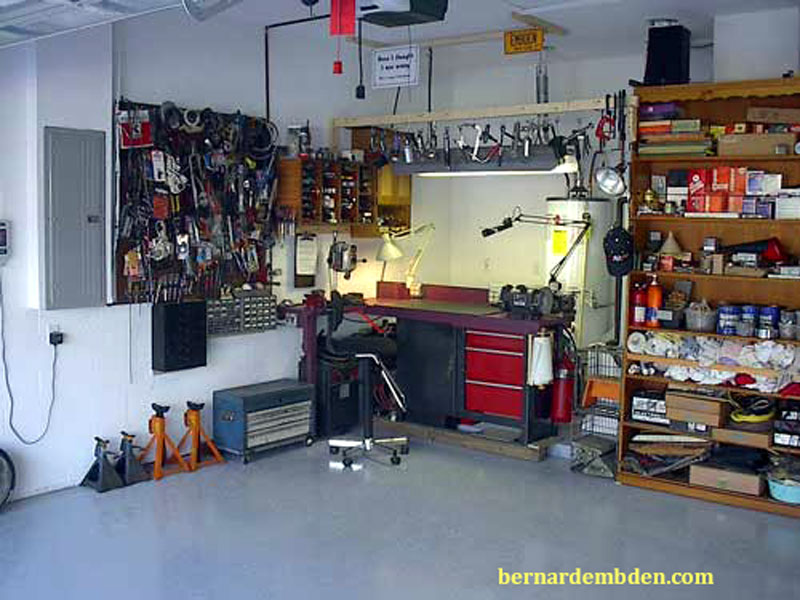
I believe every garage must have a pegboard. This allows you to put "stuff". Space would only allow a 48x48 inch board. In addition I installed an old message cubby center. It allows me to label each cubbyhole individually for things I need but have nowhere else to store properly.
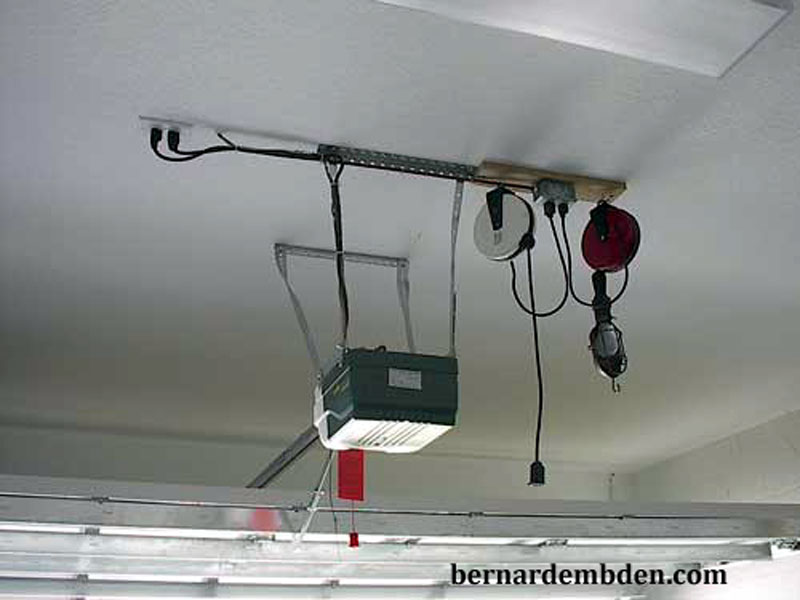
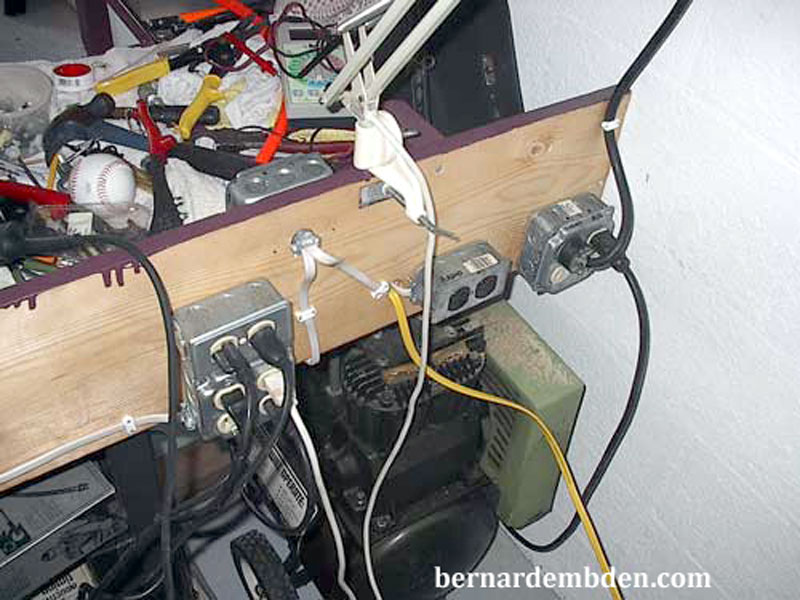
Drop down lights and extension cords are essential. I installed a short extension from the existing receptacle to power the units.
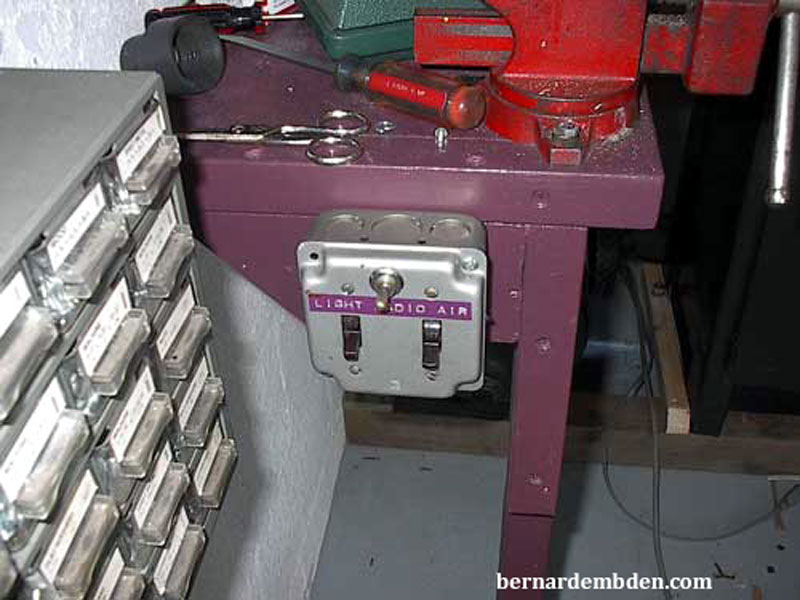
Photographed below is the rear of the workbench. There are switchable outlets for the work light, air compressor and radio. I also have installed six outlets for the drill press, grinders, work lights, drill chargers etc. This leaves the eight outlets at the front of the workbench always available. (you can never have too many outlets).
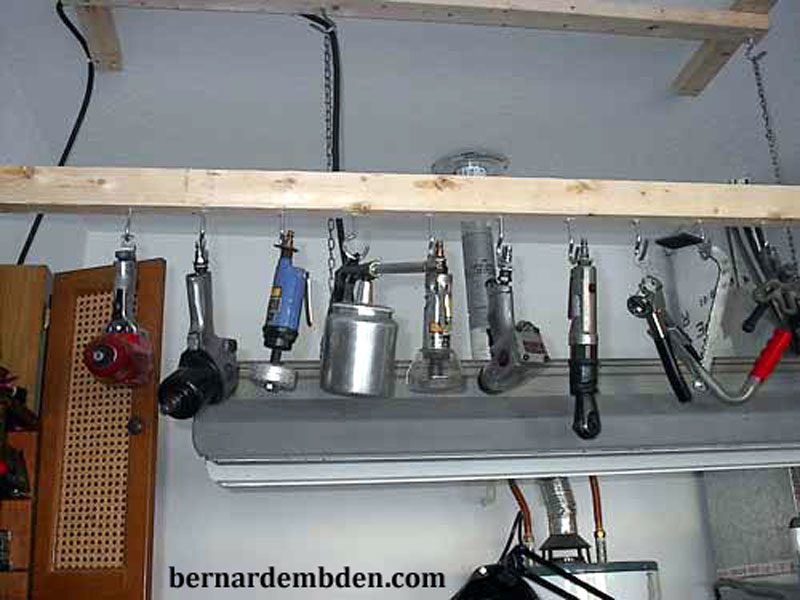
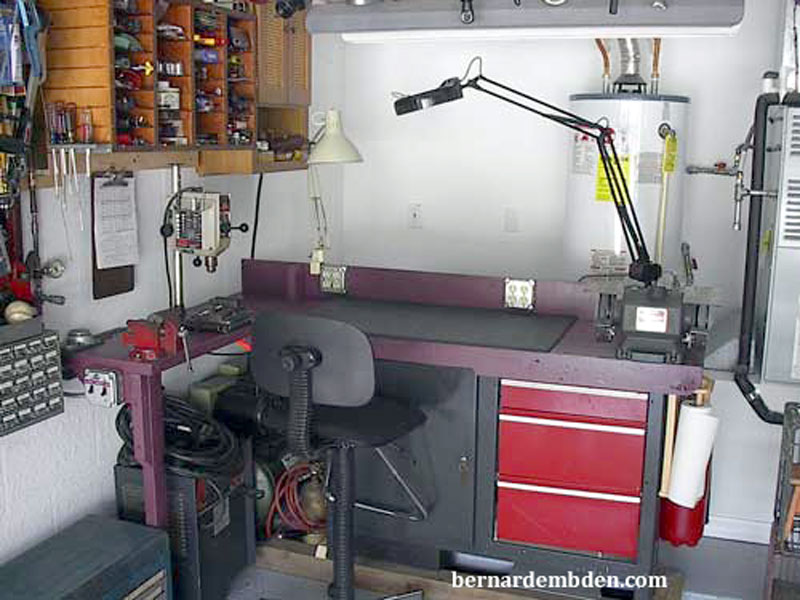
In any work space you can never have too much light. I installed a 3-tube florescent unit directly above the workbench. Note the 2x4 piece of wood installed across the top of the bench. (green arrow photographed below).
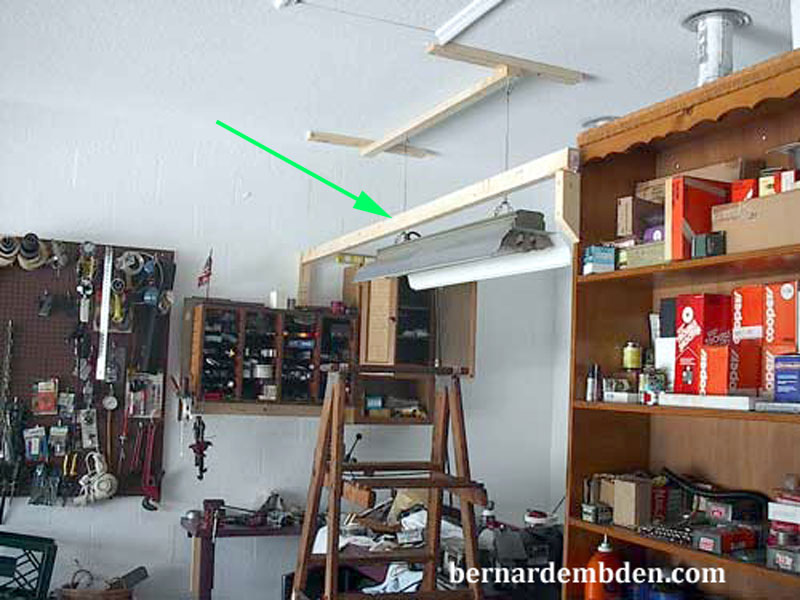
The 2x4 (green arrow photograph above) is used to hang my air tools along with various other tools and pullers.
A direct, 30-amp electric line to the workbench is strongly recommended. (The proper wire size and circuit breaker should be installed by an electrician). The garage can be a tough environment, so I also recommend that the wire is enclosed in "BX" or metal pipe.
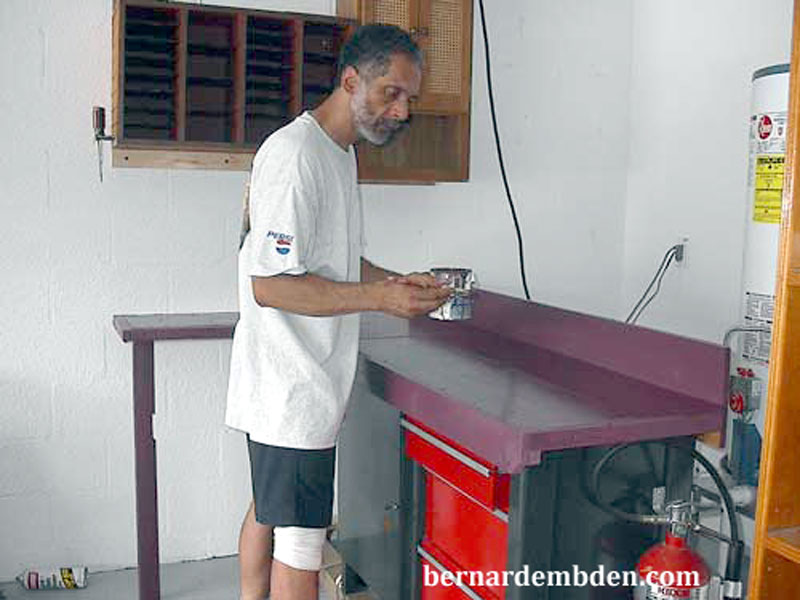
You need places to store a variety of small parts. Below is a photograph of my small parts bins, which stores a wide variety of stuff, including screws, nuts, washers, bolts and pop rivets etc.
One switch location controls the air compressor, workbench florescent light and garage radio.
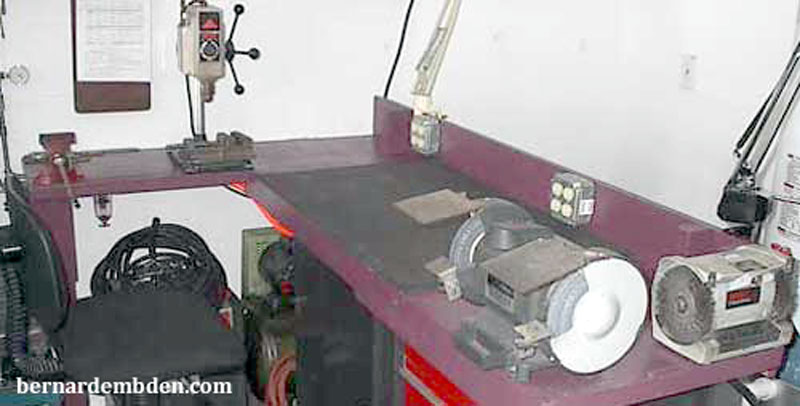
The relationship between the three main devices on the workbench is critical. The vice, drill press and grinding/buffer wheels must be placed so they do not interfere with each other. In addition, the vice must be installed securely, over a direct support to the garage floor. This allows you to hammer and twist objects being worked on in the vice.
Workbench completed. Note electrical outlets and magnification light on right side of bench. With my failing eyesight, I have found this light to be invaluable :-)
Installation of the compressor is next. In my experience there are three items that distinguish a good workshop from a great workshop. They are:
1) Air capability (at least 150 lbs. preferably 200 lbs.
2) Heat. An acetylene torch is best.
3) Welding capability. (I recommend a 220 volt welder).
I installed my trusty Craftsman air compressor underneath the workbench. Air compressors tend to vibrate. A flexible hose connects the compressor to the metal distribution pipe.
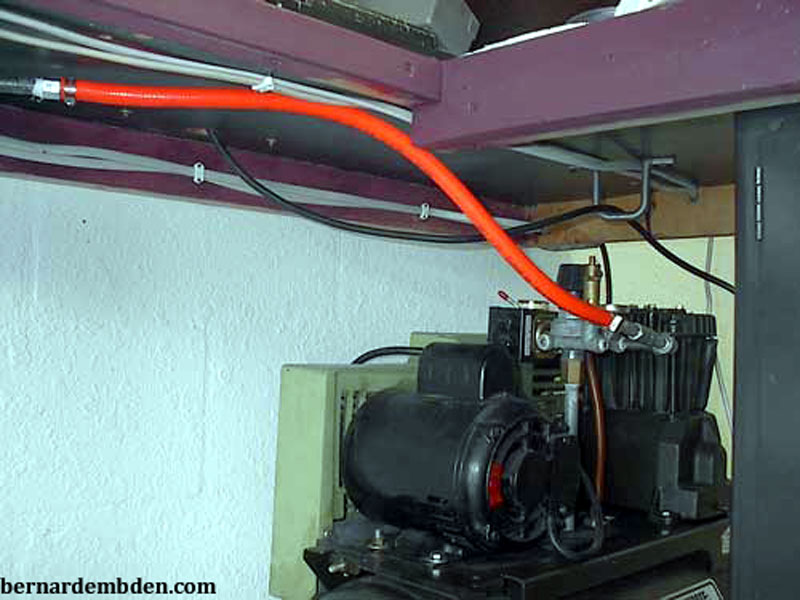
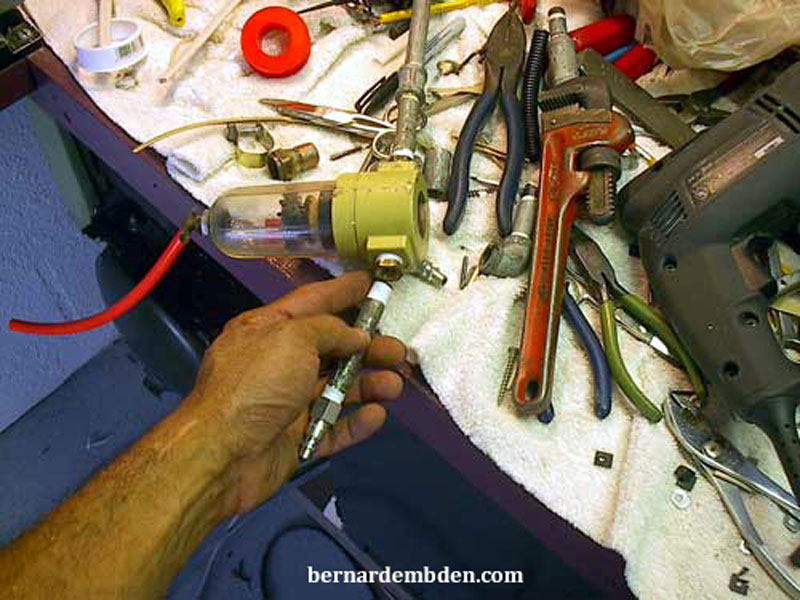
I strongly recommend an air filter/water separator as the first device off the air compressor. (photograph below).
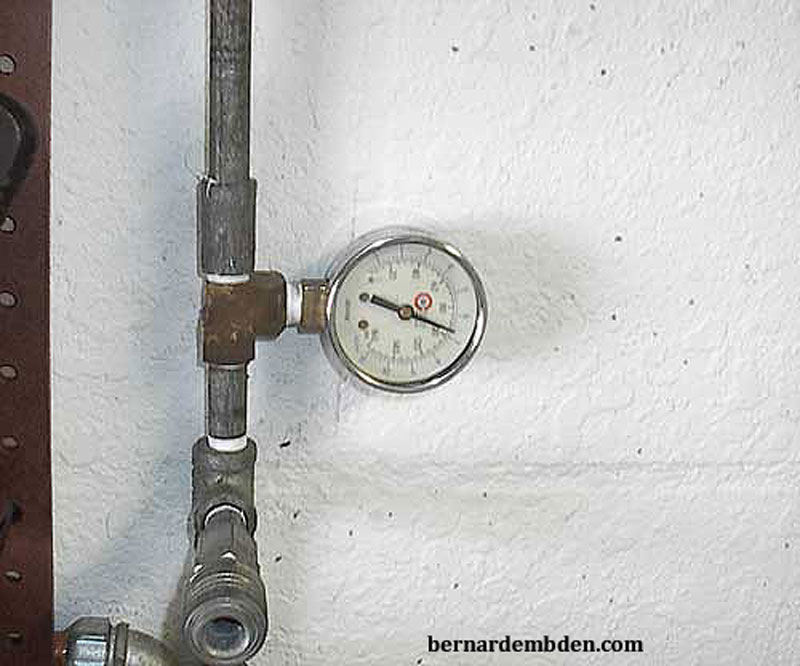
Air pressure gauge installed at left side of work bench.
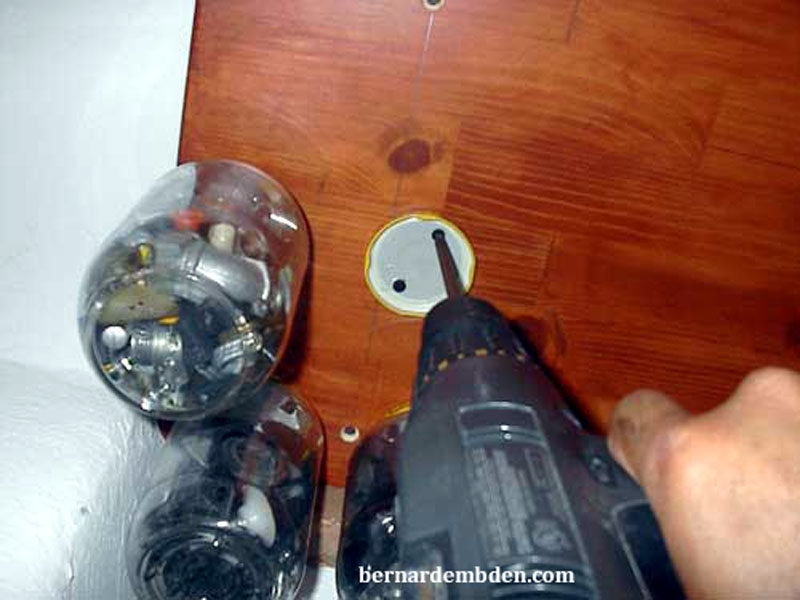
I wanted a minimum of three locations with air outlets. I decided to use copper pipe to run the air lines. Sweating copper pipe is a lot easier that threading pipe. The technique is not difficult and easily mastered. (photograph below).
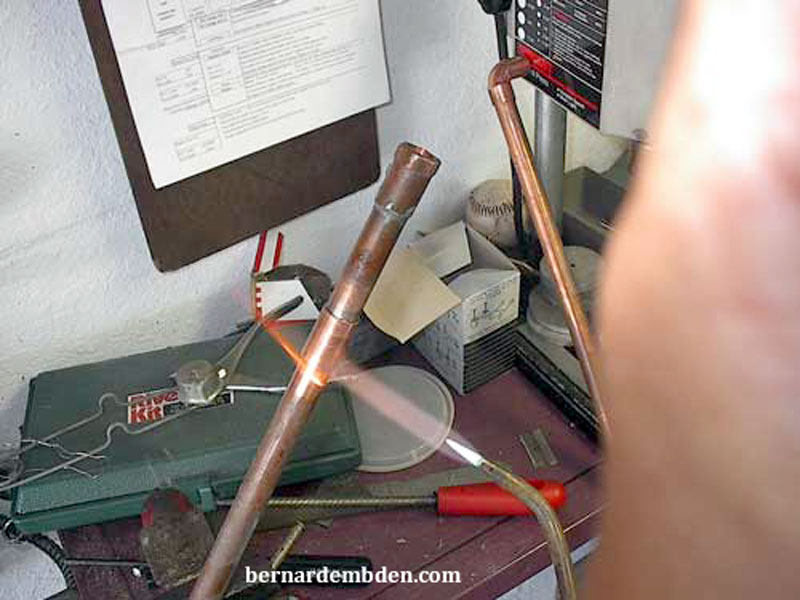
Measure and cut carefully. I found it convenient to sweat pipe at floor level and then bolt, via clamps, to ceiling joists.
Take some time to do a decent job. Make your cuts and angles professional. Remember, this is a place where you plan to spend a significant amount of time.

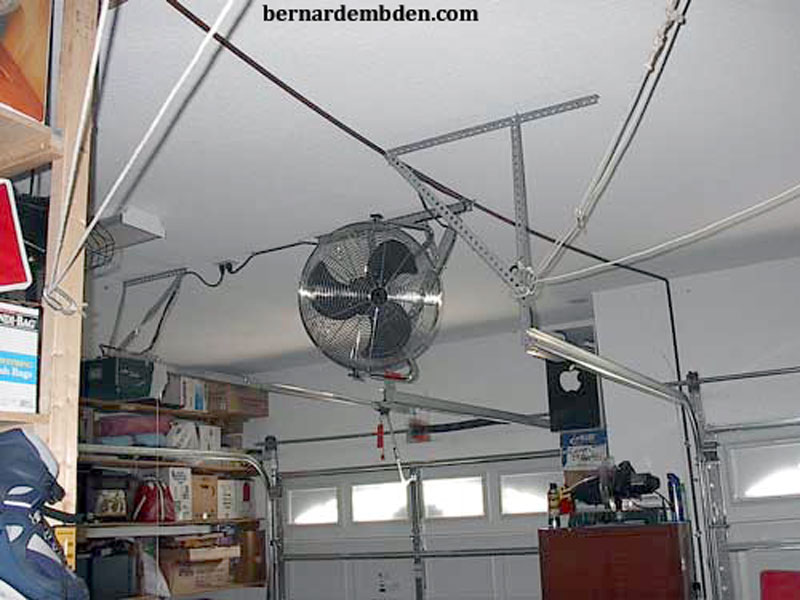
I installed a hi-flow fan from the garage door support. During the summer months it does get somewhat warm in this part of the country.
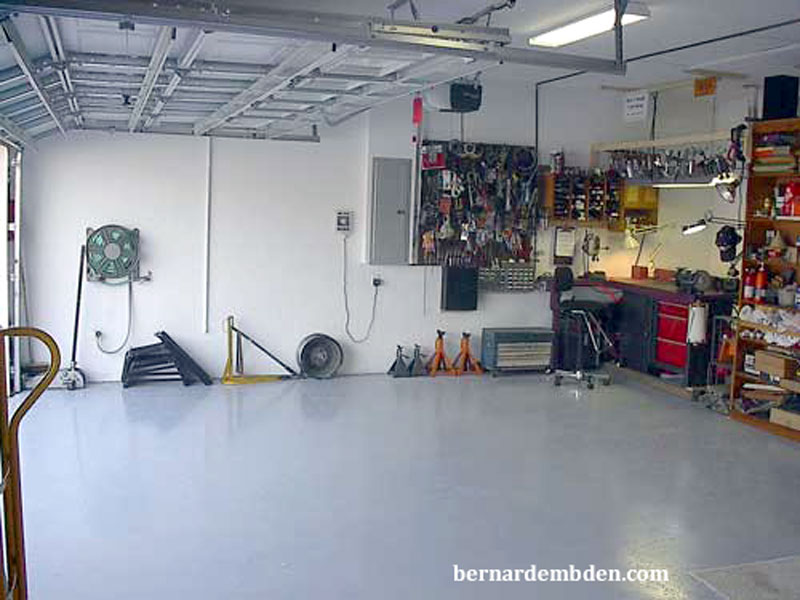
Garage project complete. Note acrylic paint on floor and space underneath 3rd garage storage shelves that enables car to be parked. A proper work stool is essential. Plan on spending a couple of weeks on this project.
The challenge was to create a work environment in a garage built only to park cars. With no extra space there was the need to be creative.
Because there is nothing as important to the car enthusiast as a proper equipped and functioning garage this effort was well worth it.
