
If you ever wonder what makes these cars frustrating, maddening (or unique) look no further than the Jaguar XJ-S transmission mount. It is either a brilliant design or another example of Jaguar over-designing and complicating what should be a simplistic piece of automotive hardware.
(It's difficult to argue with the results. Jaguars have a deserved reputation for exceptional suspension refinement, that exclusive quality that makes a Jaguar drive like no other car.)
A conventional transmission mount serves two main purposes. Isolating the transmission from the passenger compartment, and locating the transmission in a specified location. In the vast majority of cars, a section of rubber, bonded to two metal pieces, serves this purpose quite well.
This simplistic solution did not meet Jaguar specifications. Instead, Jaguar designed the XJ-S transmission to be supported with a spring. Drive train noise is addressed by isolating the spring at the top and bottom with rubber bushings. A center bushing (spool) limits vertical transmission movement.
That's not all, the center "stud" through the spring support is secured at the bottom to a bracket that bolts to an infernally complex apparatus that bolts to the rear of the transmission and shares two bolts with the transmission pan.
This means that removing the transmission pan for routine service also requires removal of the complete transmission mount assembly as well.
Invariably the transmission spring loses its tension over time or the center bushing deteriorates allowing the transmission to move vertically. In addition, deterioration of the spring bushings allow drive train noise to enter the passenger compartment.
The biggest problem with the Jaguar XJ-S transmission mount however, is not its design or devilish complexity, its removing it.
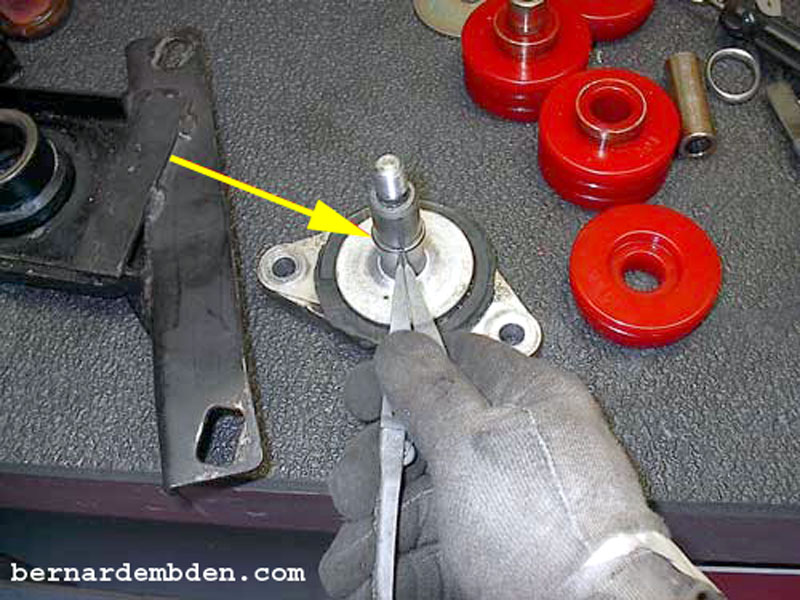
If not removed properly the damm thing could kill you. The spring is under compression, and the uninitiated might be tempted to just remove the bottom screws. WRONG. The entire assemble needs to be supported (spring compressed) before ANY bolt is removed.
The "spool" in my transmission mount had deteriorated resulting in the transmission "banging" anytime I went over any road irregularity. I was determined not to replace this transmission mount for a third time.
This was an opportunity to redesign this bad boy.
I could just fabricate a couple of brackets with a generic transmission bushing and be done, however the objective, as always, is to keep the authentic look and feel of the original.
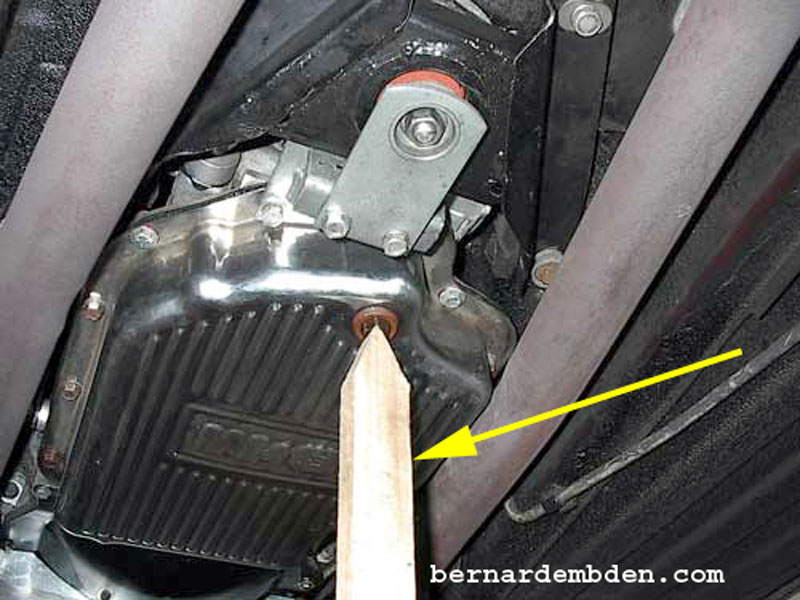
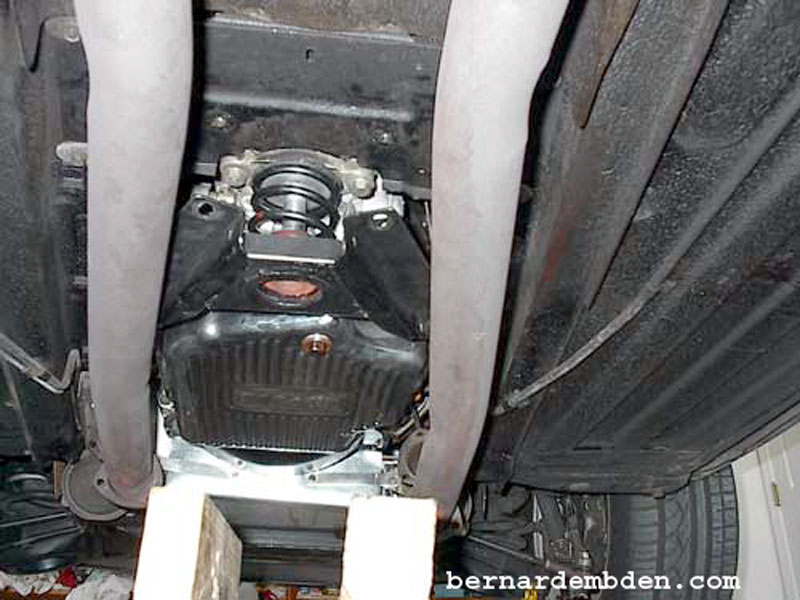
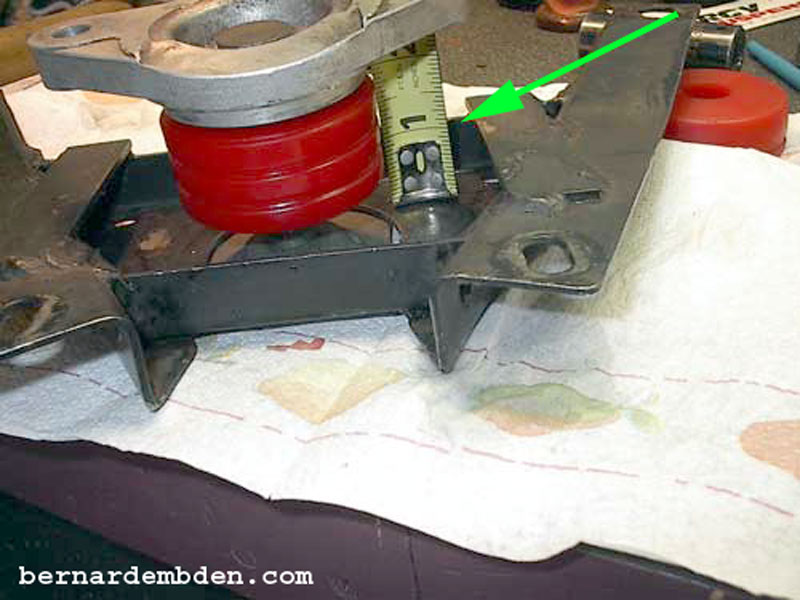
This project starts by jacking the car up and supporting it with four jack stands. Measure the height of the transmission oil pan from the floor. This will be the reference height. The objective is to be within a 1/2 inch of this measurement. I transferred the height measurement to a piece of scrap wood and cut it at the correct height. This would allow be to check the height measurement quickly during this project without searching for a tape. (yellow arrow photograph below).
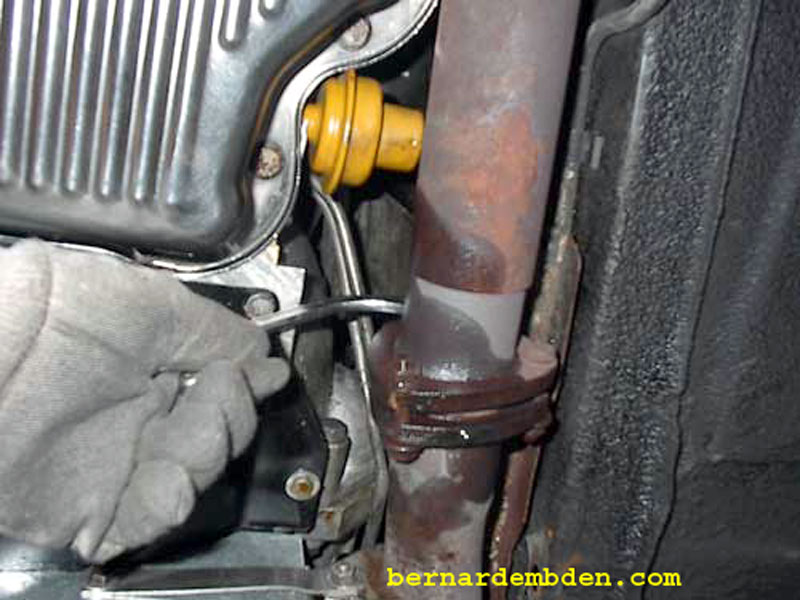
Soak exhaust connection bolts in penetrating oil and remove both exhaust pipes at the transmission unions. These pipes will need to be spread apart to access the transmission bolts.
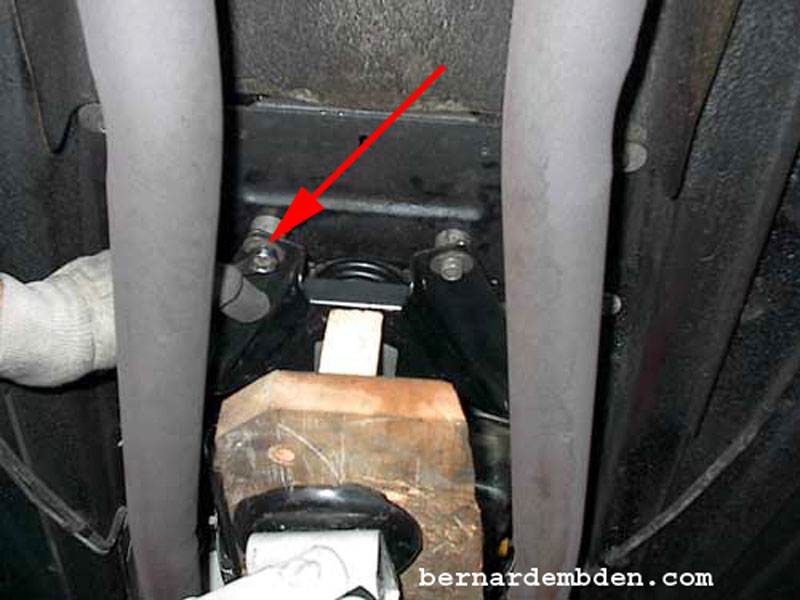
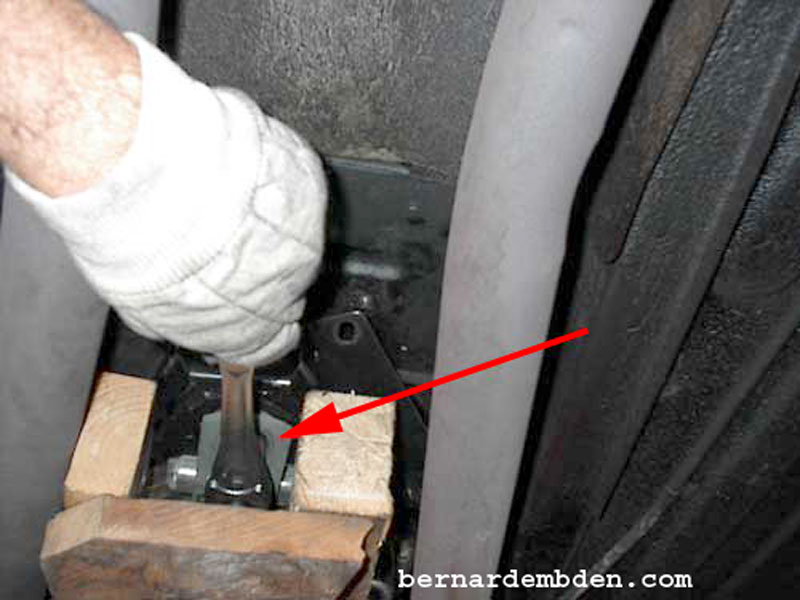
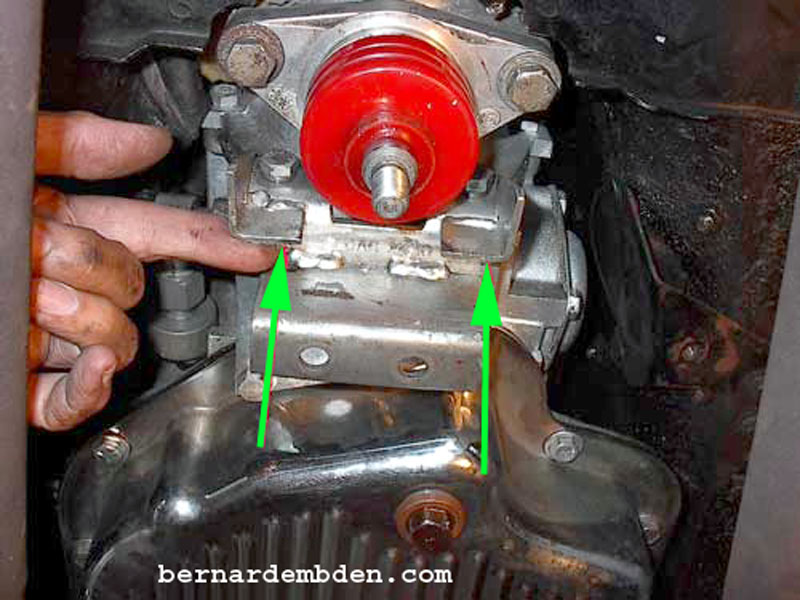
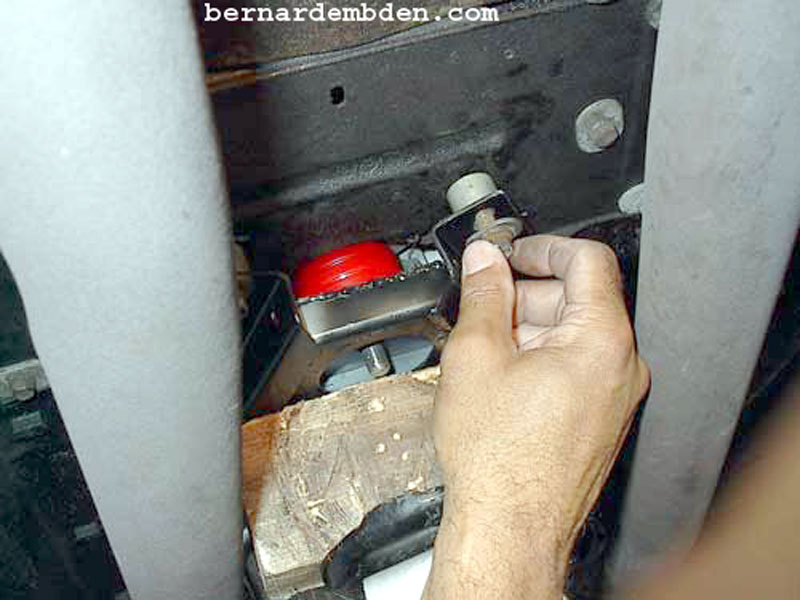
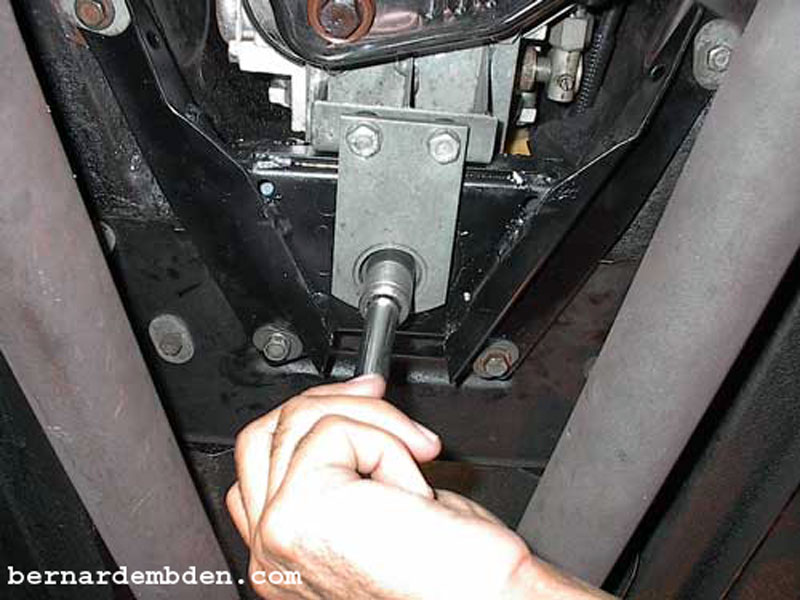
This is important. Support the transmission mount with a floor jack before removing the four perimeter screws. (red arrow photograph below).
Once the support bolts are removed the jack can be lowered. Remove jack and remove two bolts that attach the spring support bottom bracket to the transmission.
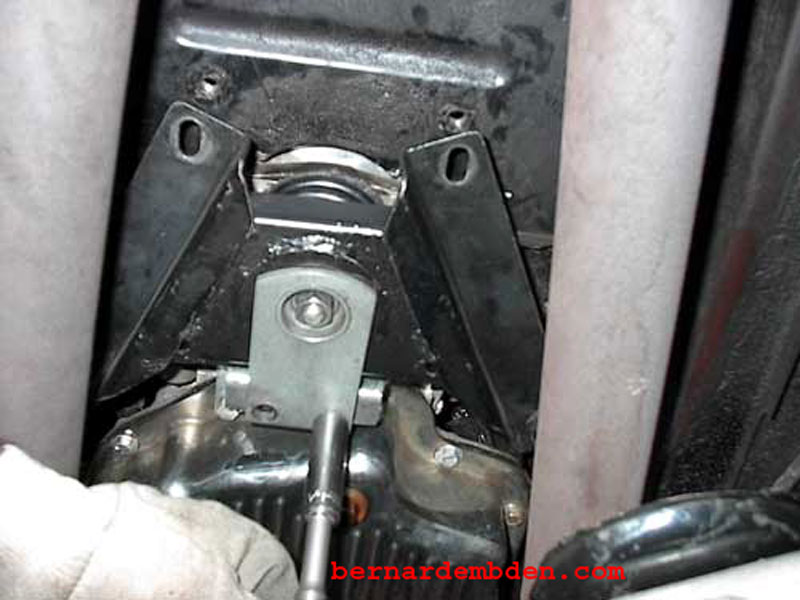
Place wood blocks in a "U" configuration and while supporting the transmission mount remove the center screw. (red arrow photograph below).
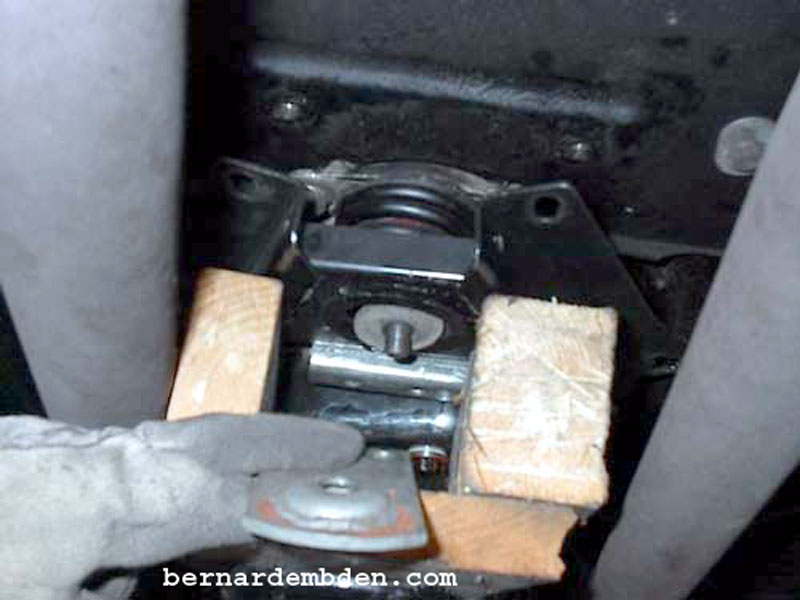
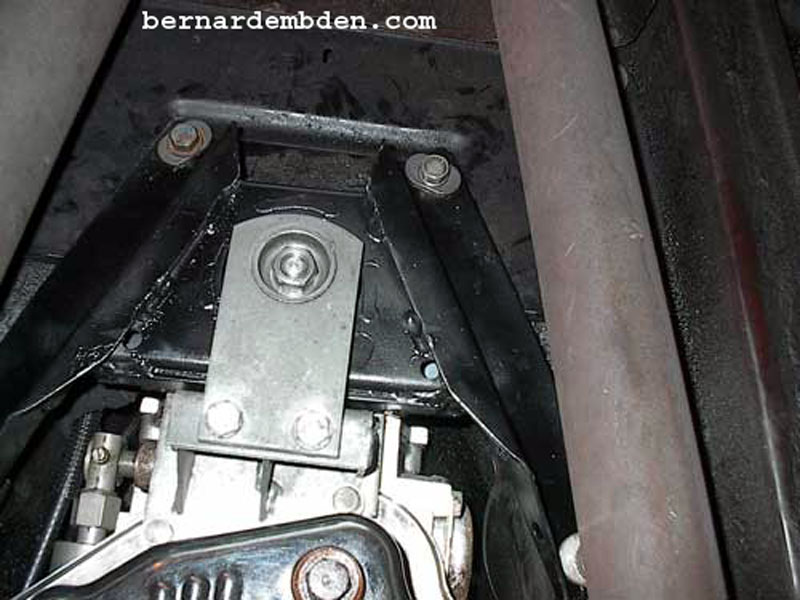
(Photographs below) Remove center bracket and slide transmission mount out between the exhaust pipes.
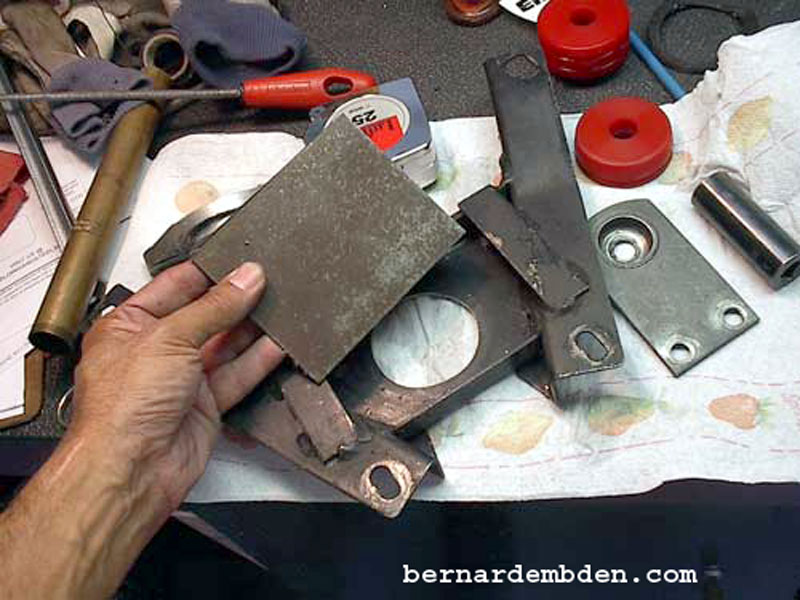
For this project I choose a universal polyurethane transmission mount, part number 94102R, manufactured by Energy Suspension (http://www.energysuspensionparts.com) This part has the correct center hole diameter. They do not sell directly to the public, however a number of resellers carry their parts. I purchased this part from Summit Racing in the US. Cost approximately $29.00 US for two complete kits.
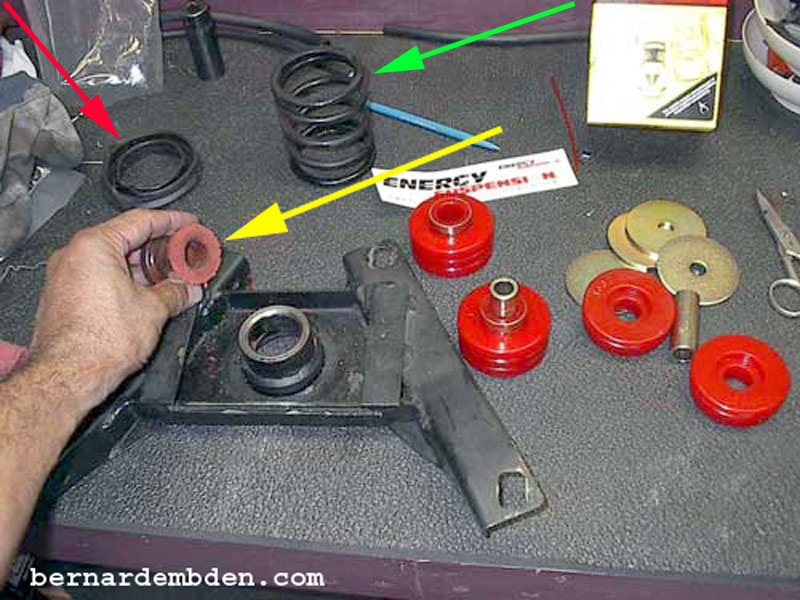
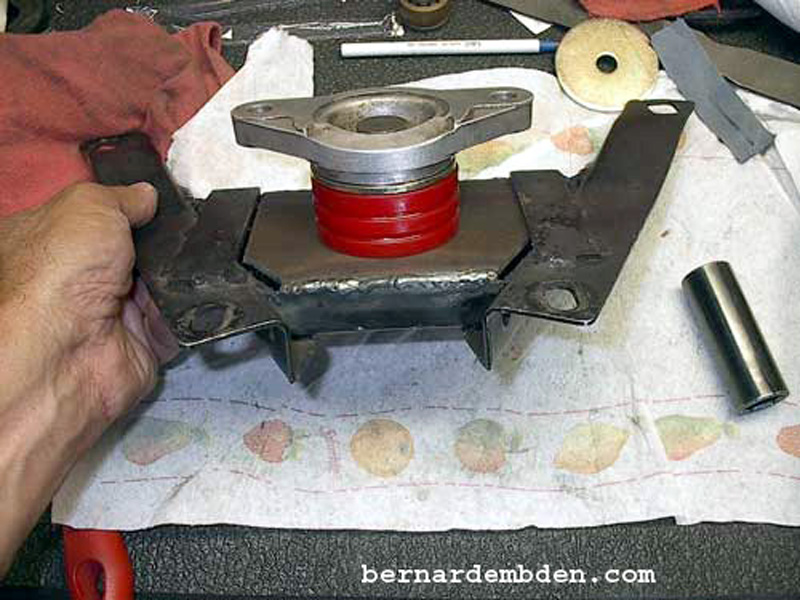
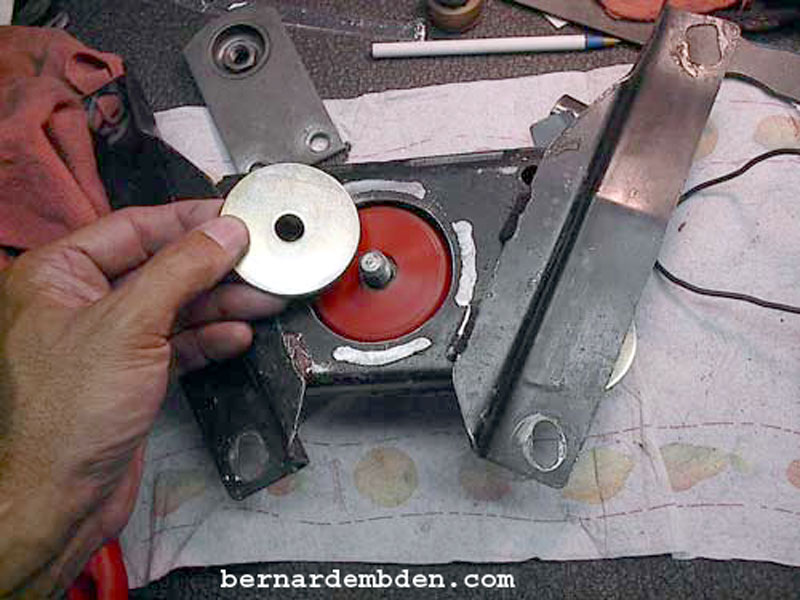
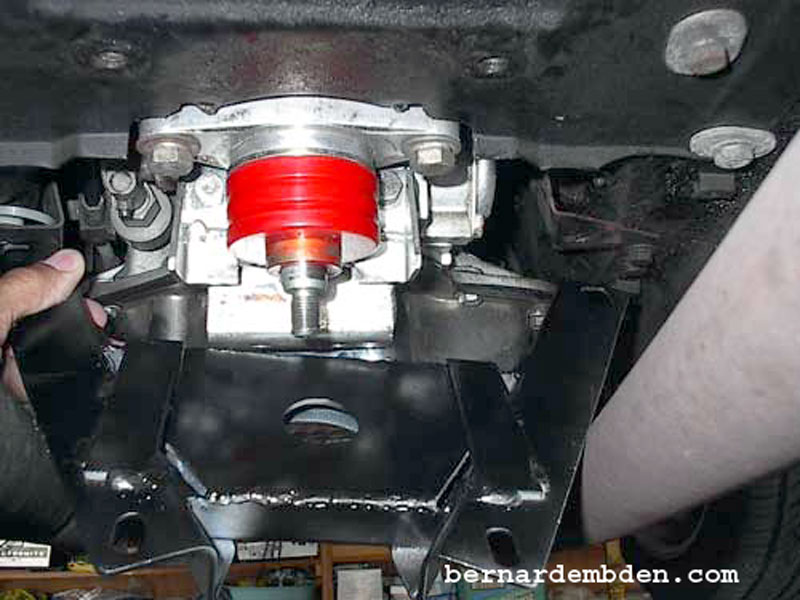
Photographed below is the transmission mount assembly. Note the following:
Yellow arrow. Deteriorated center "spool".
Green arrow. The infamous spring .
Red arrow. Deteriorated bottom rubber washer.
Also photographed are the various parts from two complete kits of Energy Suspensions universal transmission mounts.
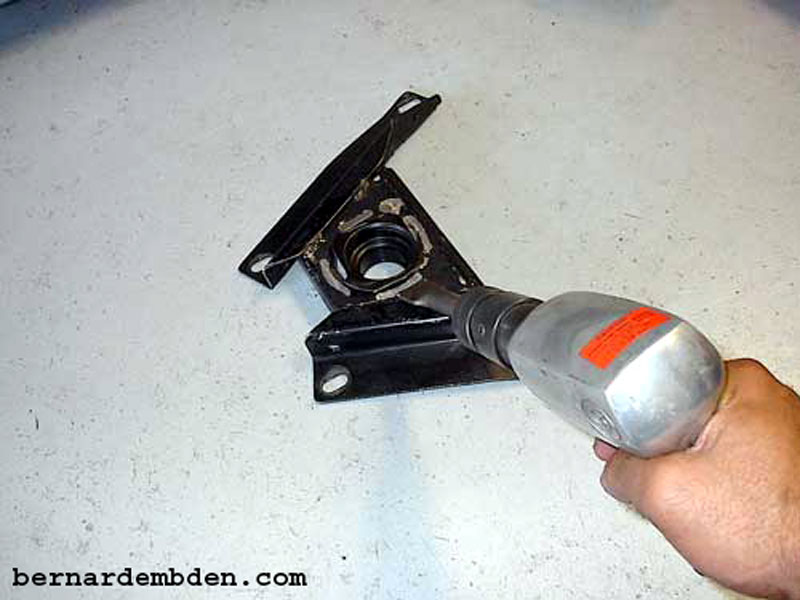
The transmission mount modification project starts by removing the center tube from the existing transmission mount. The tube is held in place by four spot welds. You can hammer it out with a chisel or have a welding facility cut it out. I choose to use an air chisel to remove it. (photographs below).
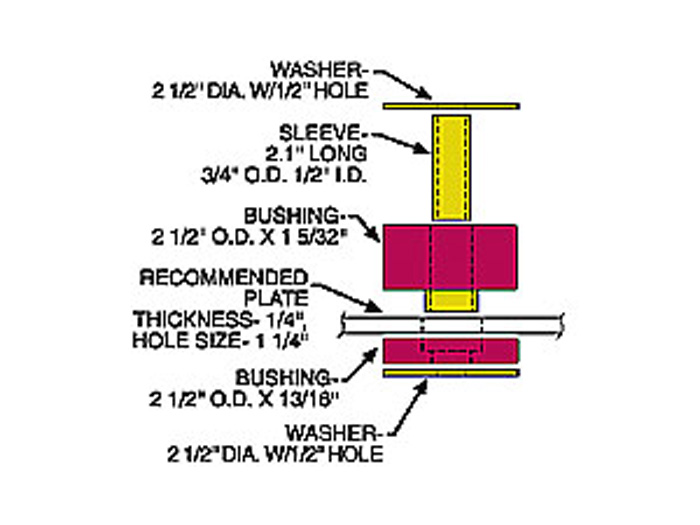
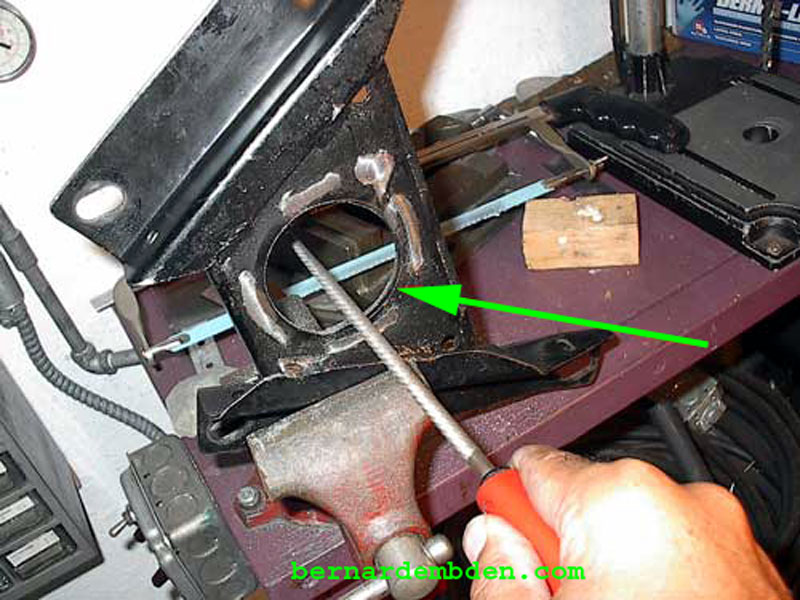
The modified transmission mount will change the distance between the transmission and the mounting surface. This will require the new bushing to pass through the opening that the centers tube was removed from. Using the new bushing as a guide, mark the existing opening and enlarge with a round file. (green arrow photograph below).
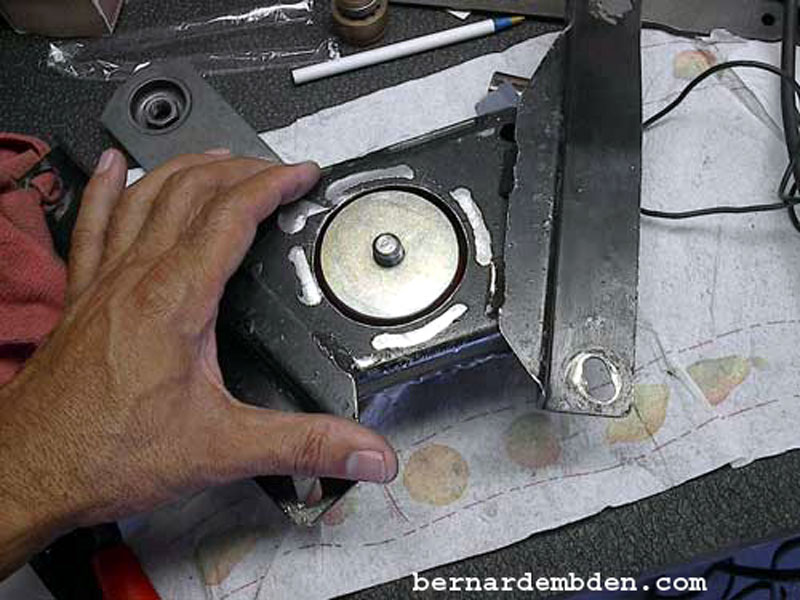
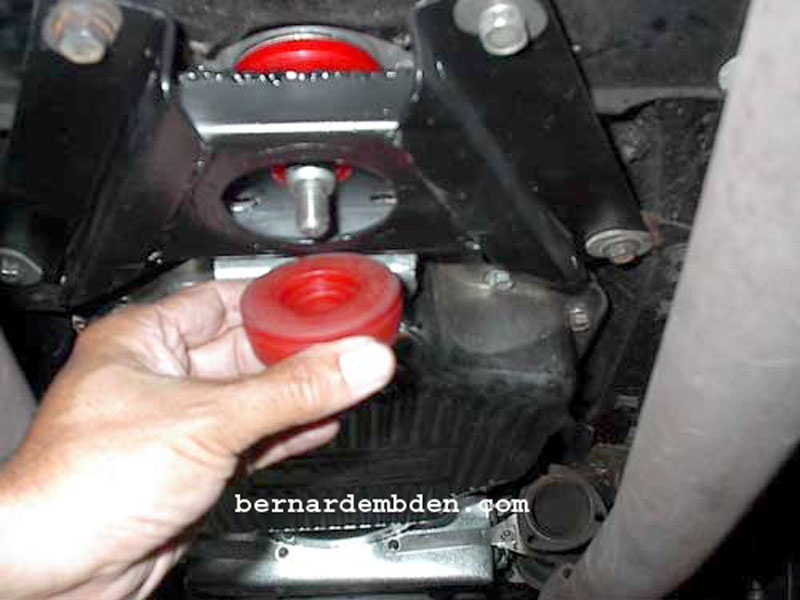
Remove the spring support from the transmission. Remove the rubber bushing from the base and the "C" clip from the shaft. (yellow arrow photograph below).
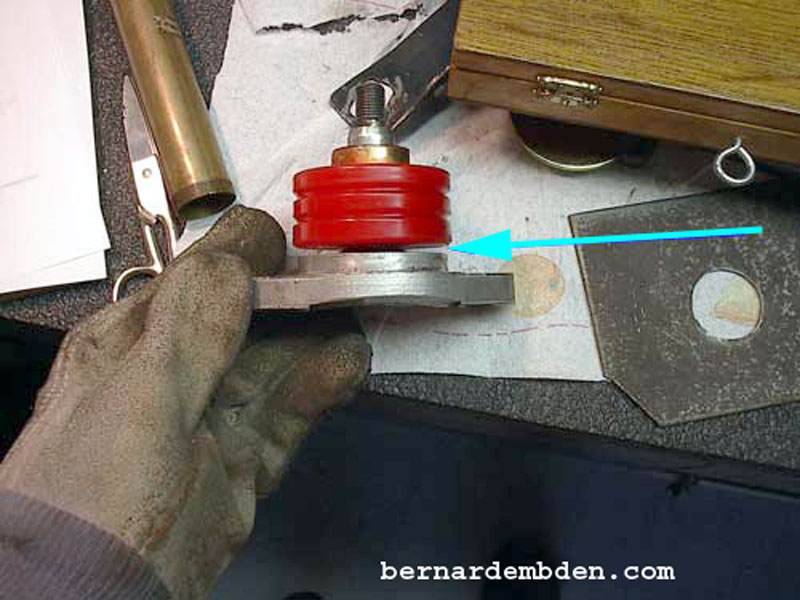
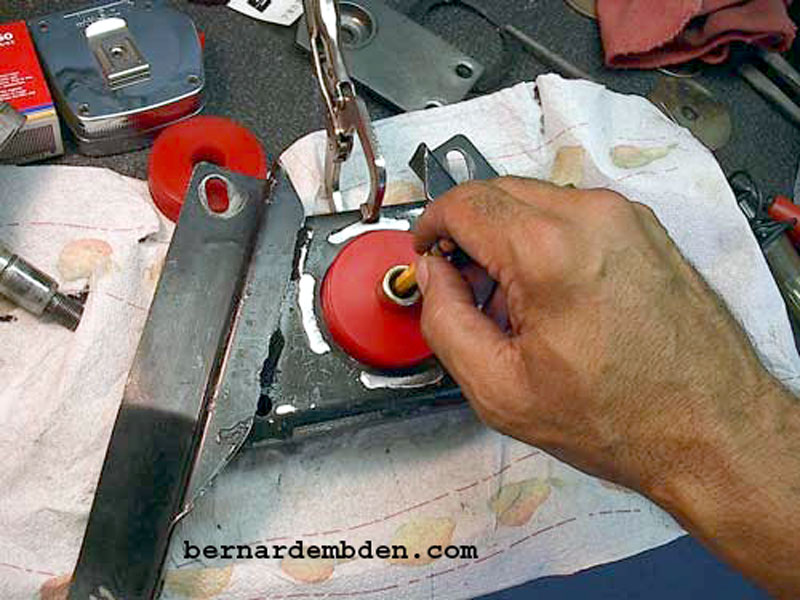
Initial installation of the upper transmission polythene bushing indicates that the spring support base is not flat. This results in a gap between the bushing and the spring base. (light blue arrow photograph below) This is not a huge deal. The weight of the transmission will most likely push the bushing down. You know me, I had to fix this.
Using one of the washers that came with the kit I drilled out the center hole until the washer fits snugly around the spring support base. (green arrow second photograph below).
Temporarily install the mount on the spring support. Feed the spring support "shaft" through the transmission mount center hole and attach the bottom bracket. Position the spring support so the bottom bracket is in the same location as it would be if the original assembled transmission mount was still in the car. Locate the plane of the bottom of the top polyurethane bushing. (I measured this at the top of the side rails.) This will be the location of the new mounting surface.
I sourced a piece of 1/8-inch mild steel stock and, using a hacksaw, cut to fit the top of the transmission mount. (photographs below).

I used a welding clamp to secure the metal on top of the side rails. (This is based on my prior measurements.) Using the bottom polyurethane bushing as a guide I marked the center of the metal.
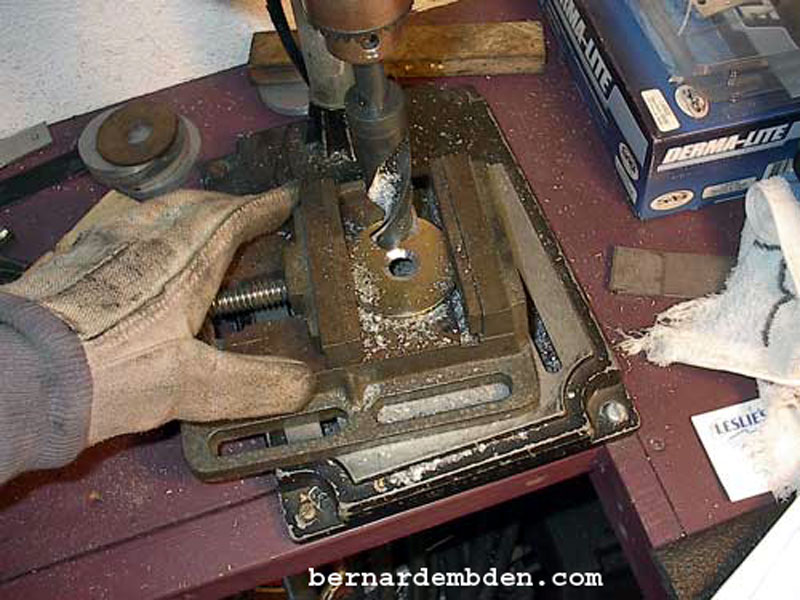
Remove the metal stock and drill a 1 1/4 inch size hole. (start small and keep going bigger). The new top transmission bushing lip should fit through the new opening. (photographs below).

Realign the metal stock to the exact same position on the modified transmission mount. Make sure the holes are centered. Secure with welders clamps and weld. If you don't have a welder take it to a welding facility. This plate needs to be secured properly.
Assemble and test fit all components of the modified transmission mount.
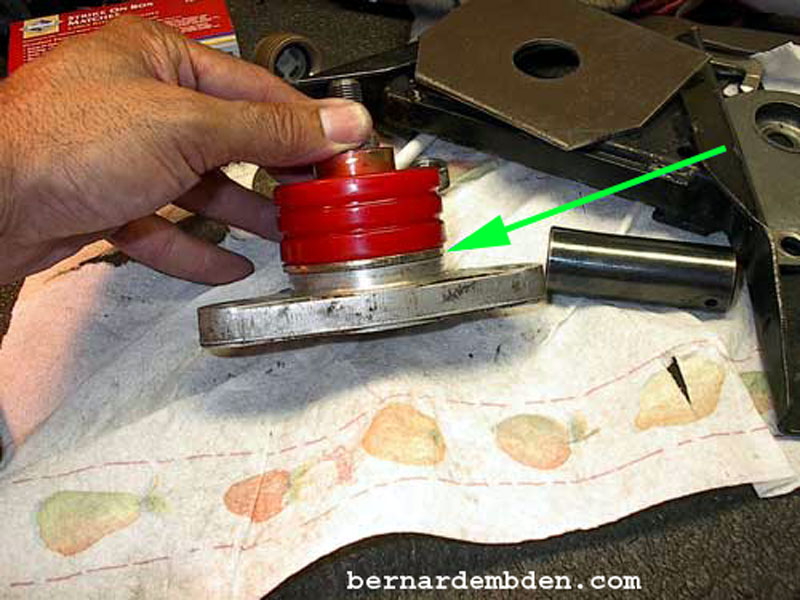
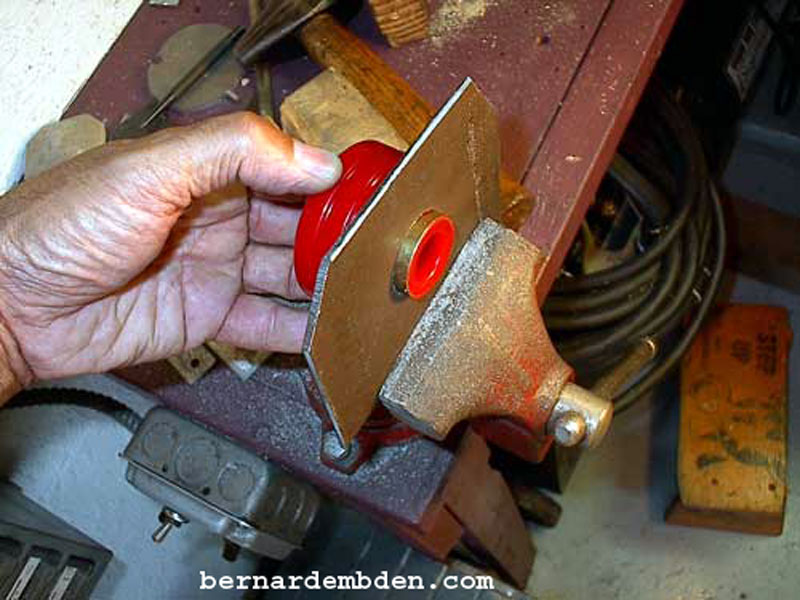
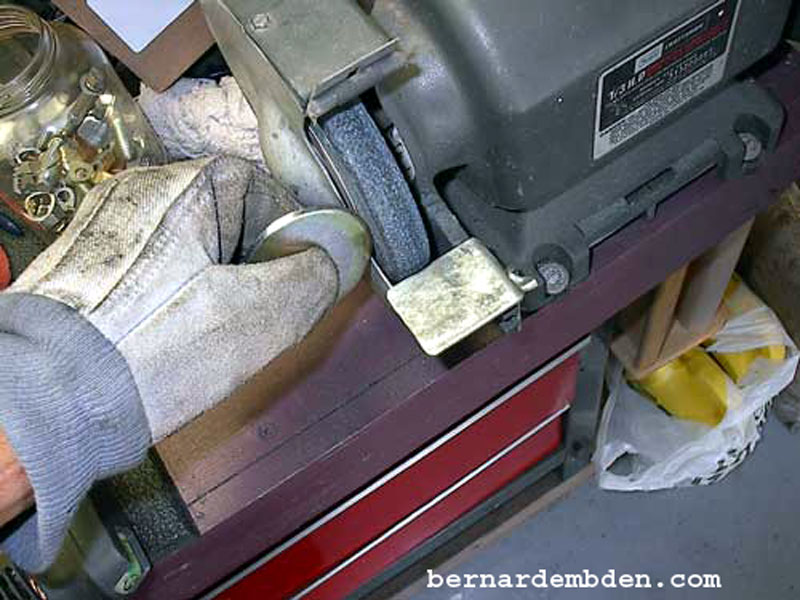
I wanted a minimum clearance of approximately 1/4 inch between the bottom polyurethane bushing and the transmission/lower bracket. To accomplish this I used a grinding wheel to reduce the size of the washer fitted to the bottom spring support. (photographs below).
Once my clearances were established I sanded, primed and painted the modified transmission mount.
After all, these projects must not only work, they must look good.
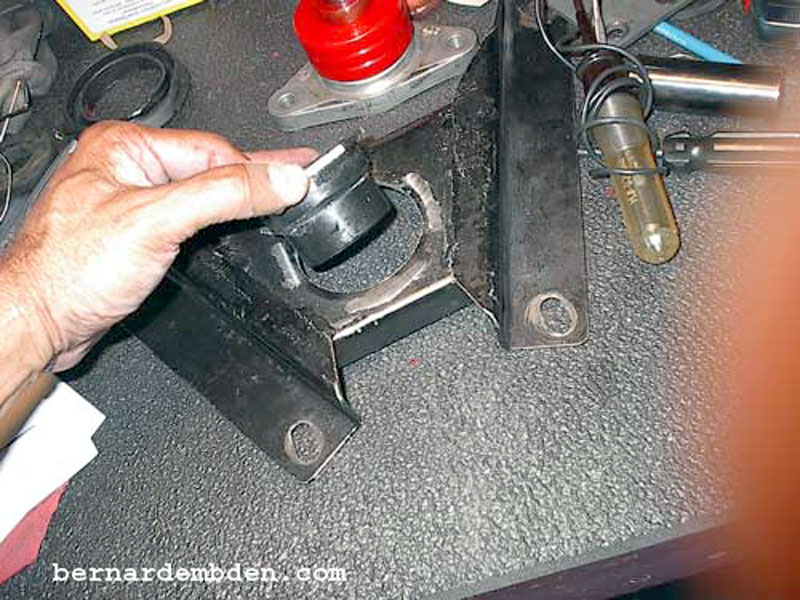
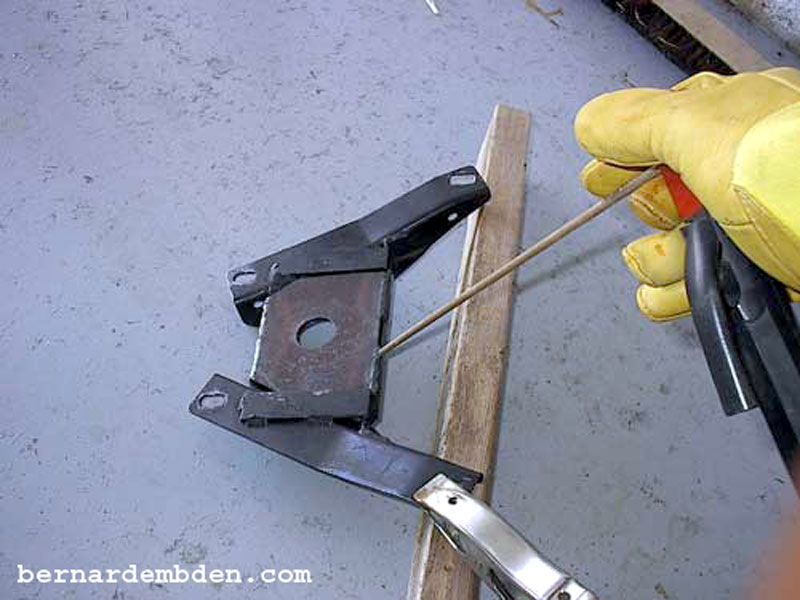
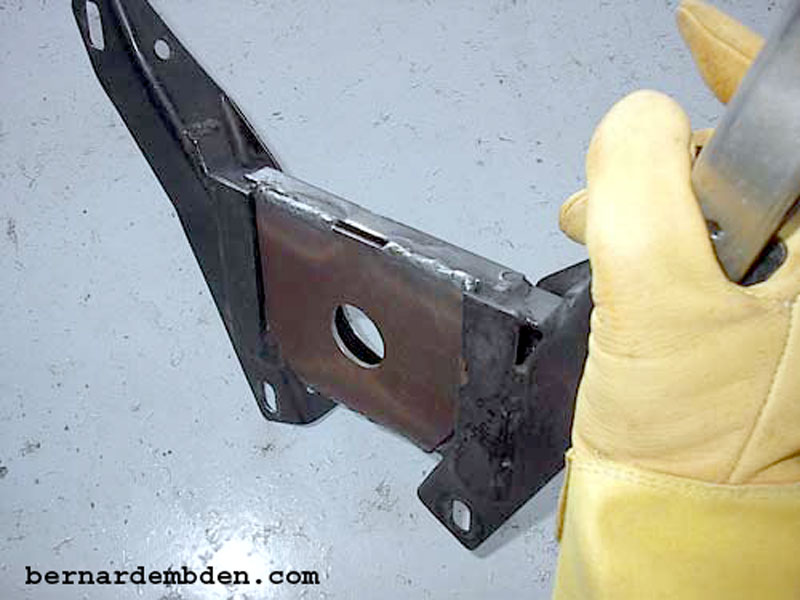
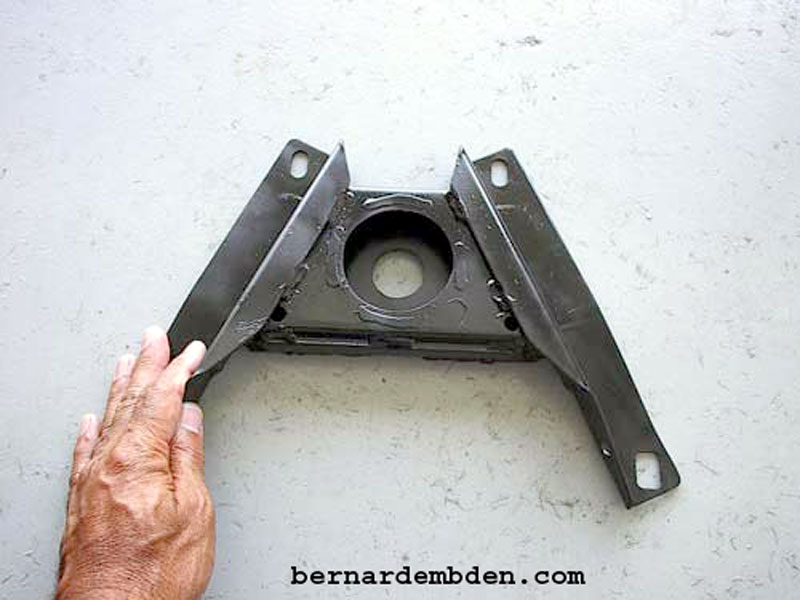
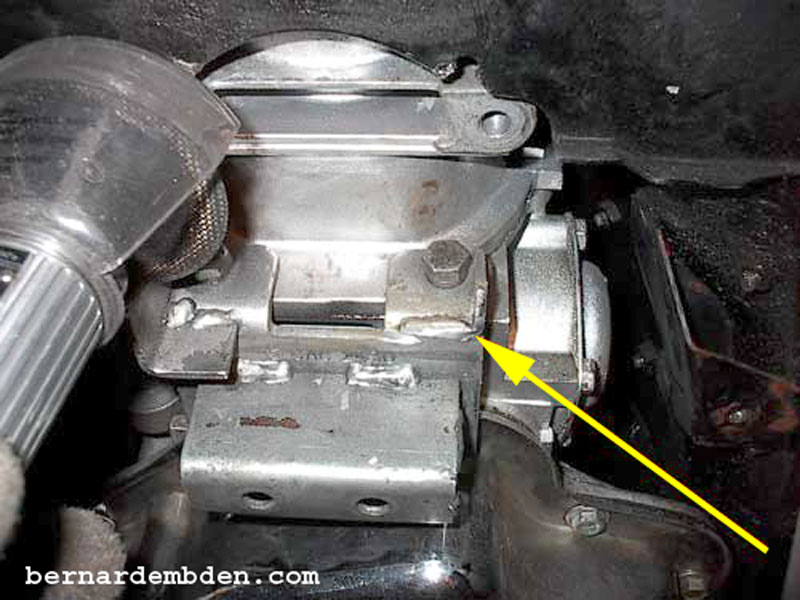
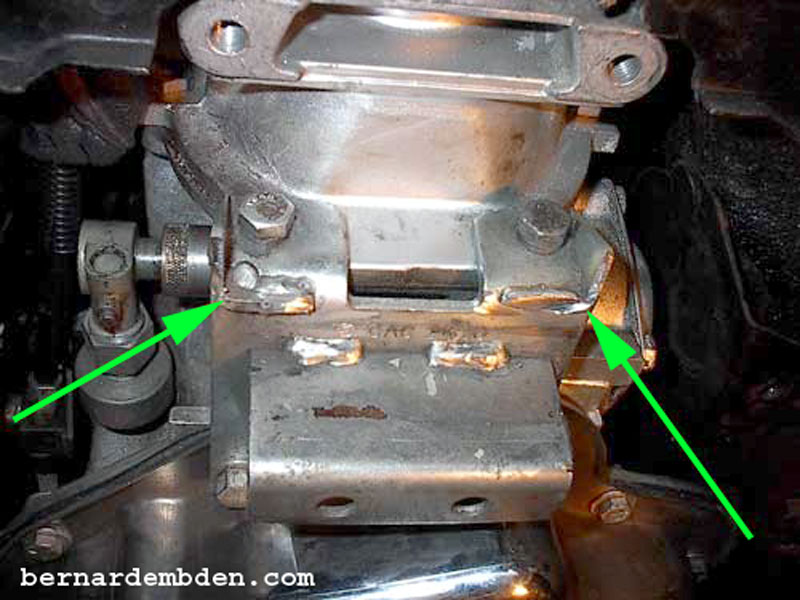
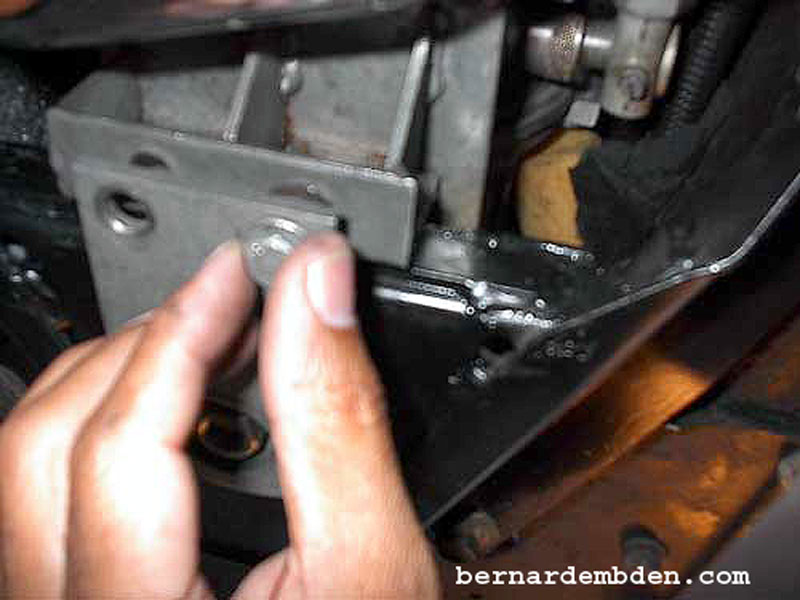
Initial installation revealed a problem. (why am I not surprised). The complex bracket that the Jaguar transmission mount bolts to has two right angle flanges (green arrows photograph below). These flanges interfere with the new metal plate that the modified transmission mount needs to support the top polyurethane bushing. These will have to be removed.
Removing this bracket and removing the flanges with a hacksaw would be the easiest method. However the infernal bracket is held in place by two bolts into the transmission itself and another two bolts that also secures the transmission pan. Removing this bracket would surely cause transmission oil to leak somewhere. Now, if your transmission pan is currently leaking oil, then go at it. My car does not leak any oil, so I decided to use an air cut-off tool to remove the flanges while leaving the bracket in place.
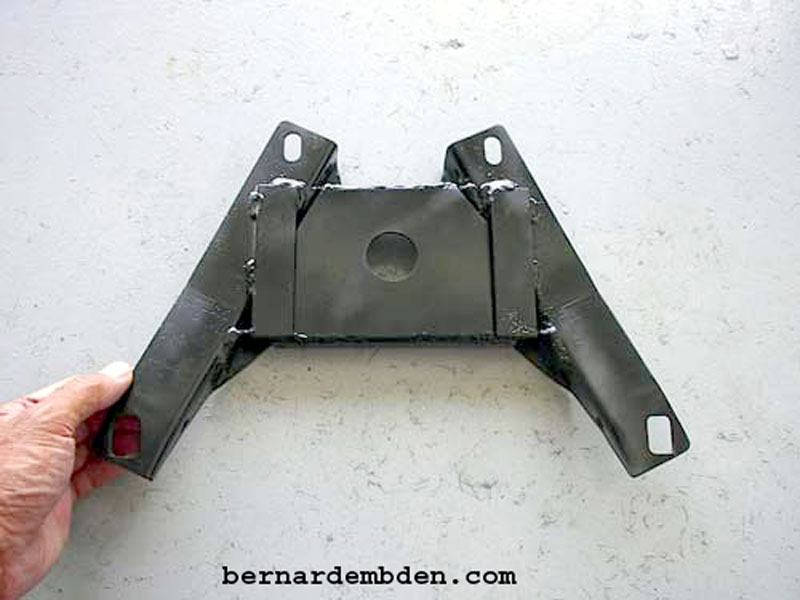
(Green arrows photograph below) Both brackets removed. .
Reassemble and install top polyurethane bushing to spring support.
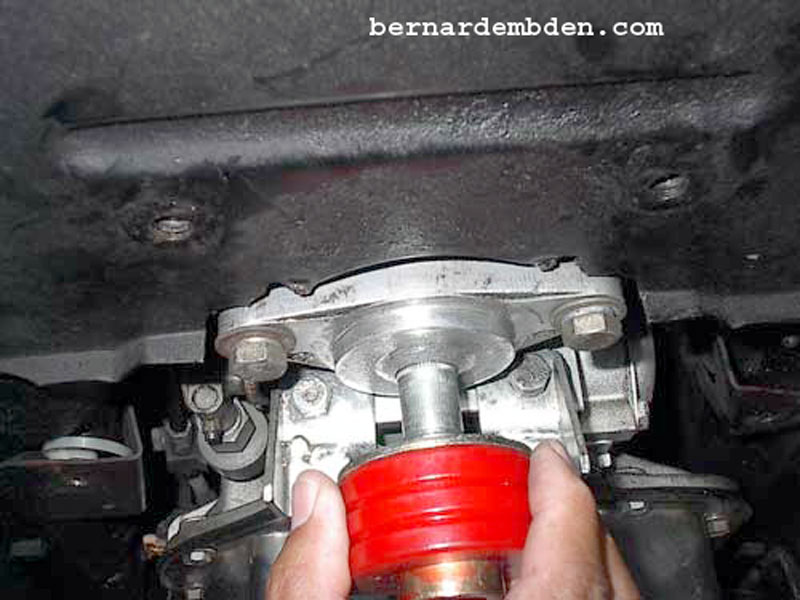
Offer up modified transmission mount up to spring support. Make sure top bushing "lip" is centered in opening. Use a floor jack to position mount to mounting holes.
Install bottom bushing. Note indentation that fits over corresponding lip in upper bushing. Install modified (smaller) bottom washer.
Attach bottom bracket re-using the original bolts, nuts and spacers.
Install bottom bracket to spring support and tighten nut.
Project complete.
When completed this transmission mount will be significantly improved, allow removal without bodily harm and will still look original.
